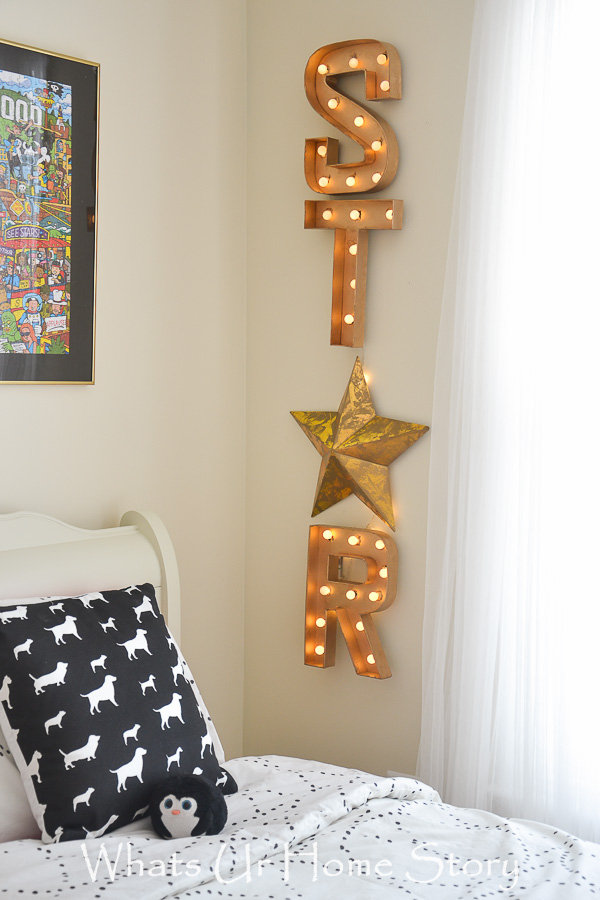
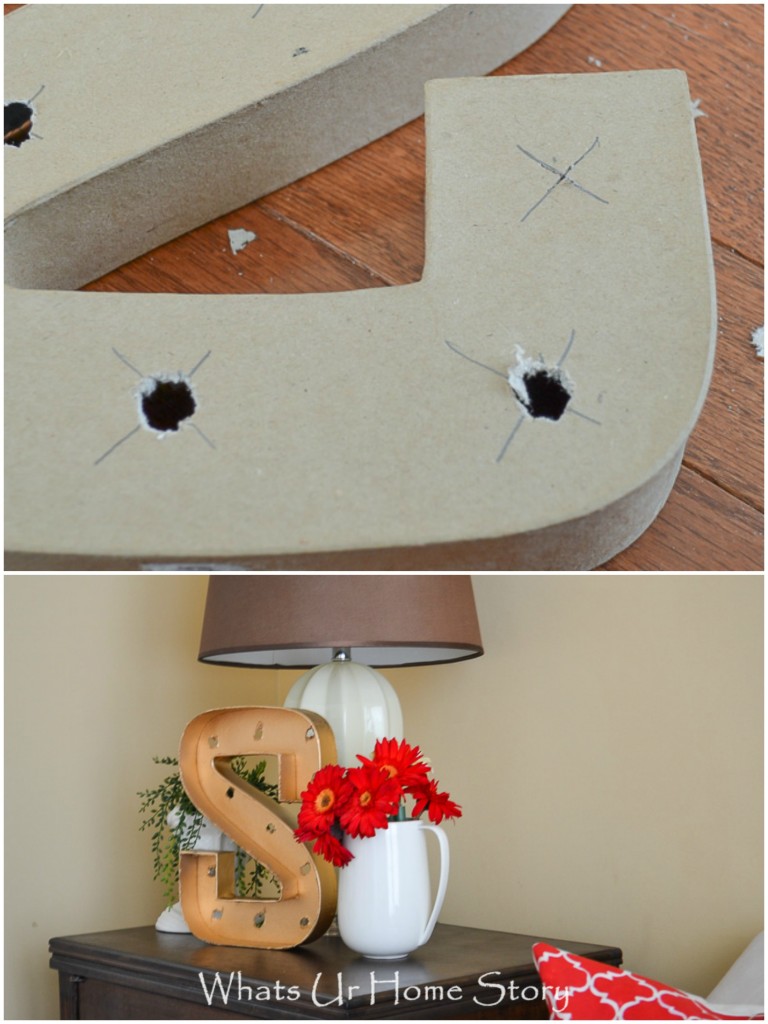
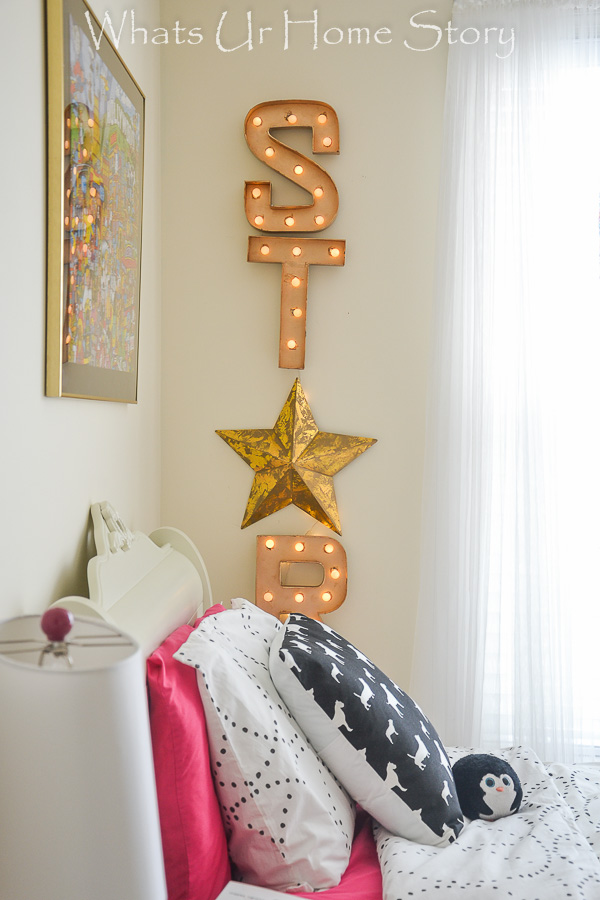
Every Hollywood themed girls room needs a DIY Marquee letters sign , don’t you think? And if it is a STAR sign perfecto!
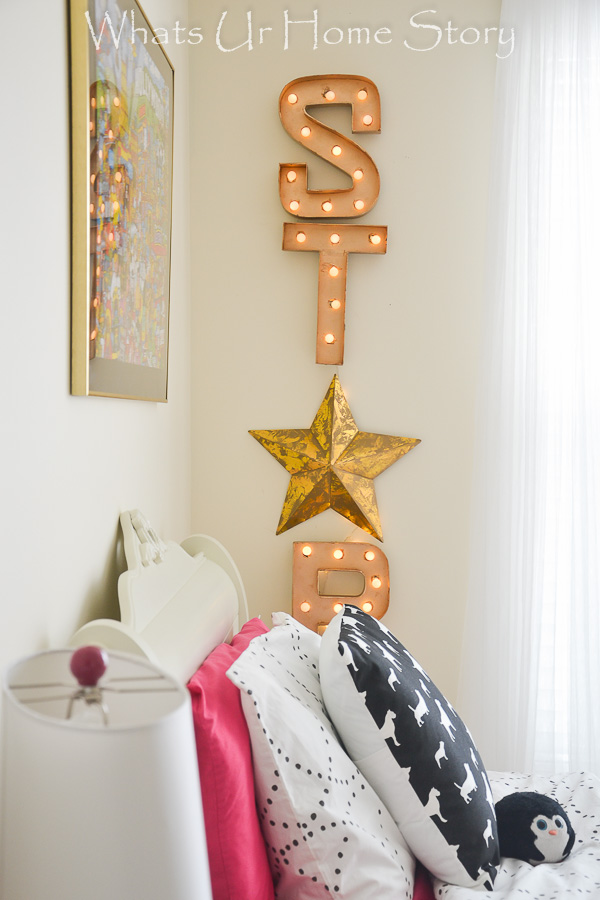
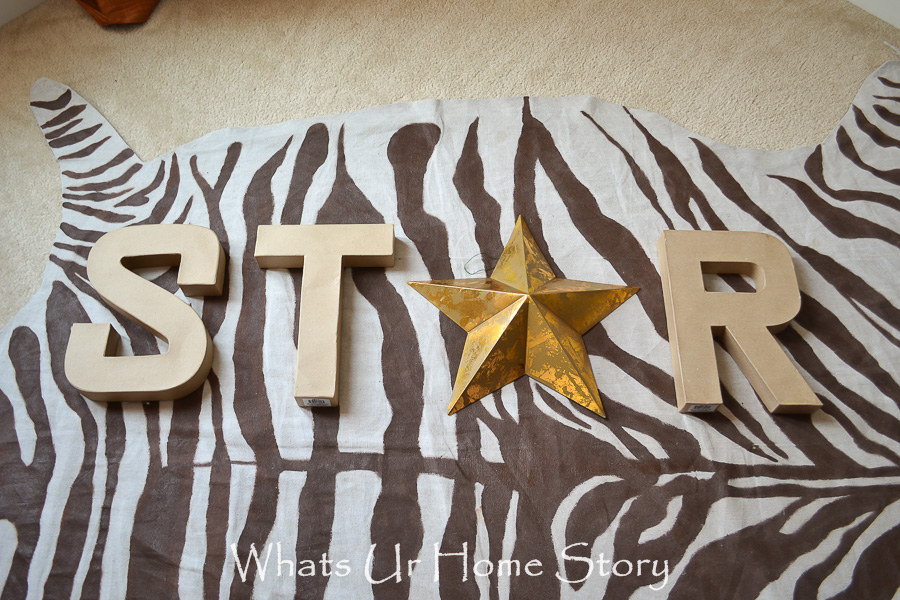
This was one of those projects that evolved in its shape and form as the room’s plan kept changing. The original plan was to spell out STAR but then I remembered I already had a golden star that I used on my Christmas mantel. Also it was supposed to go over the bed but then we framed the puzzle into art and that looked great over there (by the way doesn’t my drop cloth zebra rug still look great?).
So we went from a horizontal plan to a vertical one, which meant I had to re-string the lights on most of the letters. Even with all these hardships I’d say the project is a very simple one but you do need a good amount of patience.
Materials
12 ” Paper Mache Letters – JoAnn Fabrics
Metal Star – Walmart
LED Battery Operated String Lights (White) – Amazon *
Krylon Gold Spray Paint
Exacto Knife
Pencil & Ruler
Electrical Tape
Drill
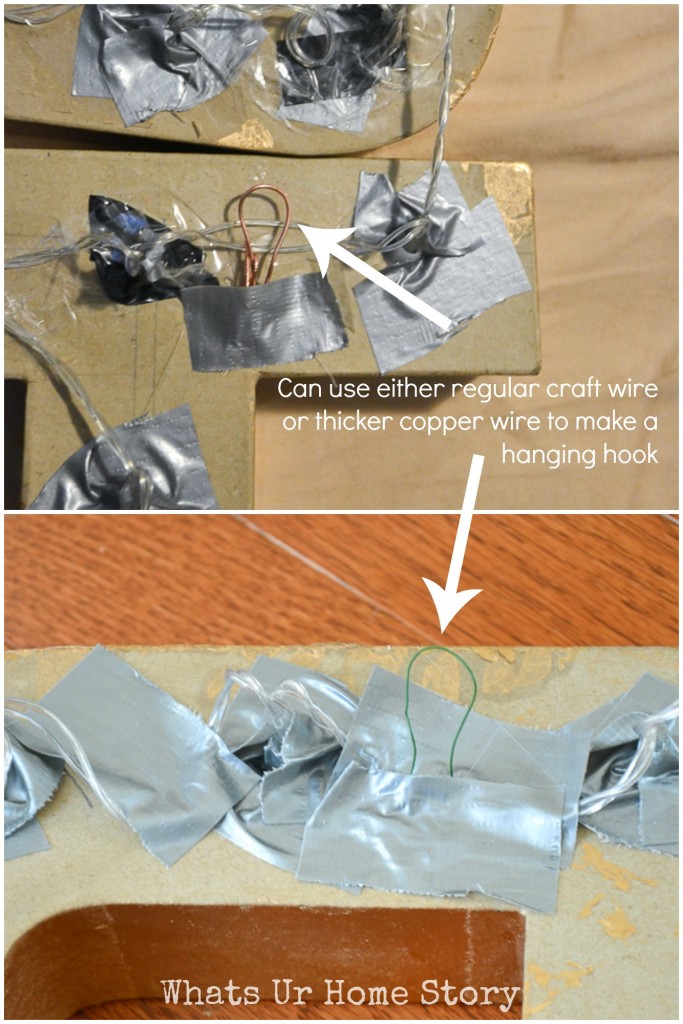
Craft wire/ Copper wire
Hot glue
Tutorial
- Using a sharp Exacto knife remove the top from the letters as shown below.
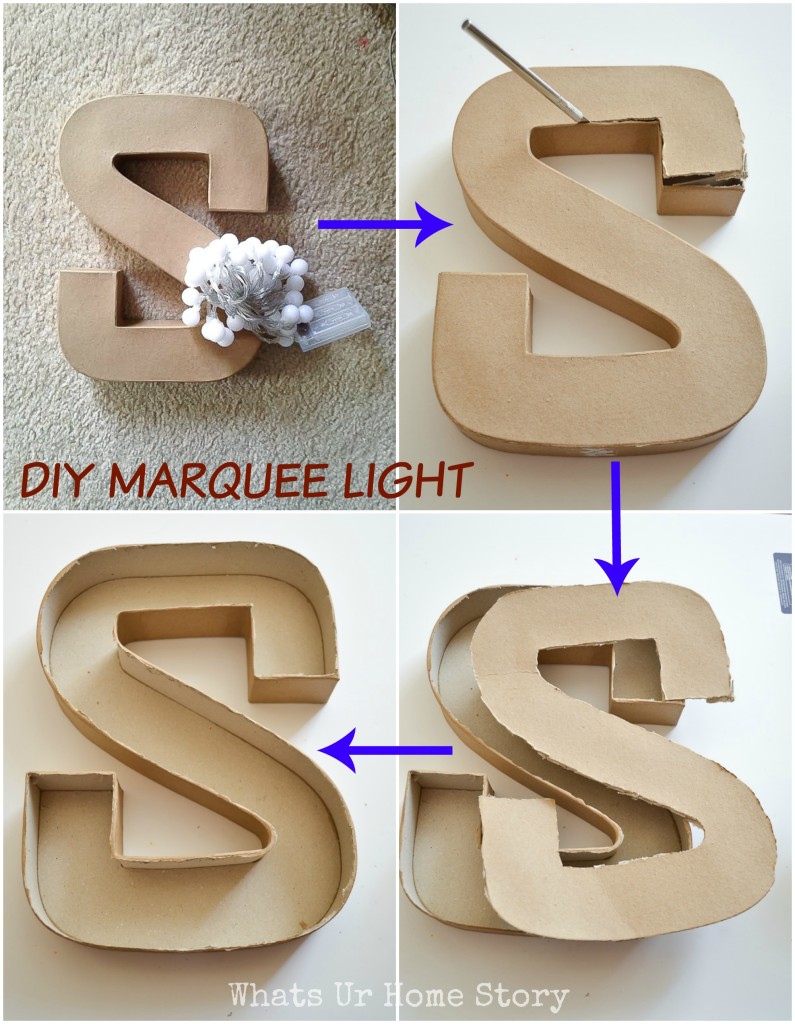
- You’ll now have a paper mache letter frame.
- Turn t he letters upside down and with a pencil mark where you want the lights to go.
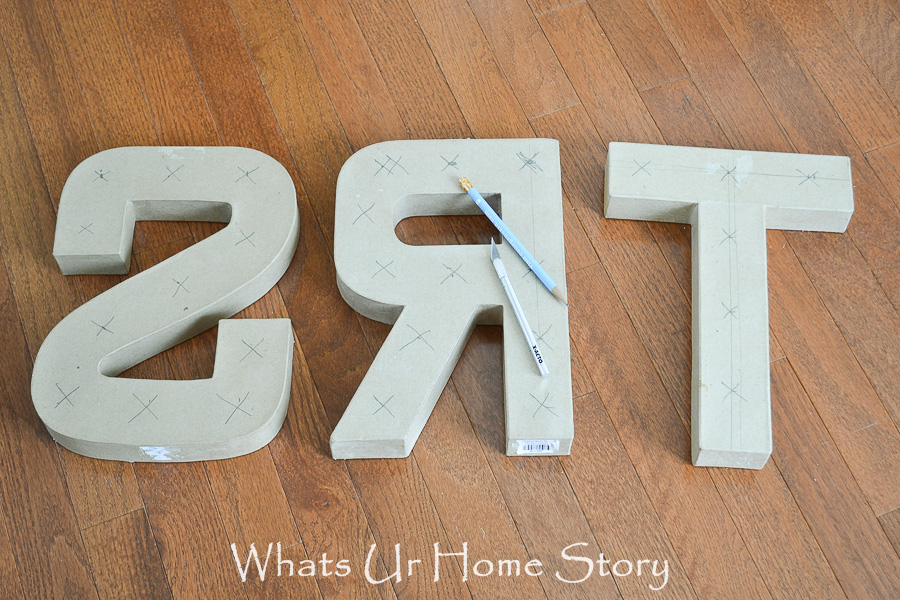
- Drill a hole big enough for the lights to push through in the center of the markings. Remember to use a DRILL (not an Exacto knife like I did) so that the holes are clean and sharp.
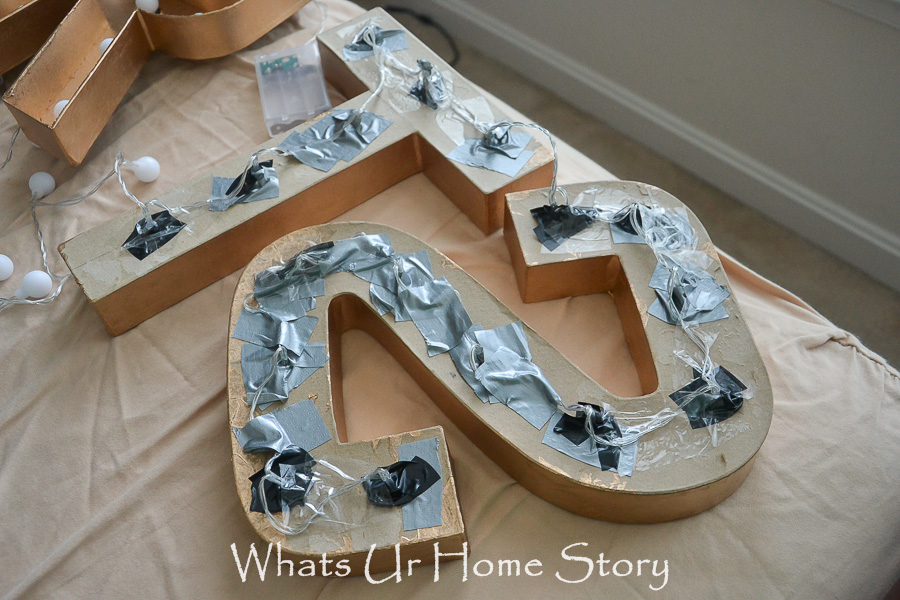
- Spray paint the inside of the letters with Gold. Took me 2 coats.
- Now it is time to string the lights through. Before you do anything lay the string of lights along side the letters and visualize how you would transition between the letters. Gently push each light through the hole from the back.
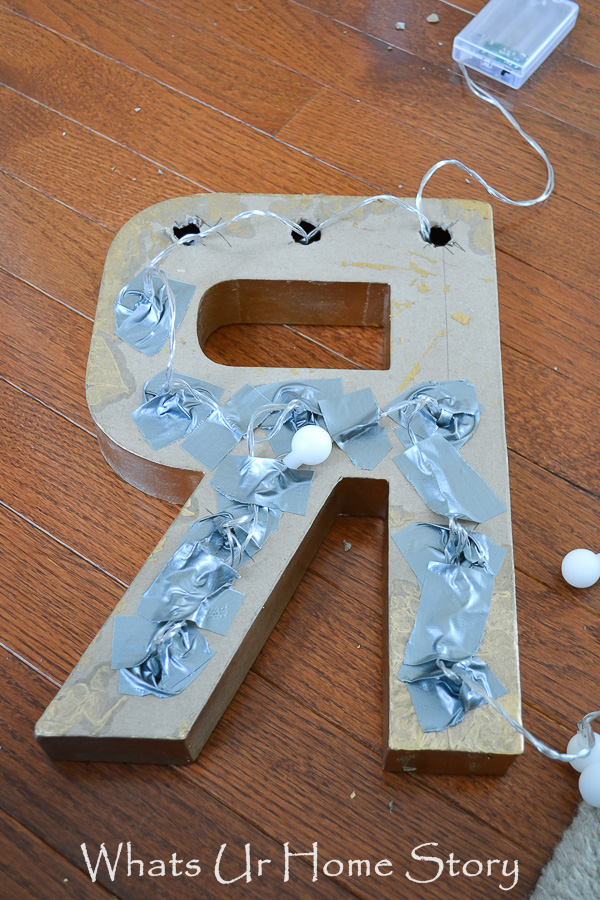
- Use ELECTRICAL TAPE (not Duct tape like I did) to secure the lights in the hole and to tape away any excess lights at the transition. I tried Duct tape first, then regular tape, and finally electrical tape as the first ones kept peeling away. Only the electrical tape held on as you can see below.
- Make a small loop with the craft wire/copper wire and hot glue it to the letter (where you want it to hang) to create a hook. Cover with tape to make it extra secure.
- Insert batteries and securely tape the battery holder behind the R.
- Tape any extra lights to the back of the star so that they stay hidden.
And that’s it. Your DIY Marquee letter sign is ready to hang!
Pretty simple, right?
* Affiliate link


Leave a Reply