
Anyone who knows me knows my love of stencils. I just cannot get enough of them! Really, I get the stencil itch if I haven’t stenciled for a while. So when I came across the line of stencils and fabric paint by ILTC’s new Tulip For Your Home line I was more than excited to try it out. I mean who can resist a box full of these goodies?
A regular stenciled pillow, what’s the fun in that especially when I’ve already done it? So I thought why not go for a layered effect and that too with a multi colored background? With Tulip For Your Home’s different sized stencils that is exactly what you can do, layer them! How cool is that?

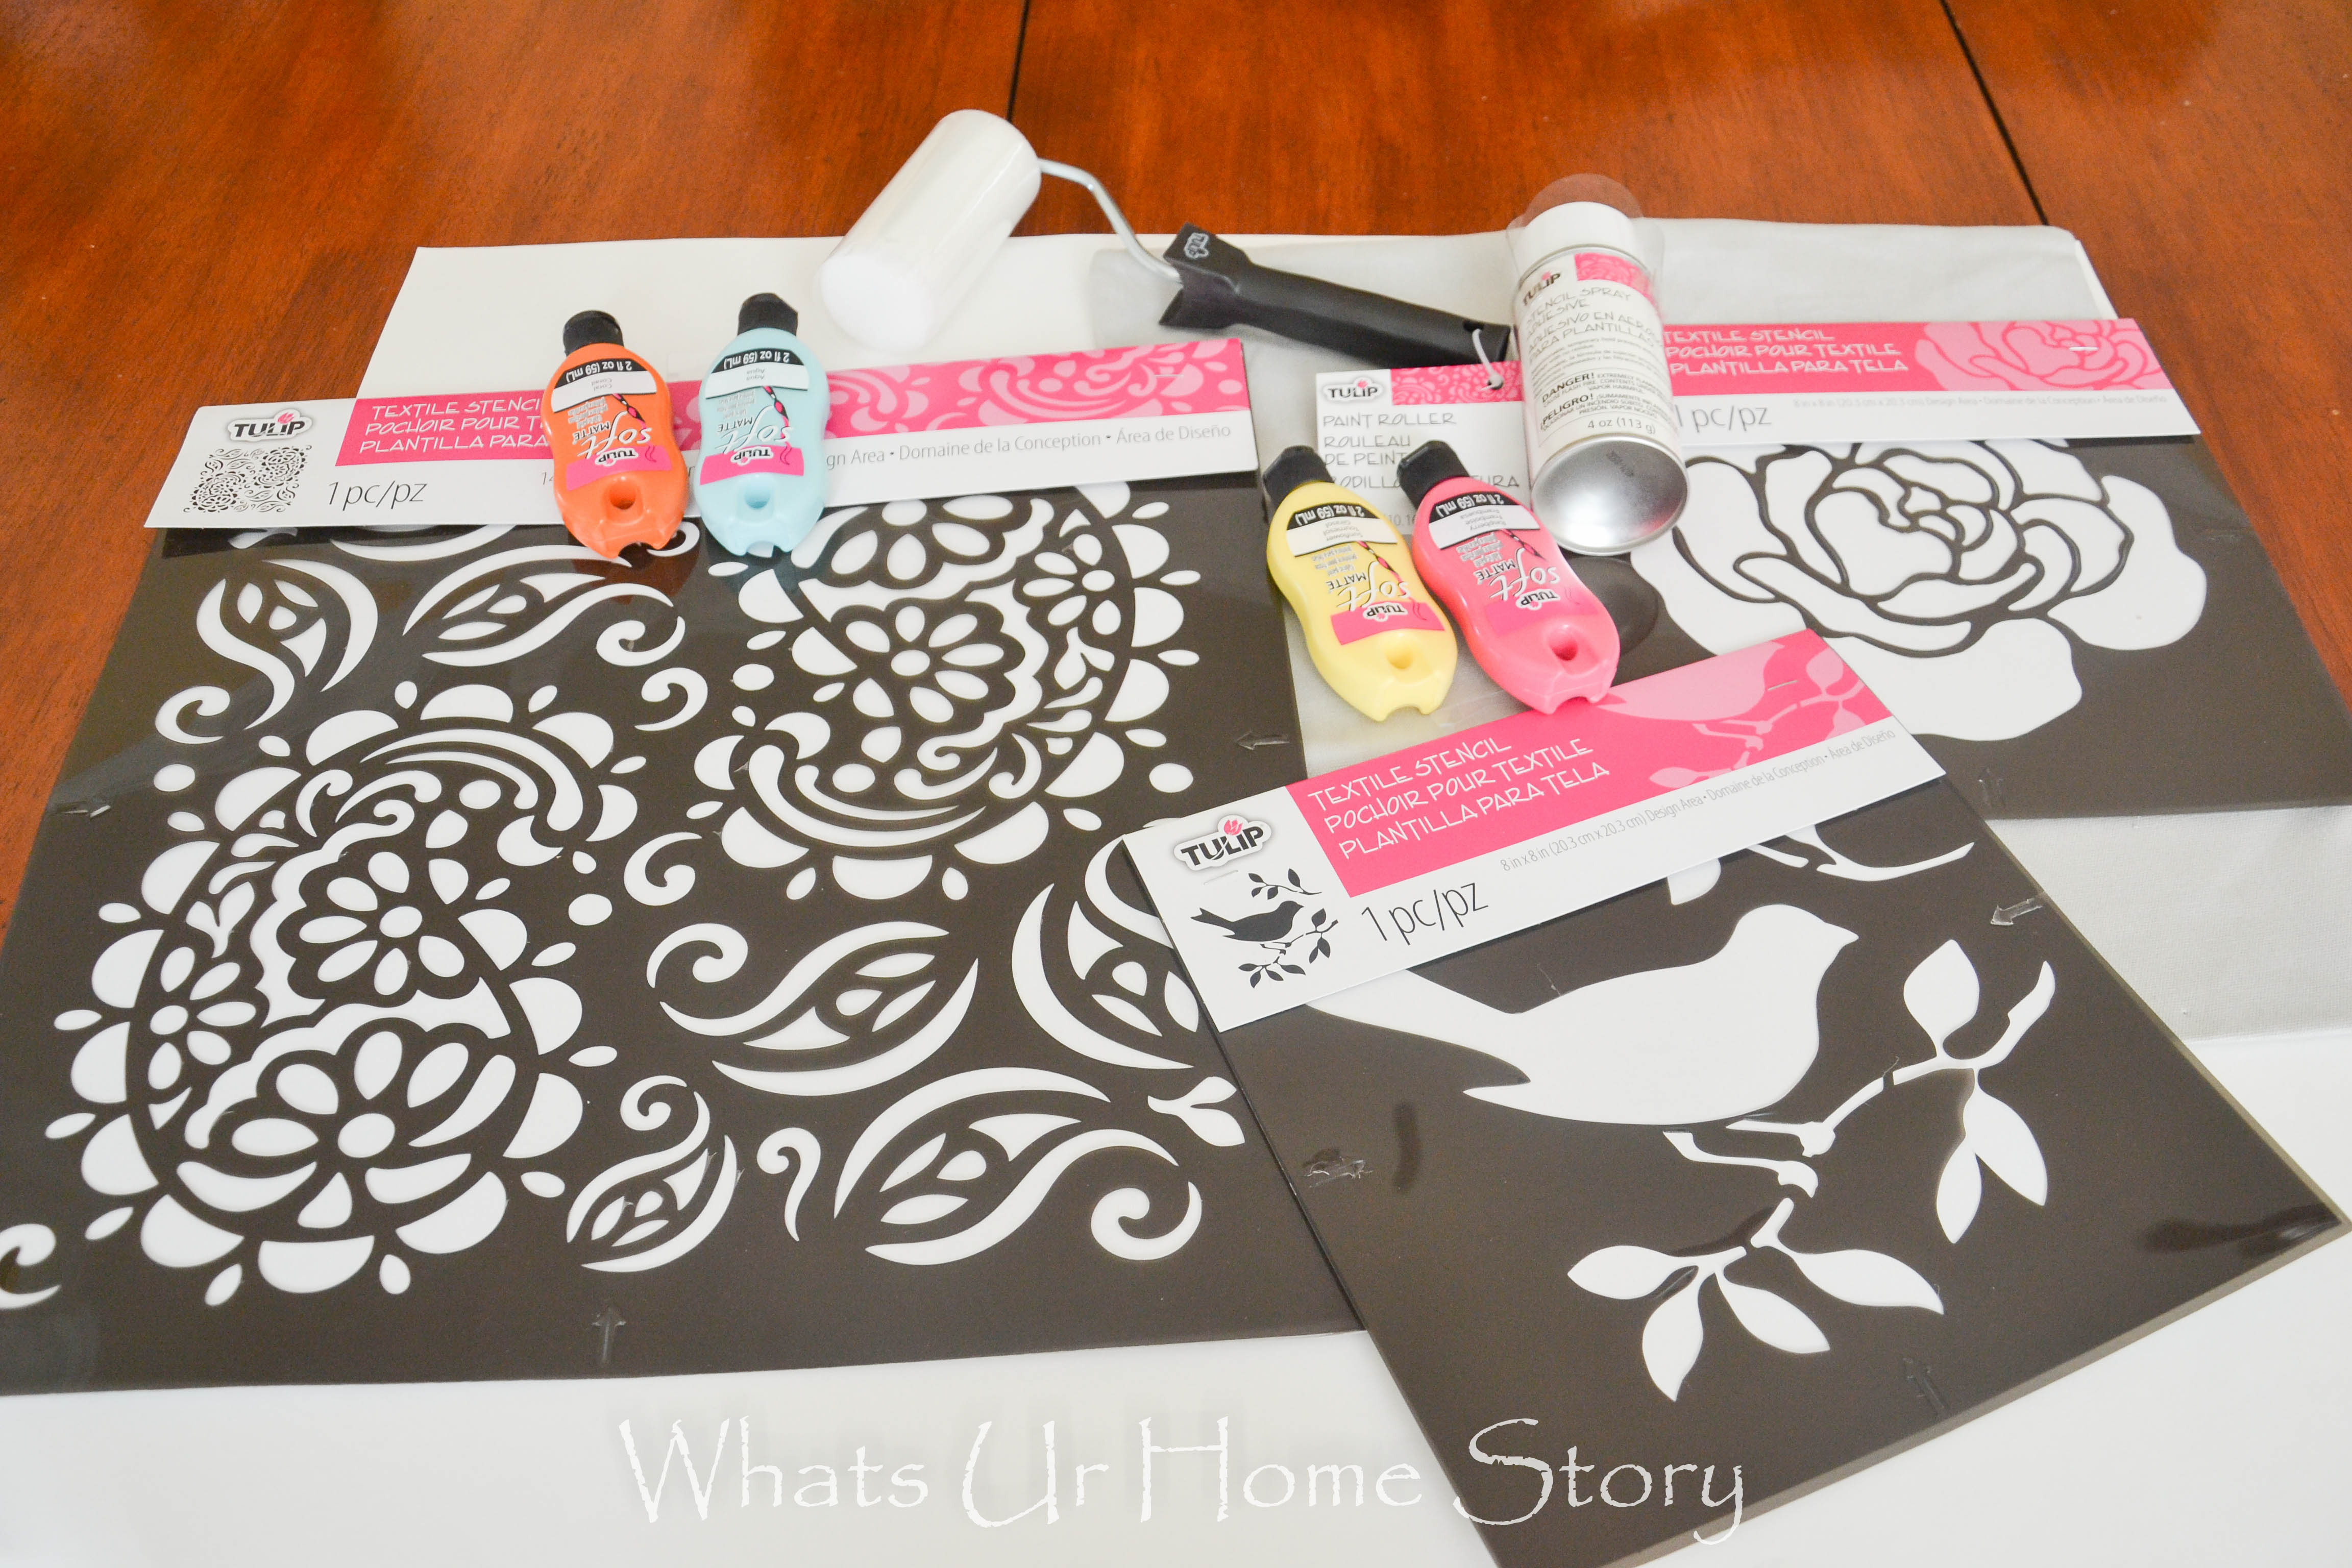
To make a multi color layered pillow cover you’ll need:
Plain pillowcase – I used the one that was provided, you can see it below the flower stencil in the 2nd pic 4 colors of Tulip soft fabric paint Tulip stencil spray adhesive – (a must for folks like me who can be sloppy crafters) 1 large Tulip textile stencil (14″ x 14″) 1 smaller Tulip textile stencil (8″ x 8″) 1 Tulip paint roller Aluminum foil or Wax paperPaper plates for painting
Painter tape
Method
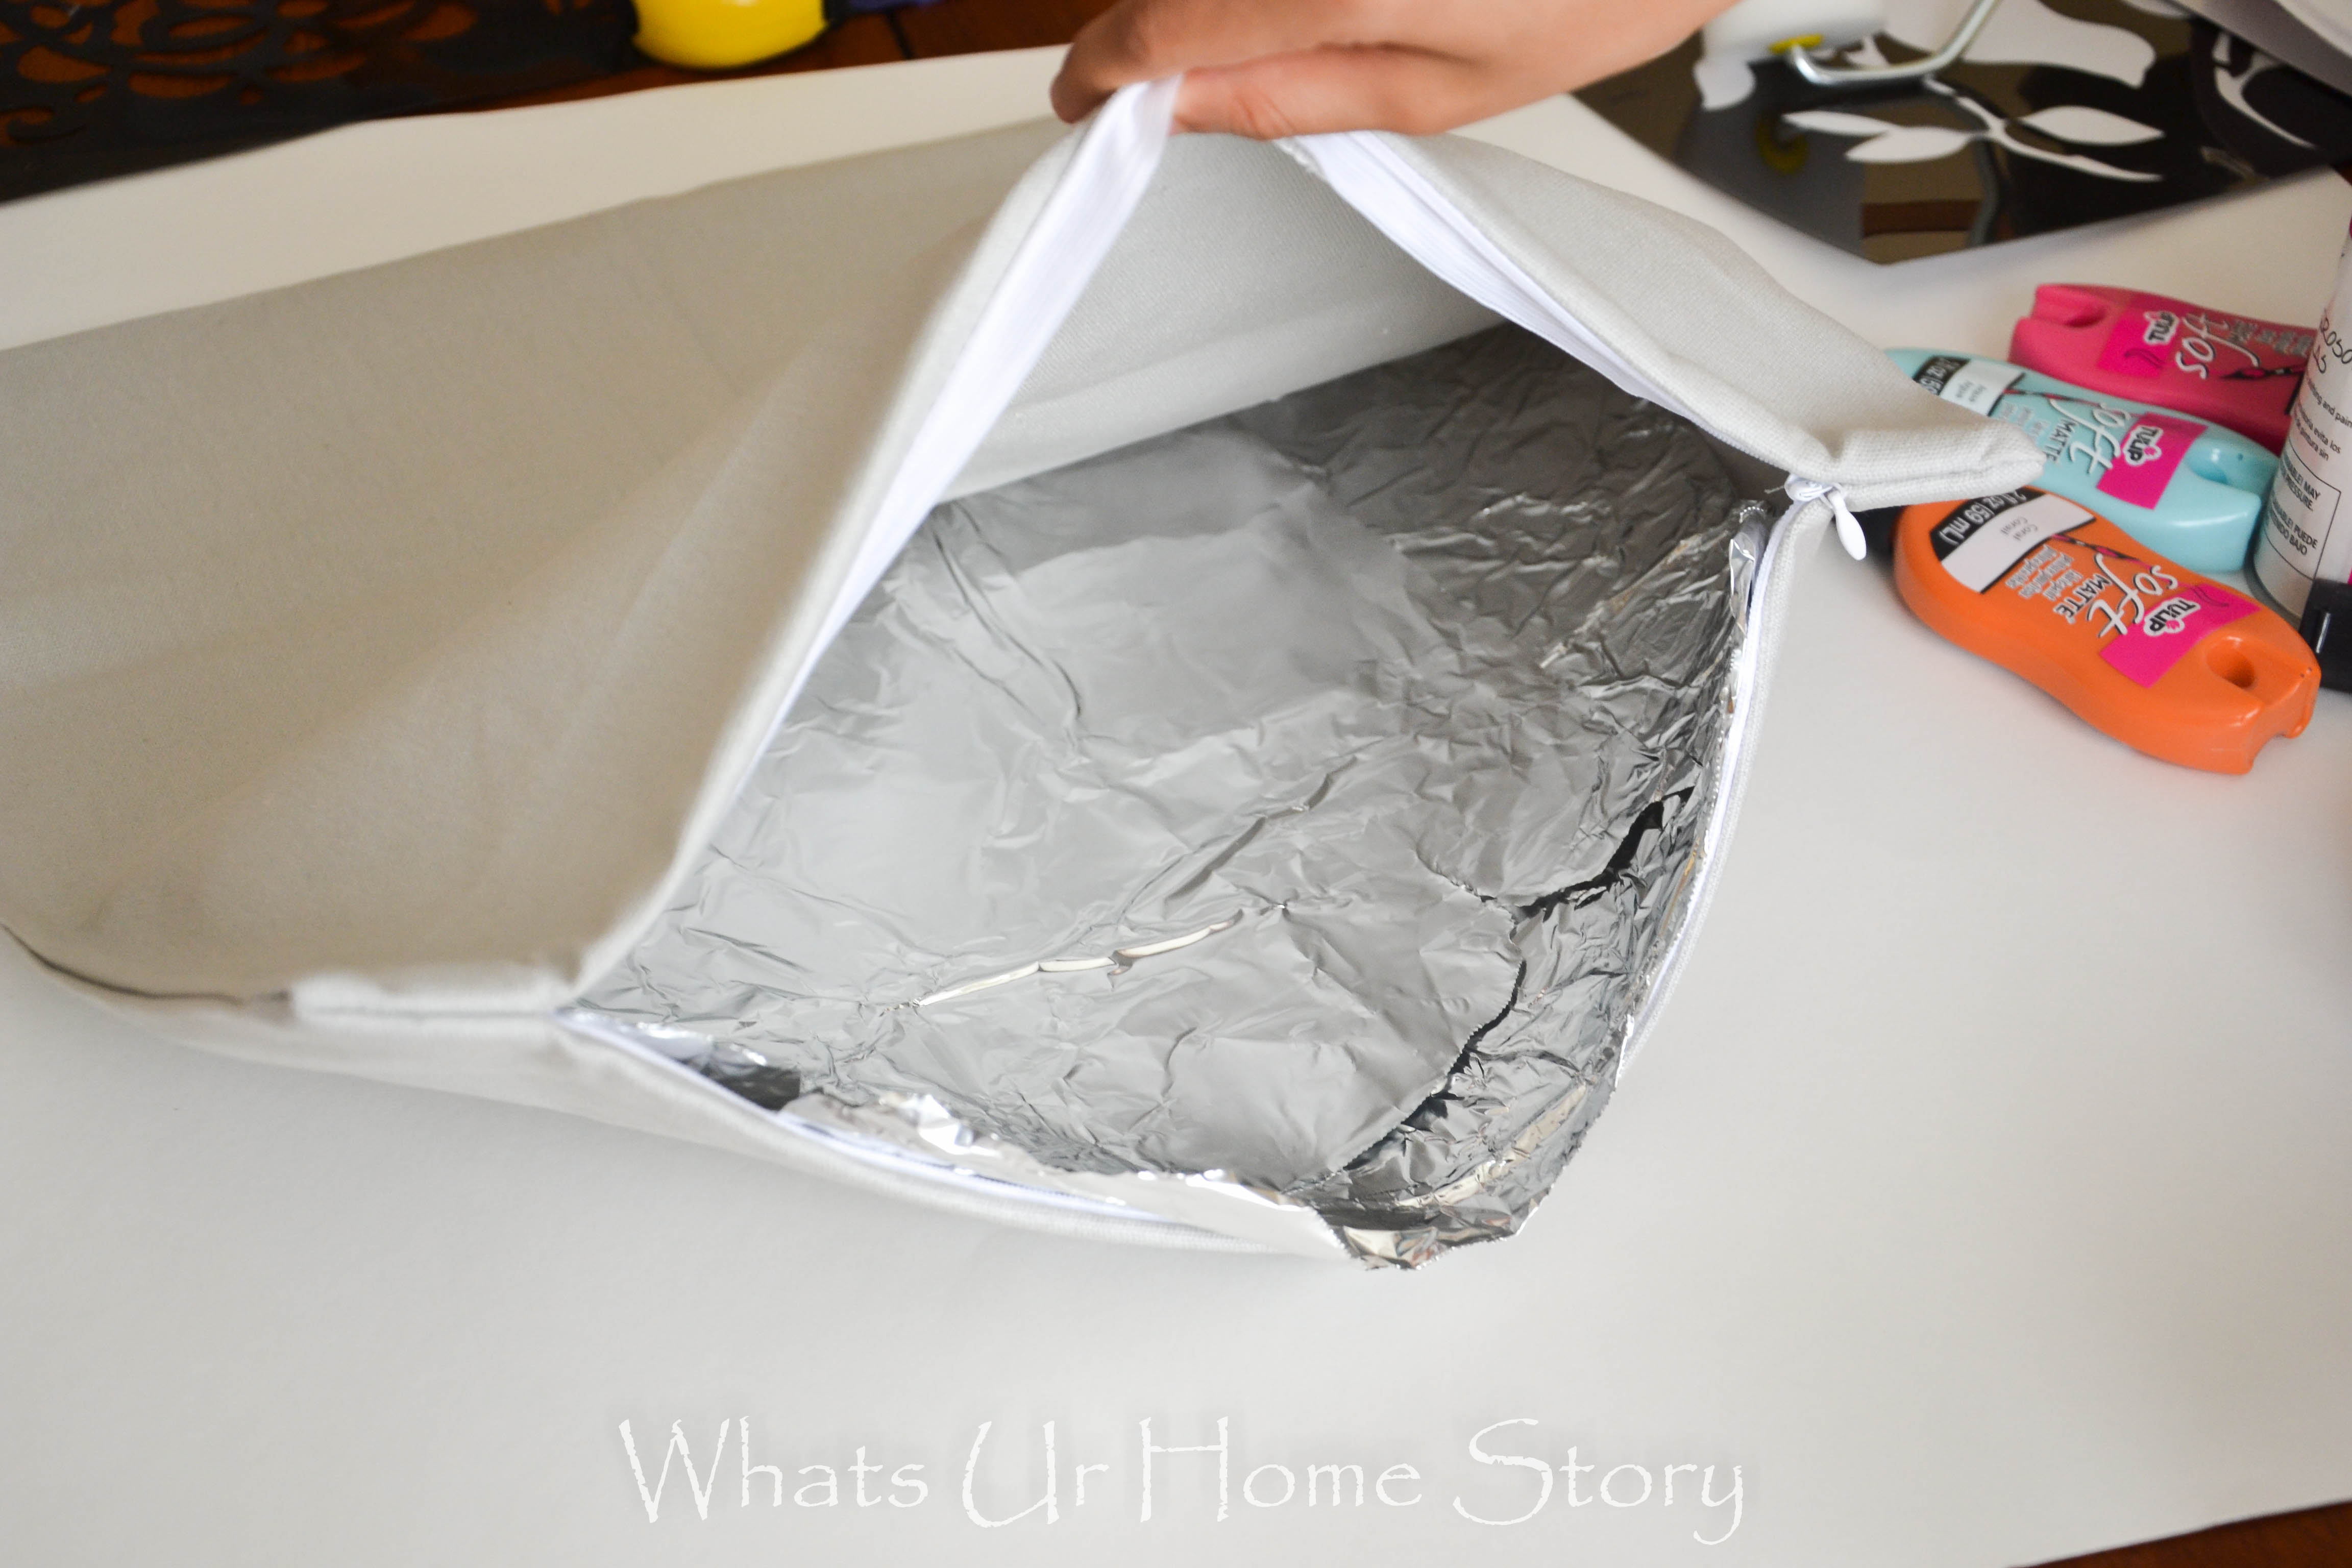
- Start by placing a sheet of aluminum foil inside the pillow cover. This will prevent any paint from seeping through to the other side.
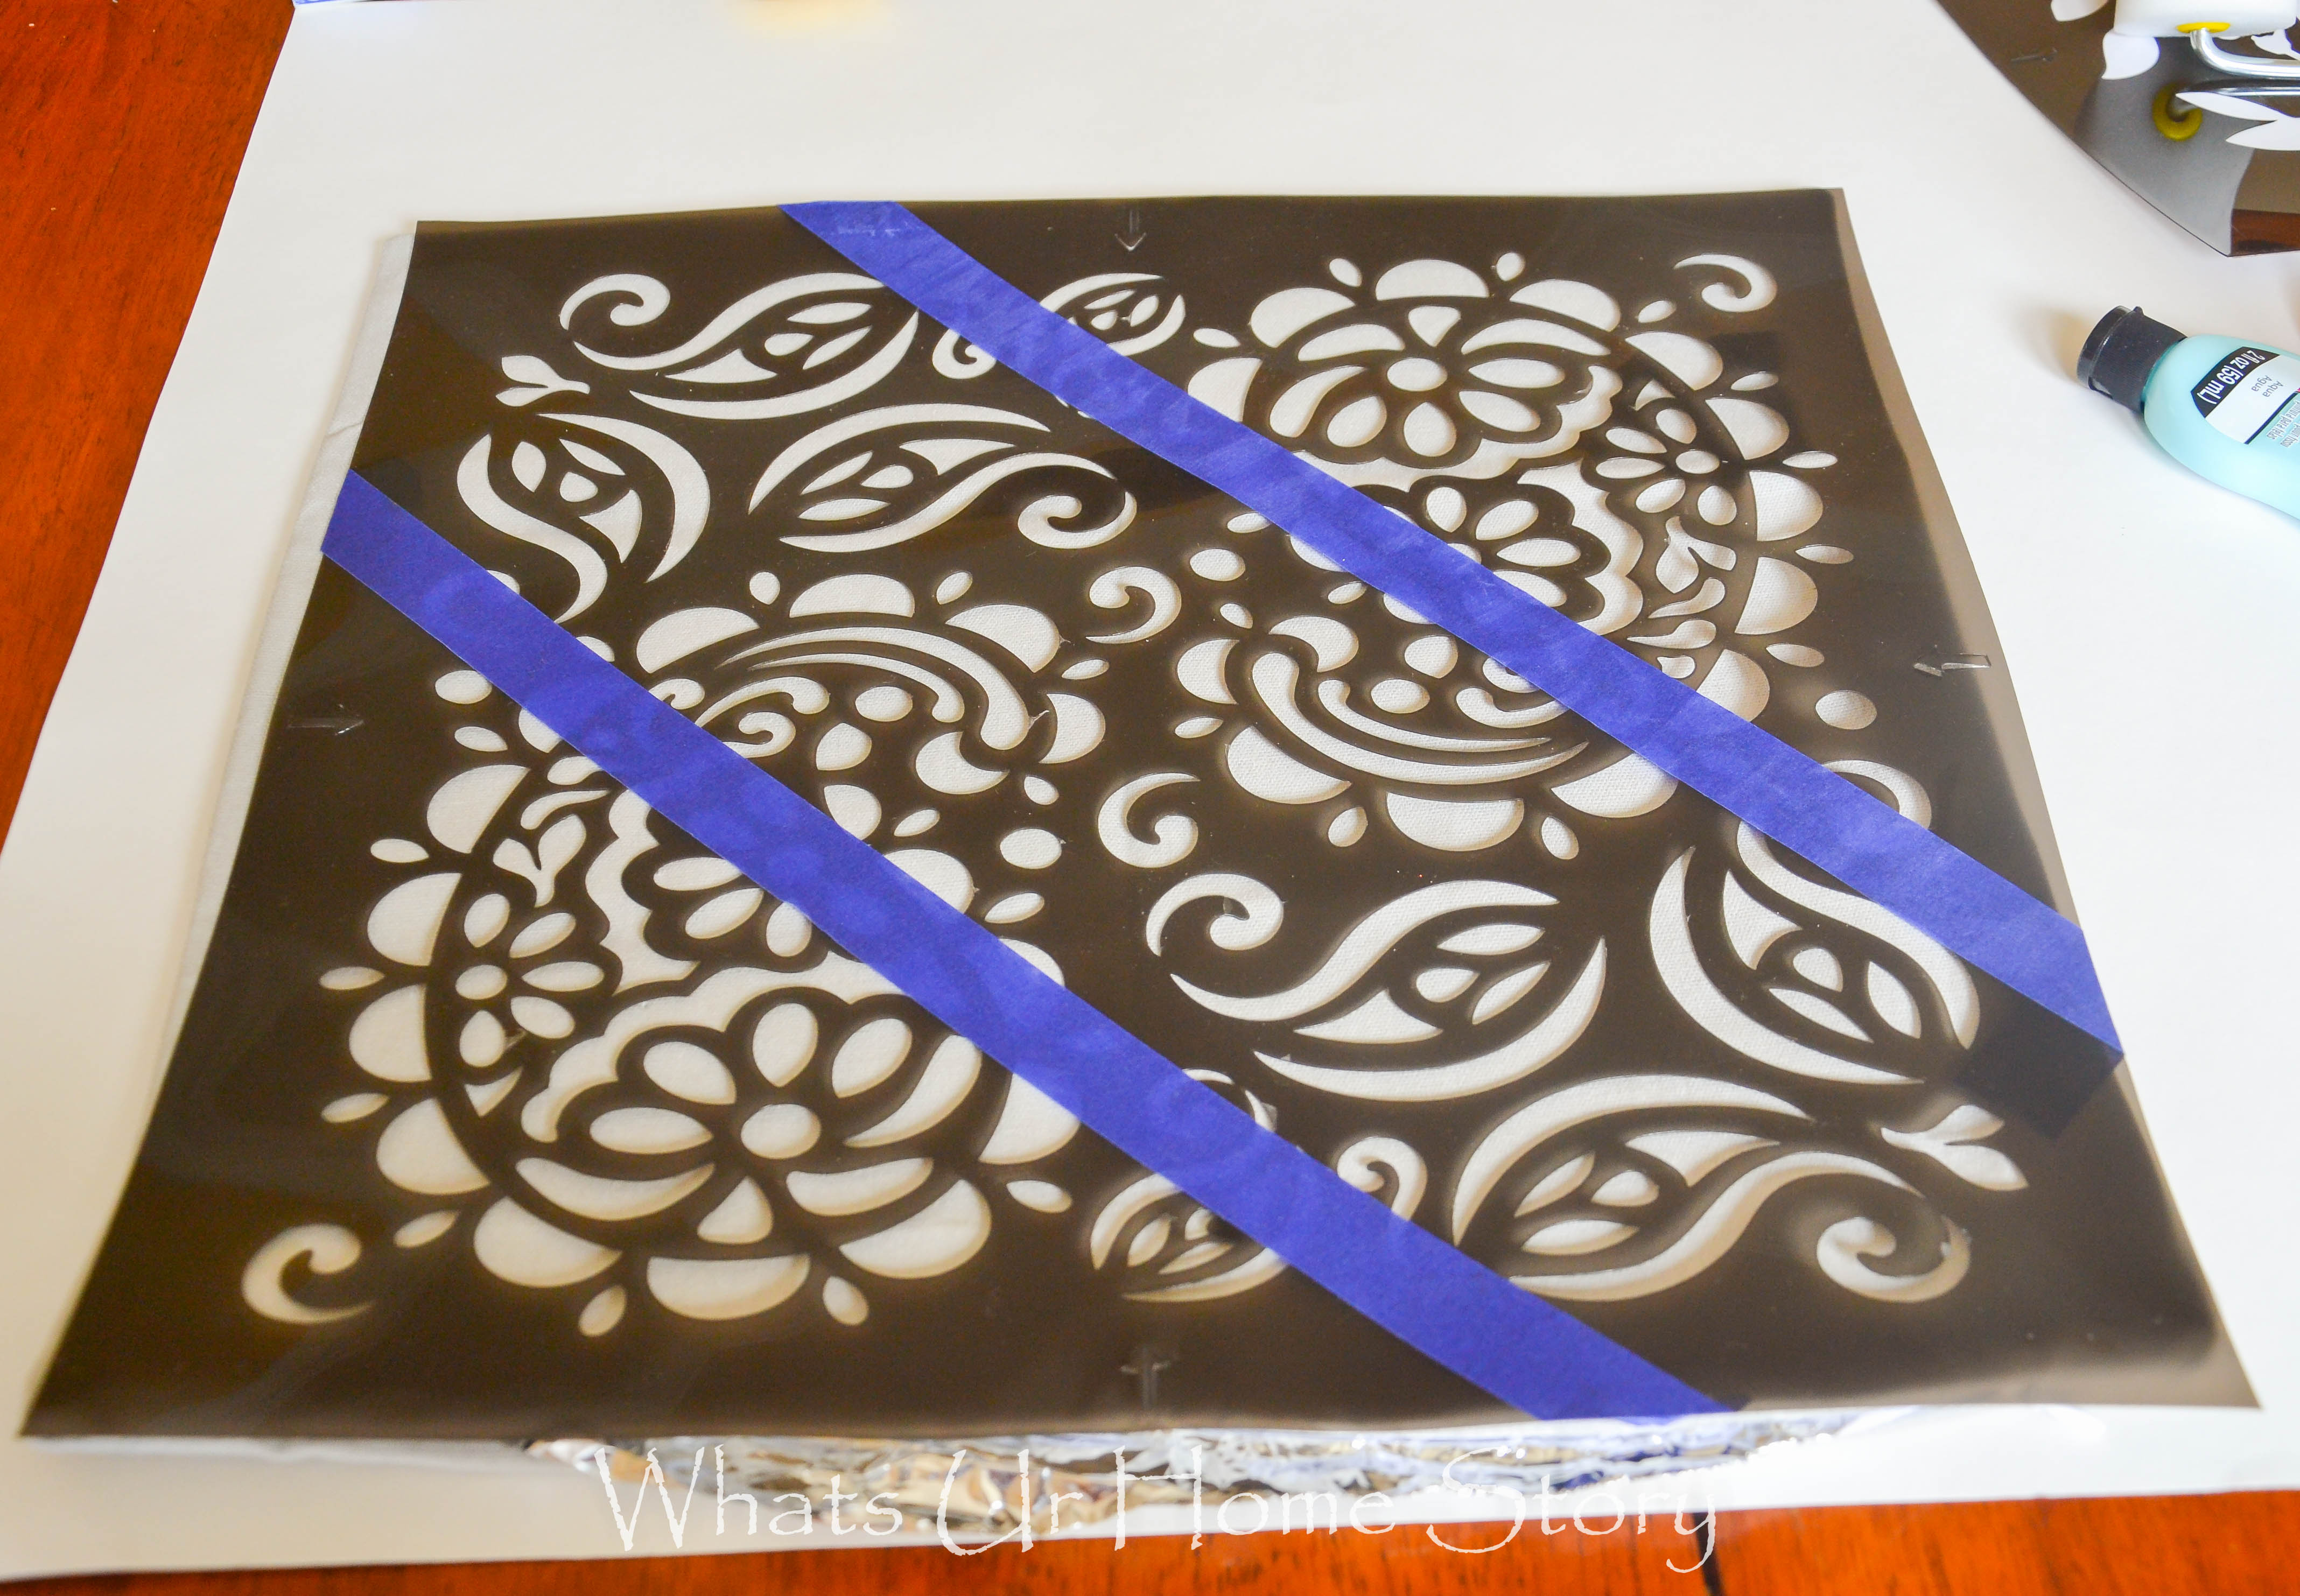
- Divide the large stencil into 3 equal sections diagonally and mark with painter’s tape.
- Spray the re-positionable stencil adhesive spray on the back side of the stencil.
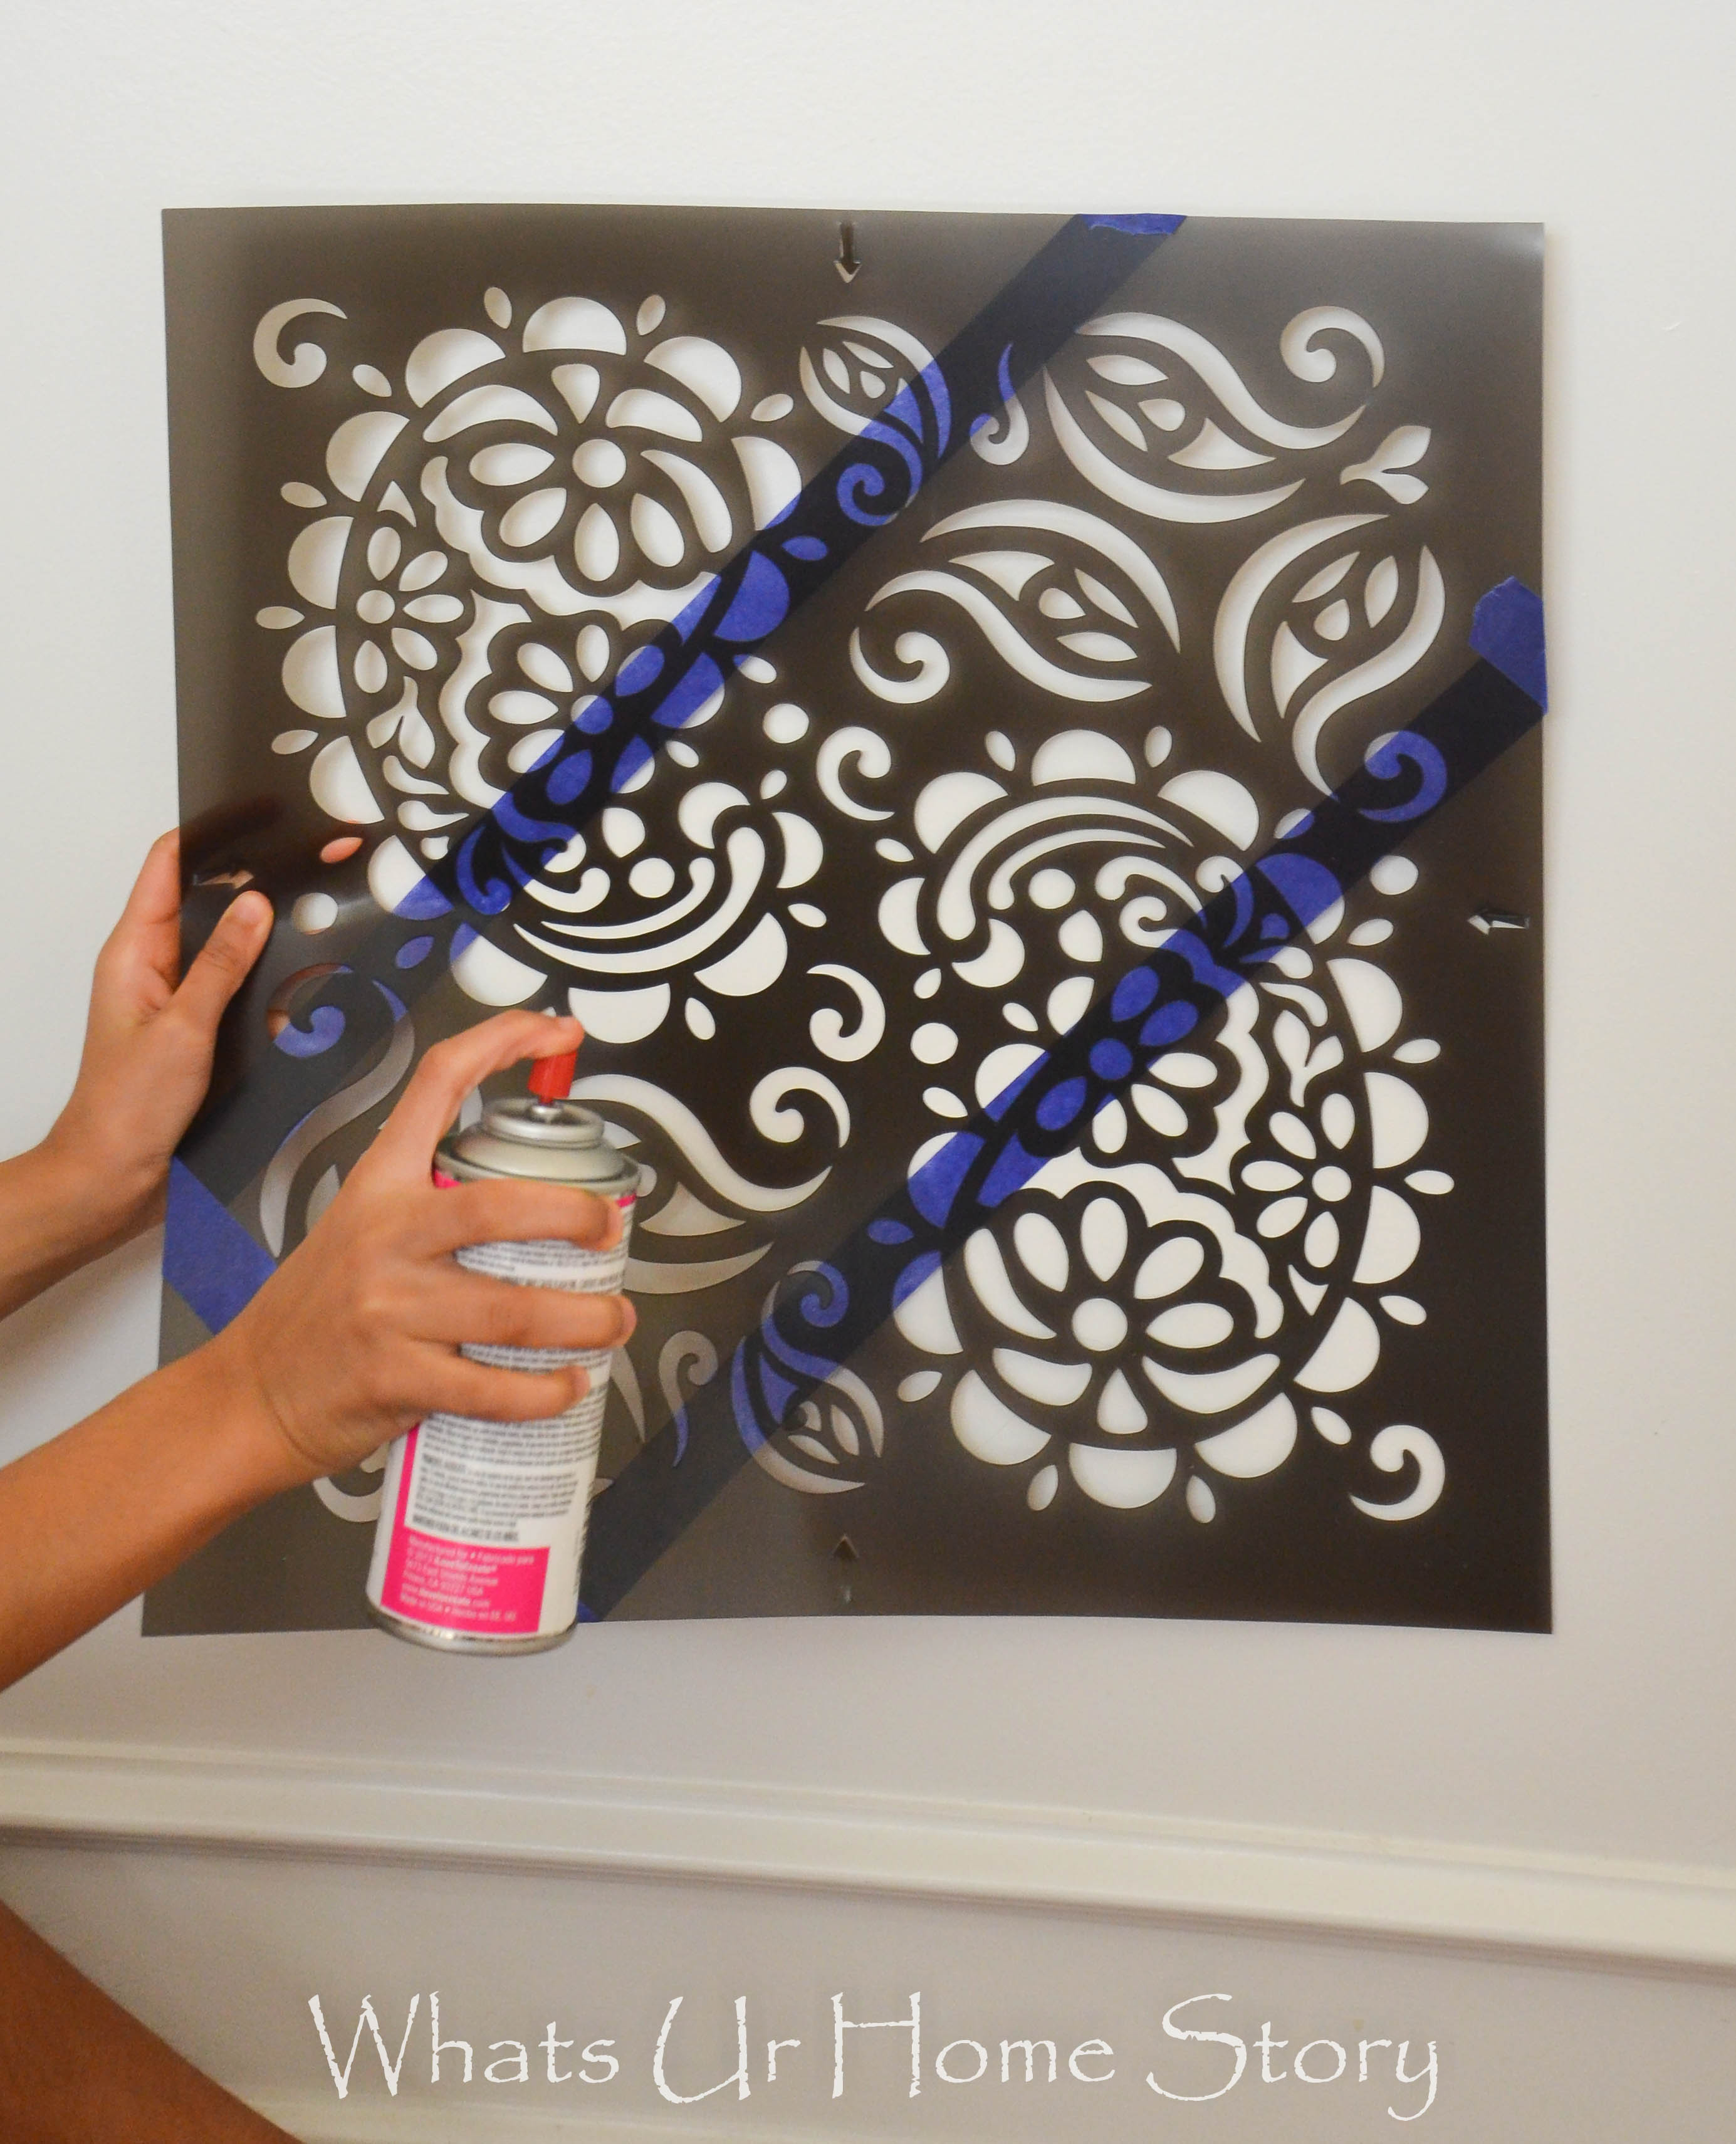
- Place the stencil over the pillow cover and press down firmly. The glue works fabulous as the stencil stays put in place all the way. I would not have gotten the clean lines of the multi color design if not for the spray.
- Paint the first section with the roller and remove the tape separating section 1 and 2.
- Paint the second section with your second color. Remove the tape when done. Continue on to the third.
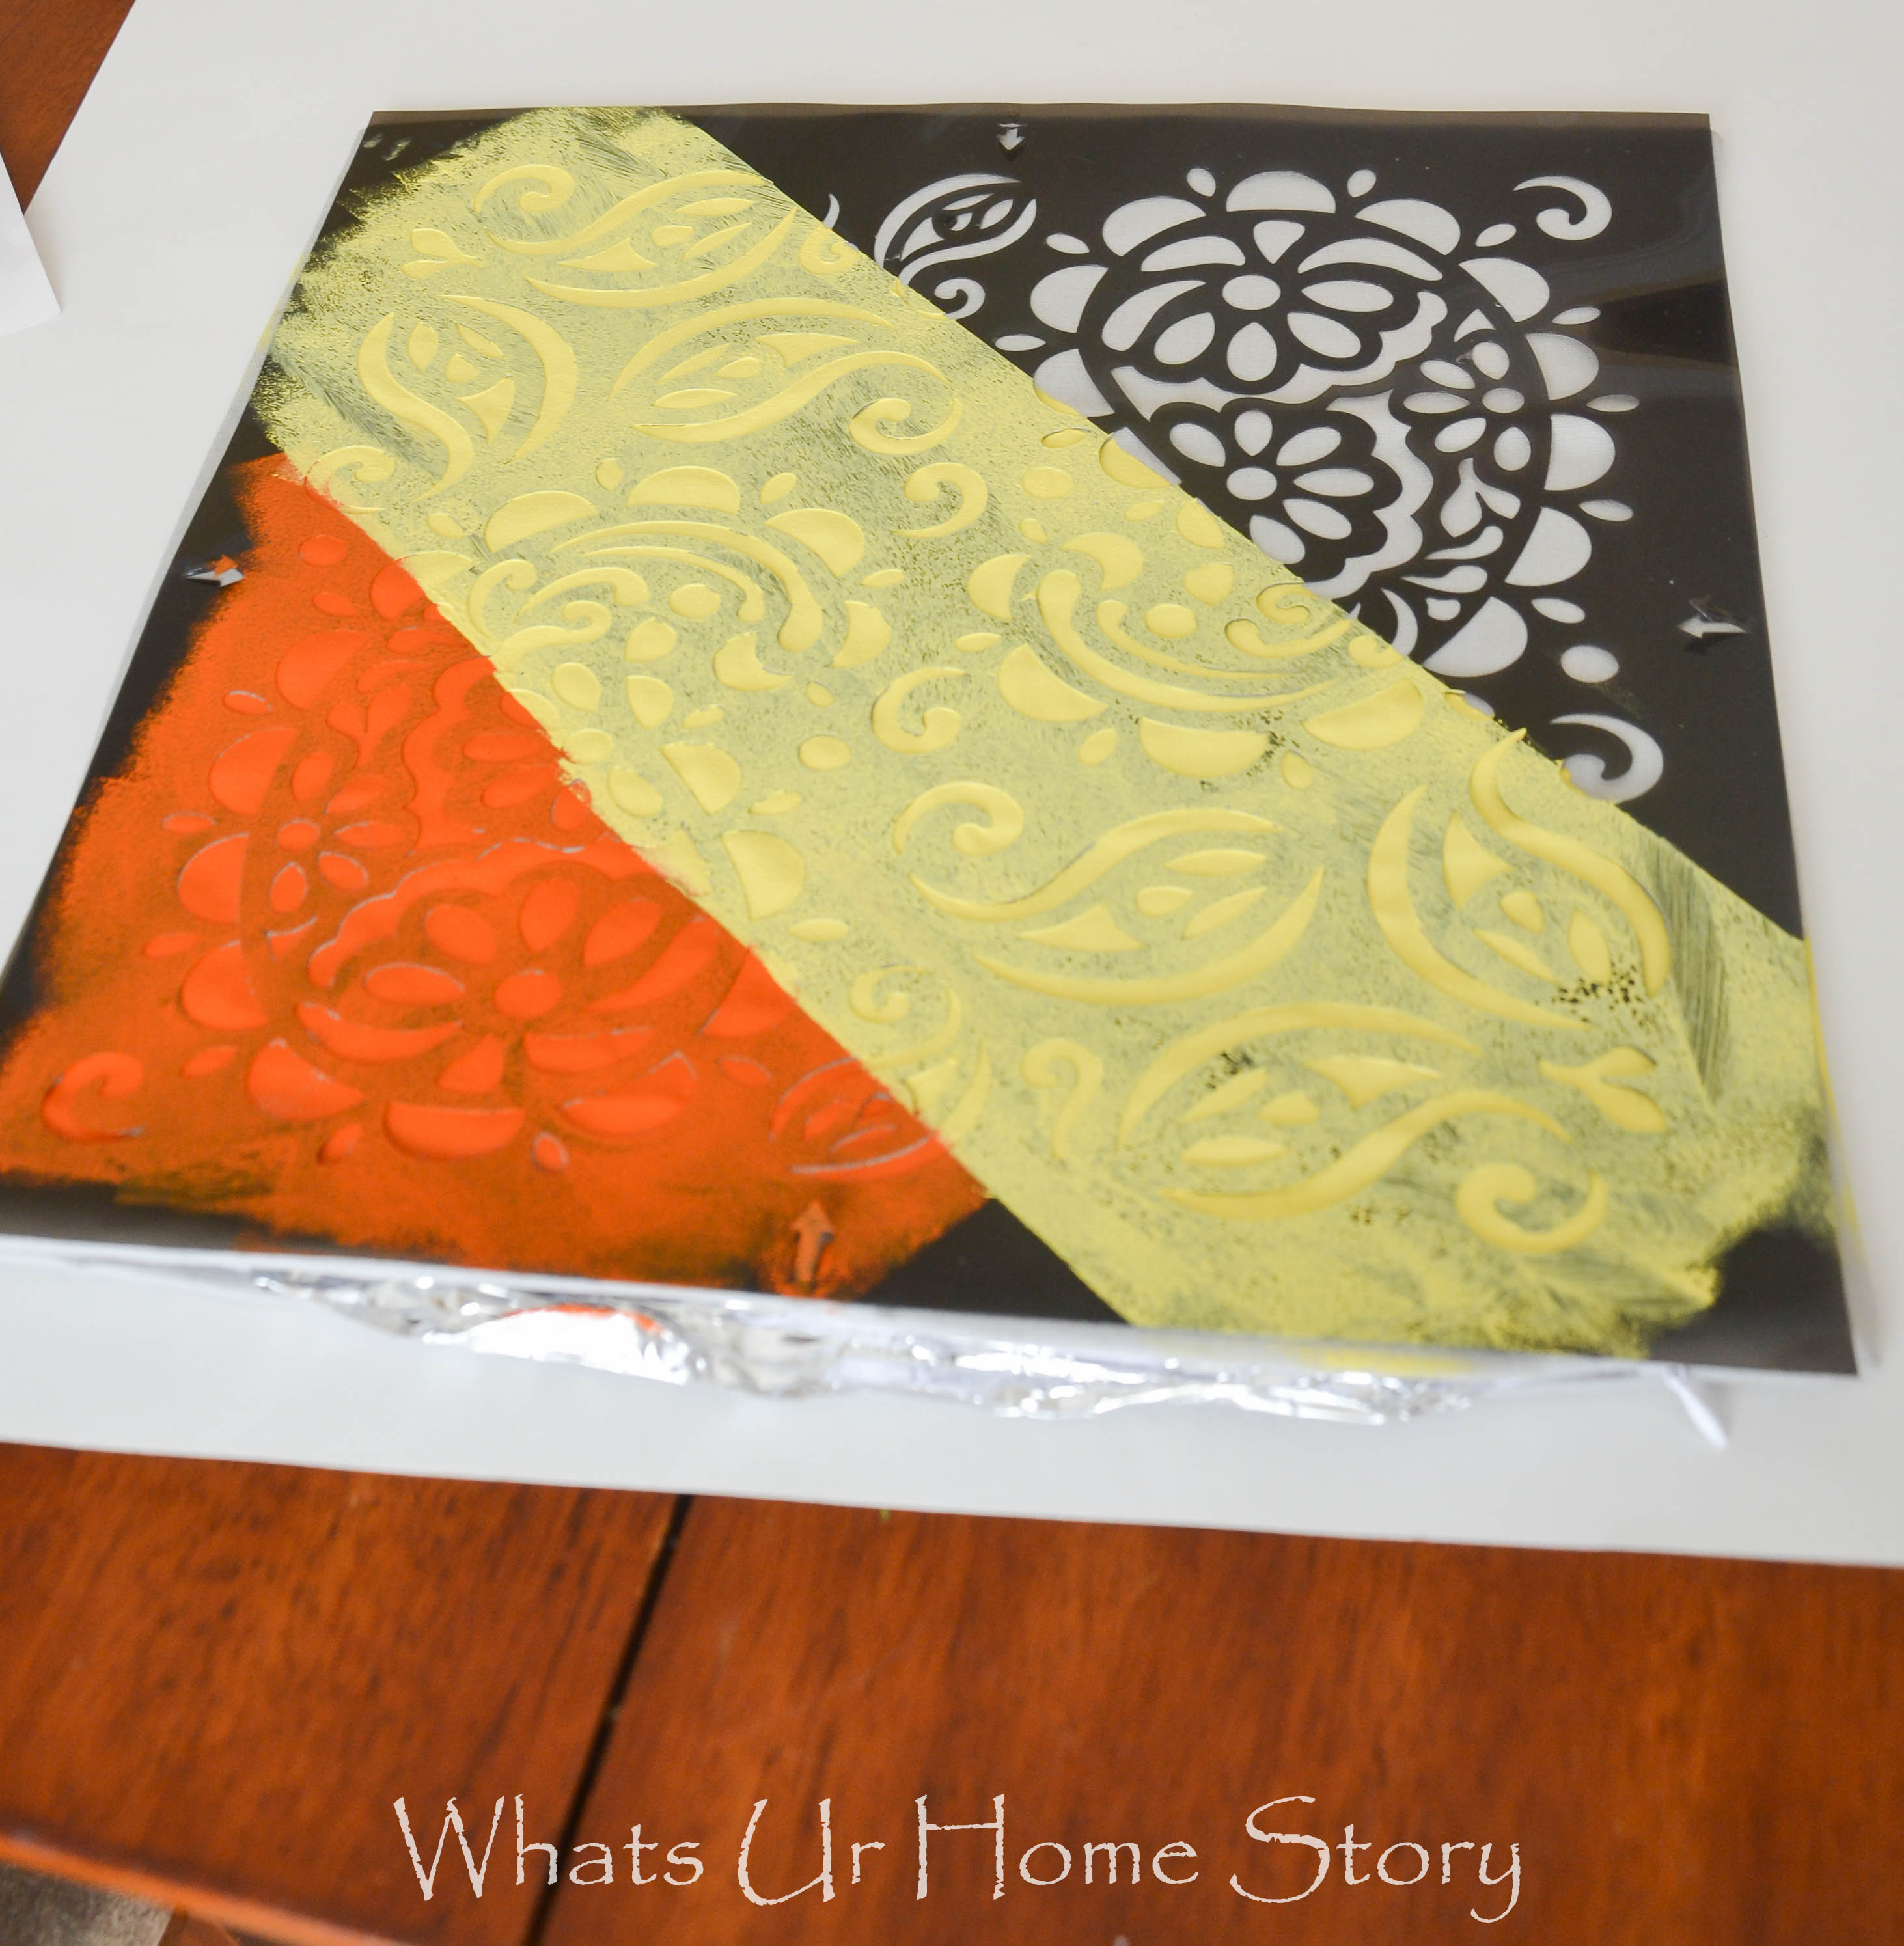
- Let it dry as per the instructions on the paint.
- Repeat step #3 on the smaller stencil. Center the smaller stencil over the already stenciled fabric. With the fourth paint color paint over the stencil.
- Let it dry.

- I had a couple of small paint accidents on the edges (see the small yellow line over the right side of the watermark?). I covered that up with some fuchsia pom pom fringe which I fabric glued on to the edge as a border.
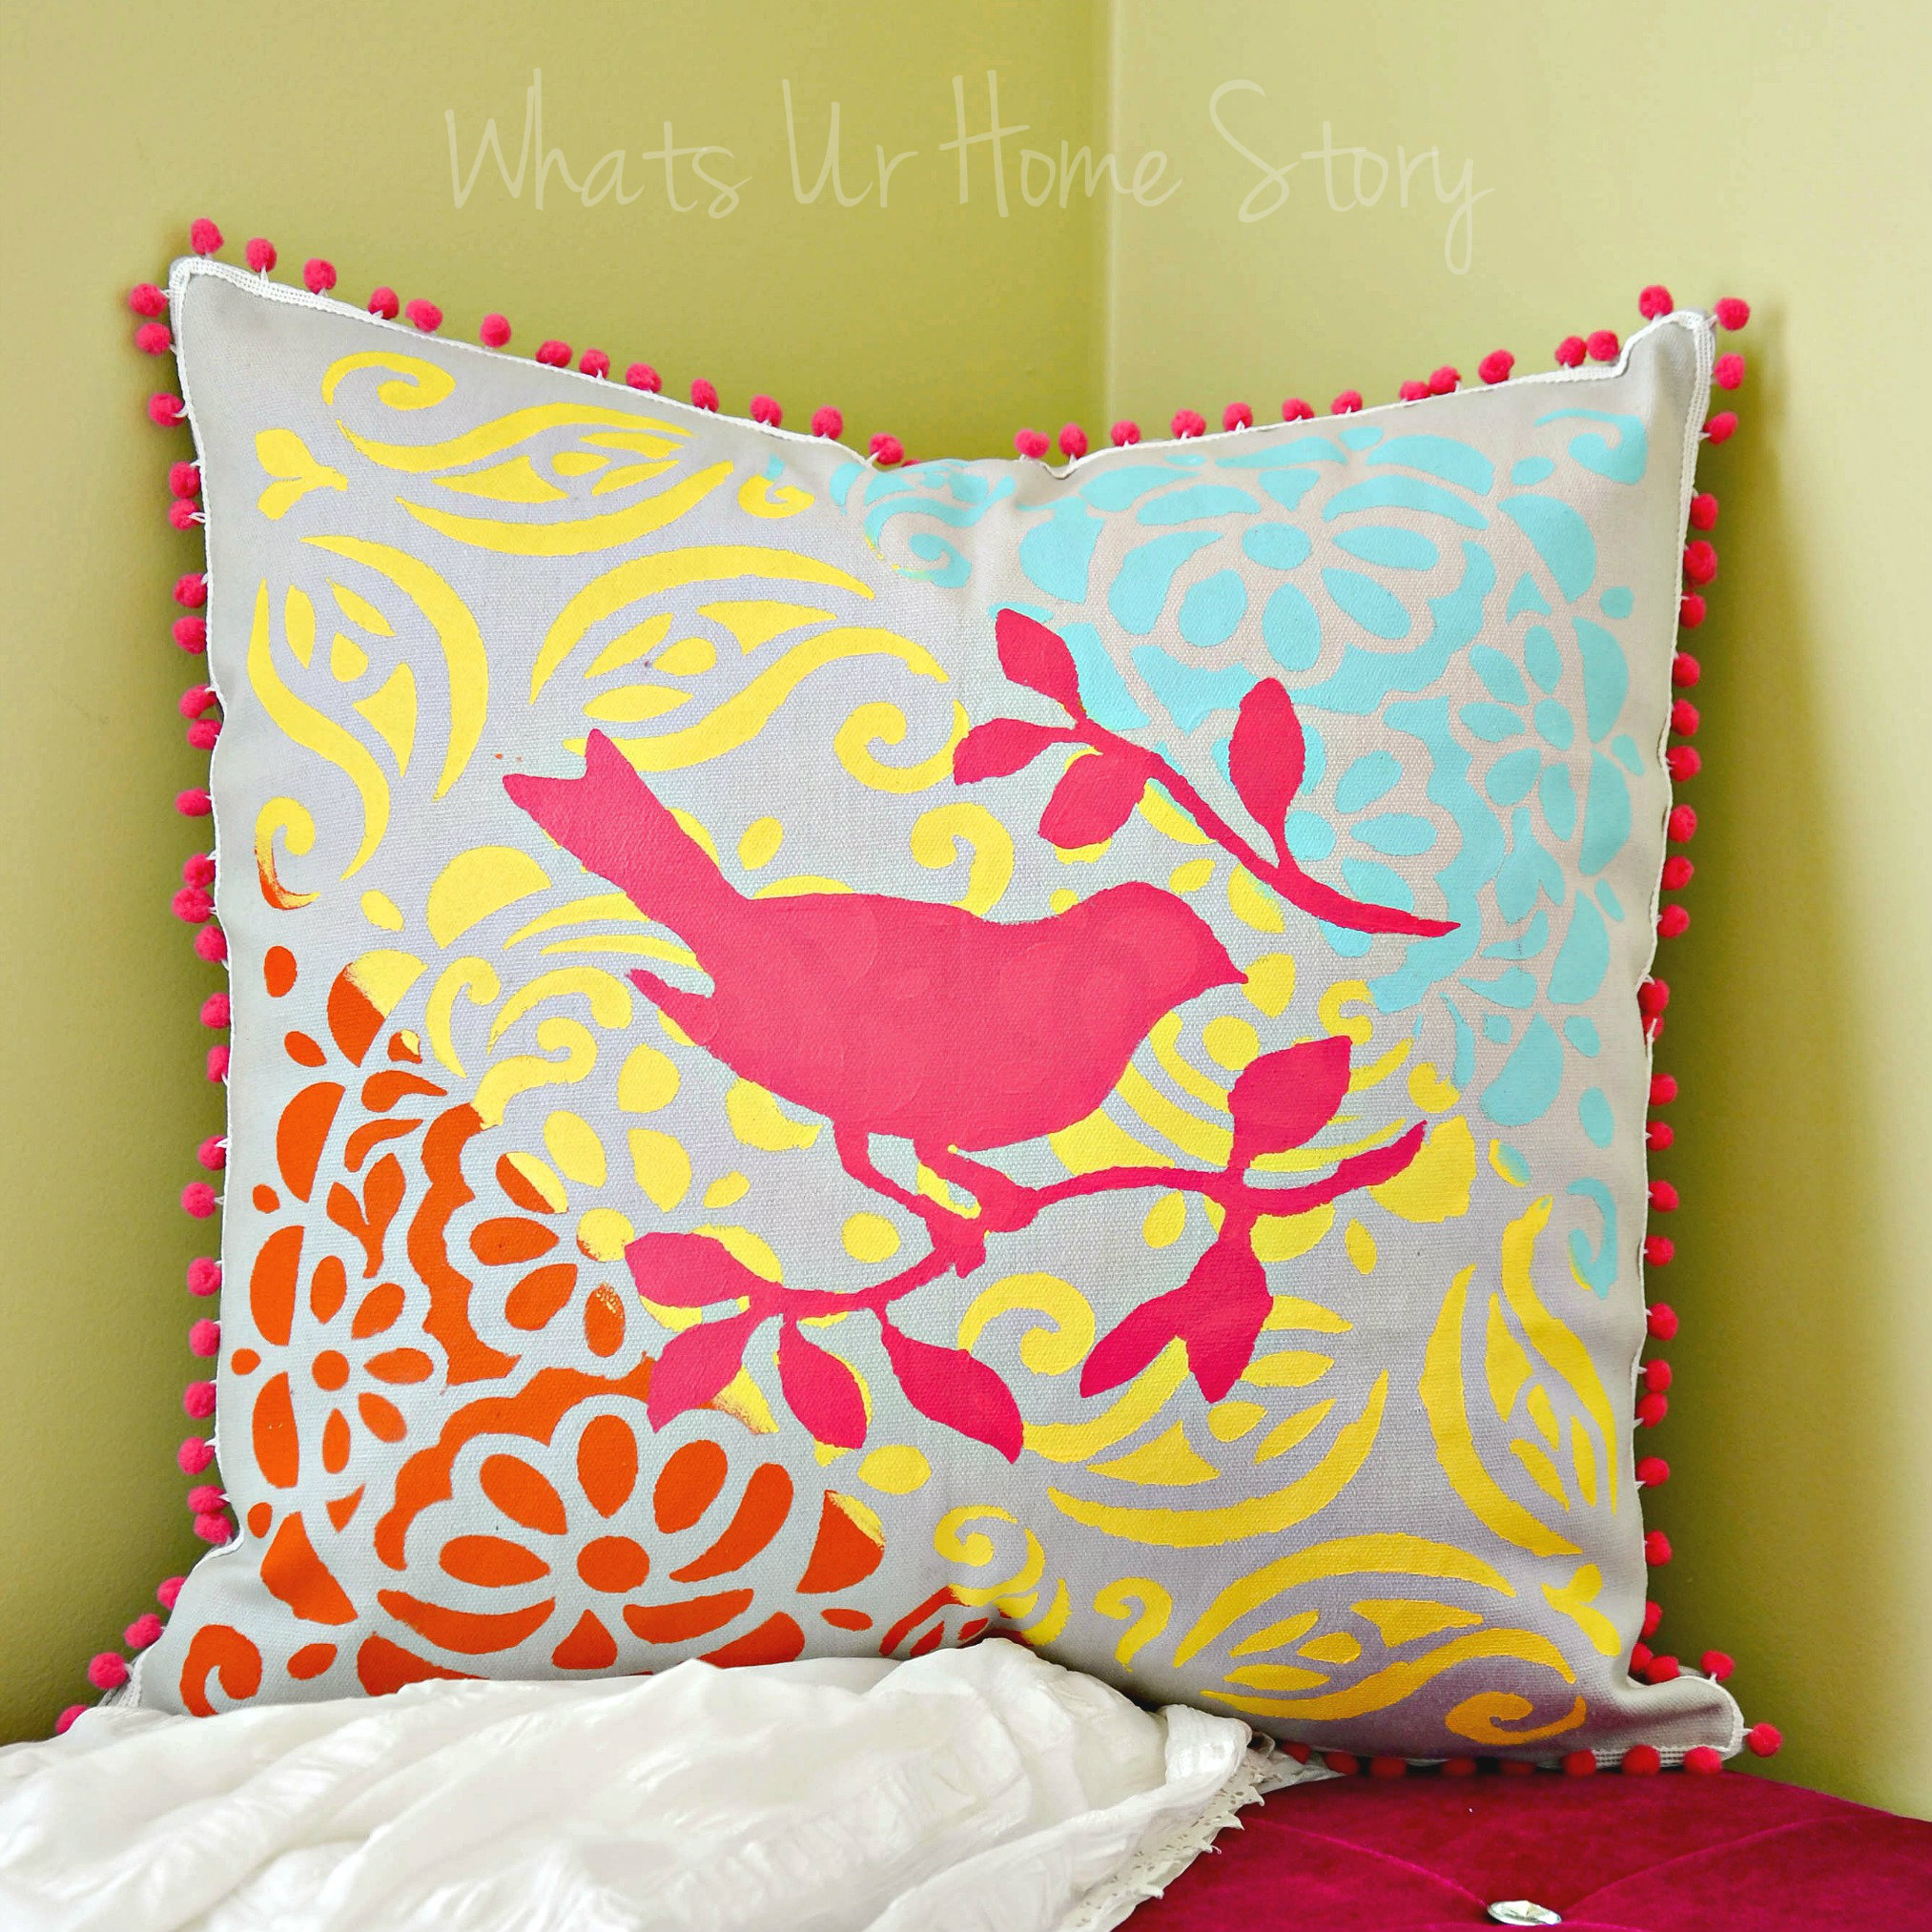
Nope, not done yet. You know me, as always I try to get the most bang for my buck. So decided to make it a double sided pillow. Sure enough the flower stencil in the pack came in handy.

The pretty pillow now graces the reading nook in my daughter’s room. Plus she gets to enjoy 2 different looks with the same pillow!
Check out I Love To Create on Facebook, Twitter, Pinterest, and Tulip’s Blog for more project ideas.
Disclosure: This post is sponsored by Tulip® and I Love to Create. As always all opinions, photos, and projects are my own.
To see what others have done with Tulip for Your Home Projects click on the images below.


Looks gorgeous and so easy to do!!!
Thanks Jesny. Yes, it was really easy to make.
Vidya
Love it Vidya… Where exactly do you shop for Stencils??
Thanks Shiji. It is available at select Micheals stores now. Can checkout the ilovetocreate website to see if it is available at your local Micheals. By July it will be available at JoAnn & Hobby Lobby.
the pillow looks very pretty . as always you rock vidya
Thanks Rakhi.
Loved it! Absolutely beautiful!!! Looks like it is easy enough for me to try! 🙂
Oh yes, it is super easy. 🙂
Loved it Vidya!!!!
Thanks Shruthi.
What a great idea…I am a stencil freak, too, but I have never used it on fabric! Can you believe it? I am pinning and trying this spring for sure! Gorgeous job!
I loved it on fabric Kim, especially these paint. They are the right consistency for stenciling. Not too gooey not too thick, just right.
I love all the bright colors! And the addition of pom-poms is genius!
Thanks Melaine. I’ve been dying to use pompom fringe on something and I was glad that I messed up. Now that I could cover it up with pom poms!:)
V
Such a pretty pillow to welcome Spring! Love the fun colors and patterns.
Thanks for sharing,
Suzanne
Pieced Pastimes
Thank you Suzanne. Tulip does have a good selection of stencils.
LOVE how you stenciled your pillow Vidya! Very clever idea. Sooo pretty and says Hello Spring and summer
I am pinning this! I recently got a sofa for my home’s living room, and have been dressing it up with DIY pillows. I’d love to make a pillow like yours for my new sofa! Thanks for sharing!
I love that you masked off the stencil and used multiple colors. And you had me at pom pom fringe. I love that stuff@
Vidya, Love the colors you picked. And I like the layering too. I will give it a try.
I really like how you used multiple colors for one stencil – very clever!