
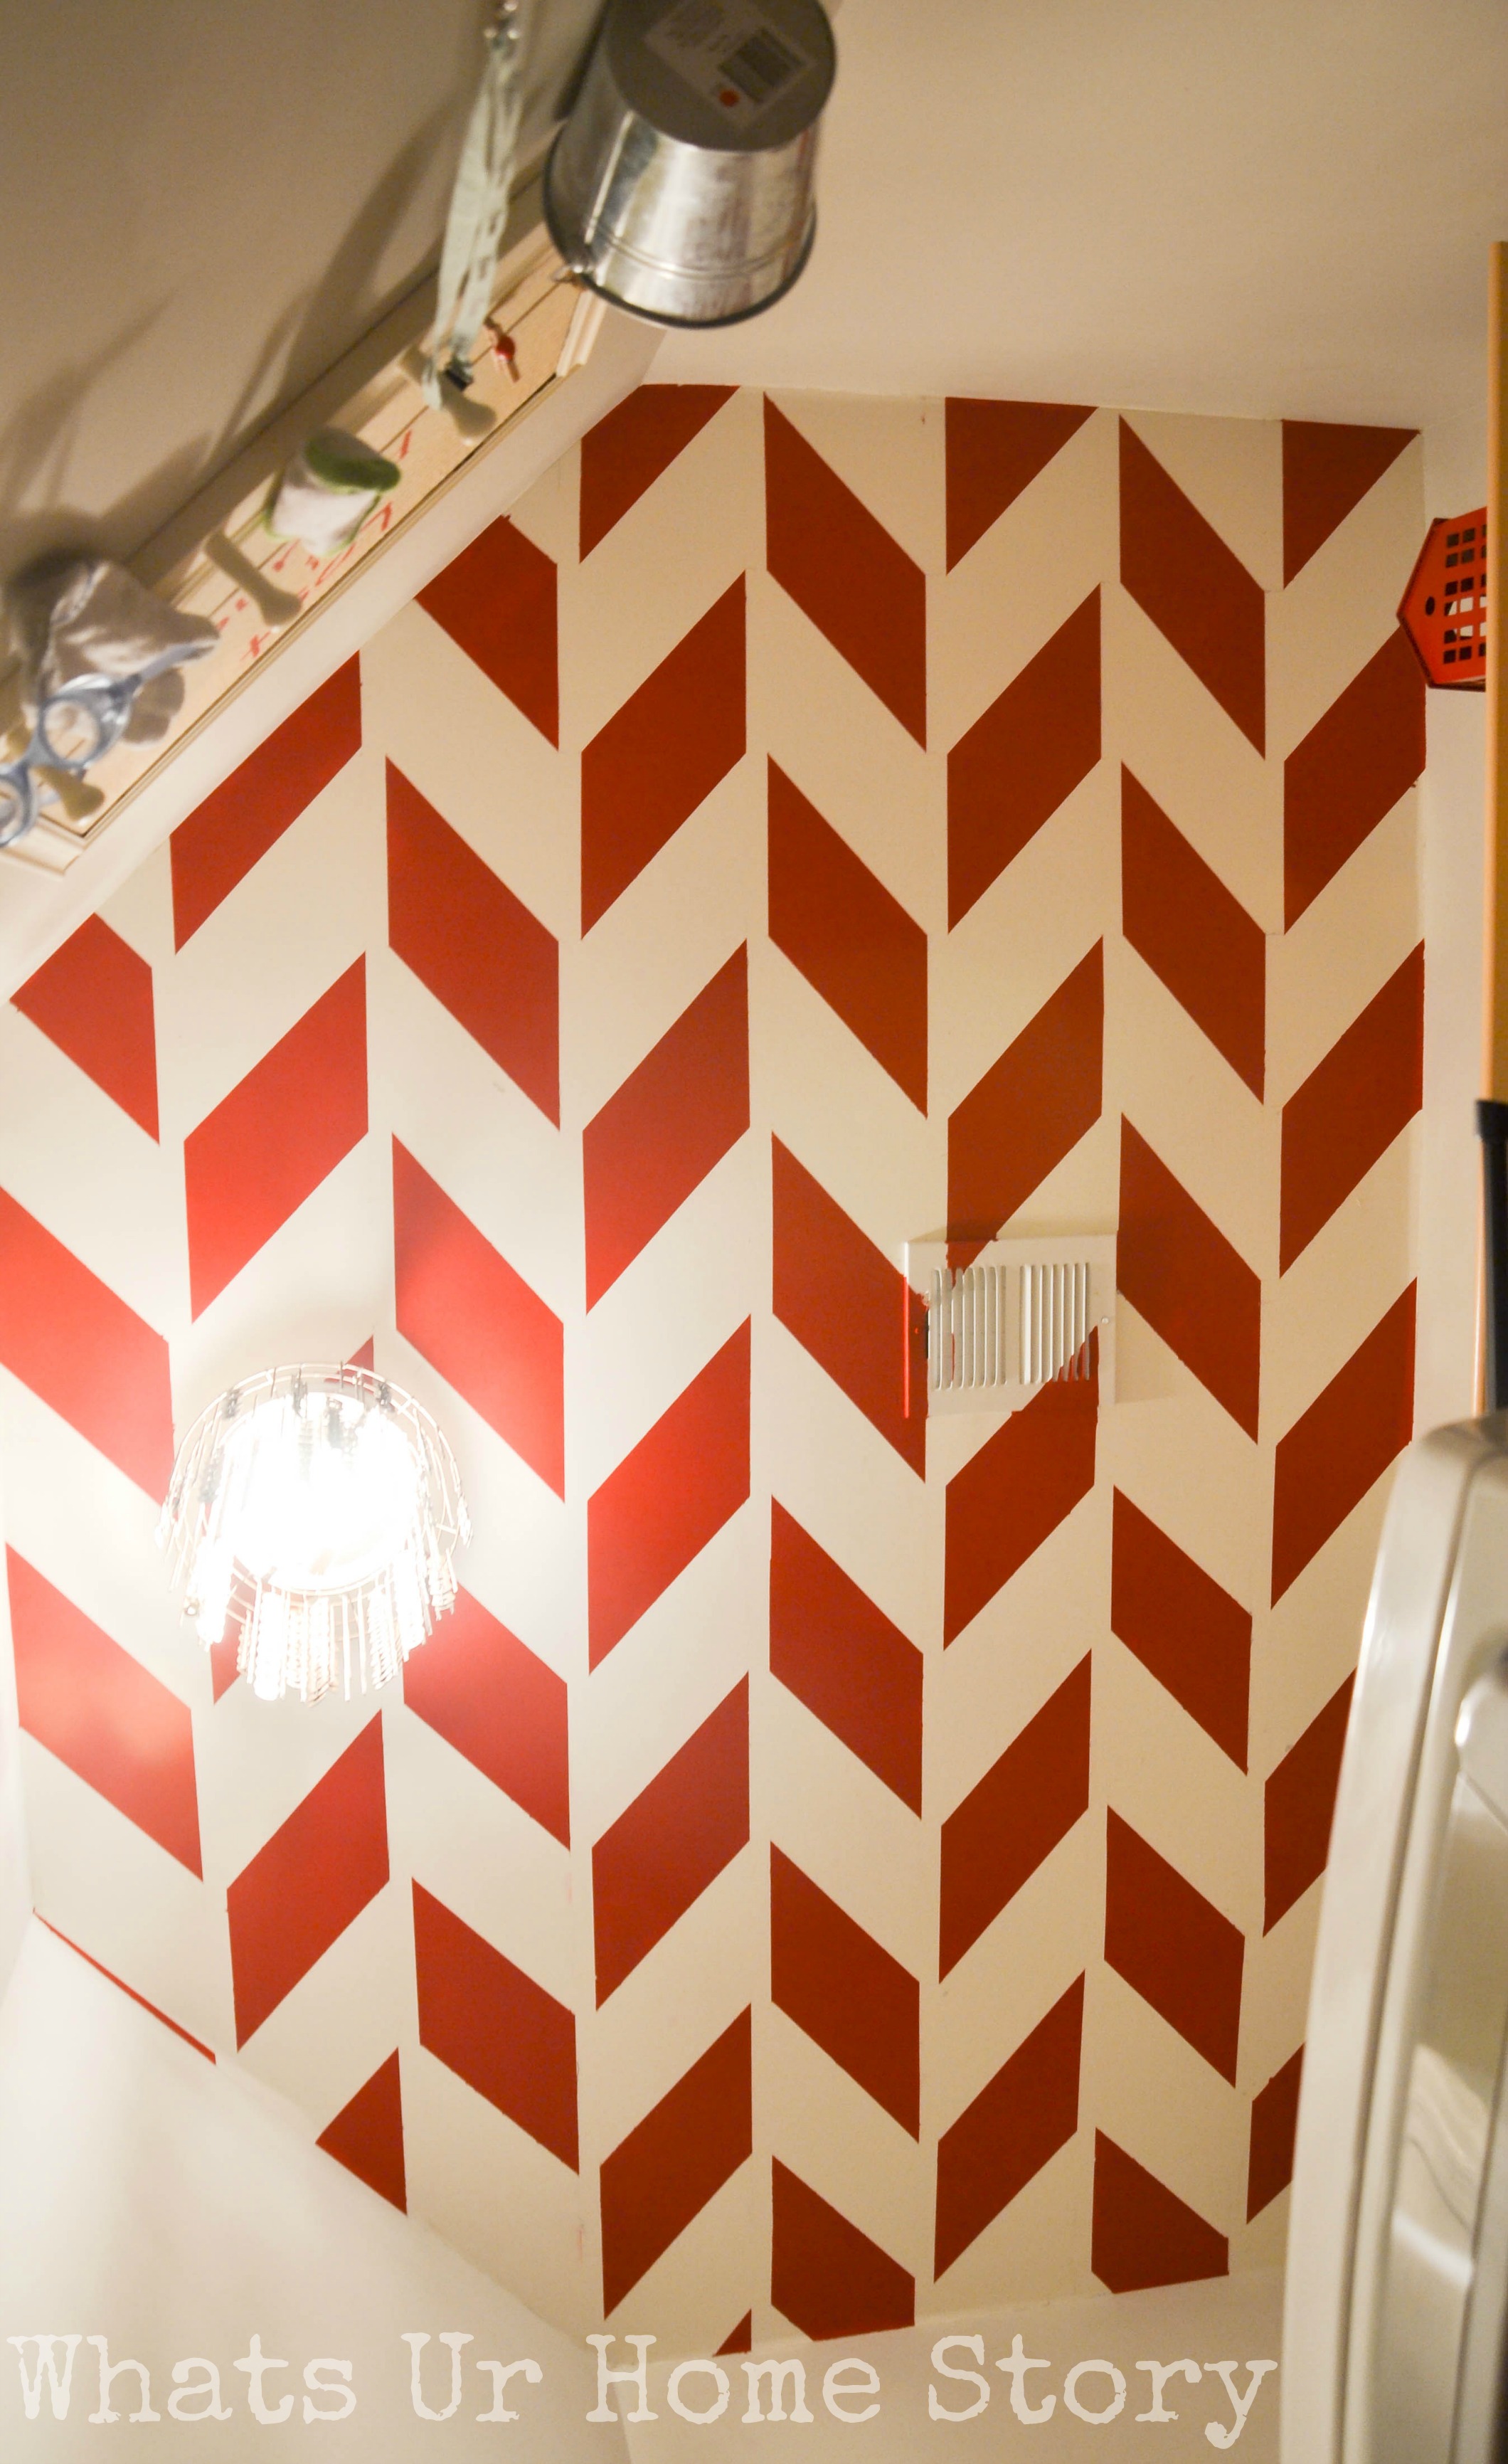
Ready for more Laundry room projects? I’ve the ceiling for ya today. My labor of love, the herringbone ceiling!

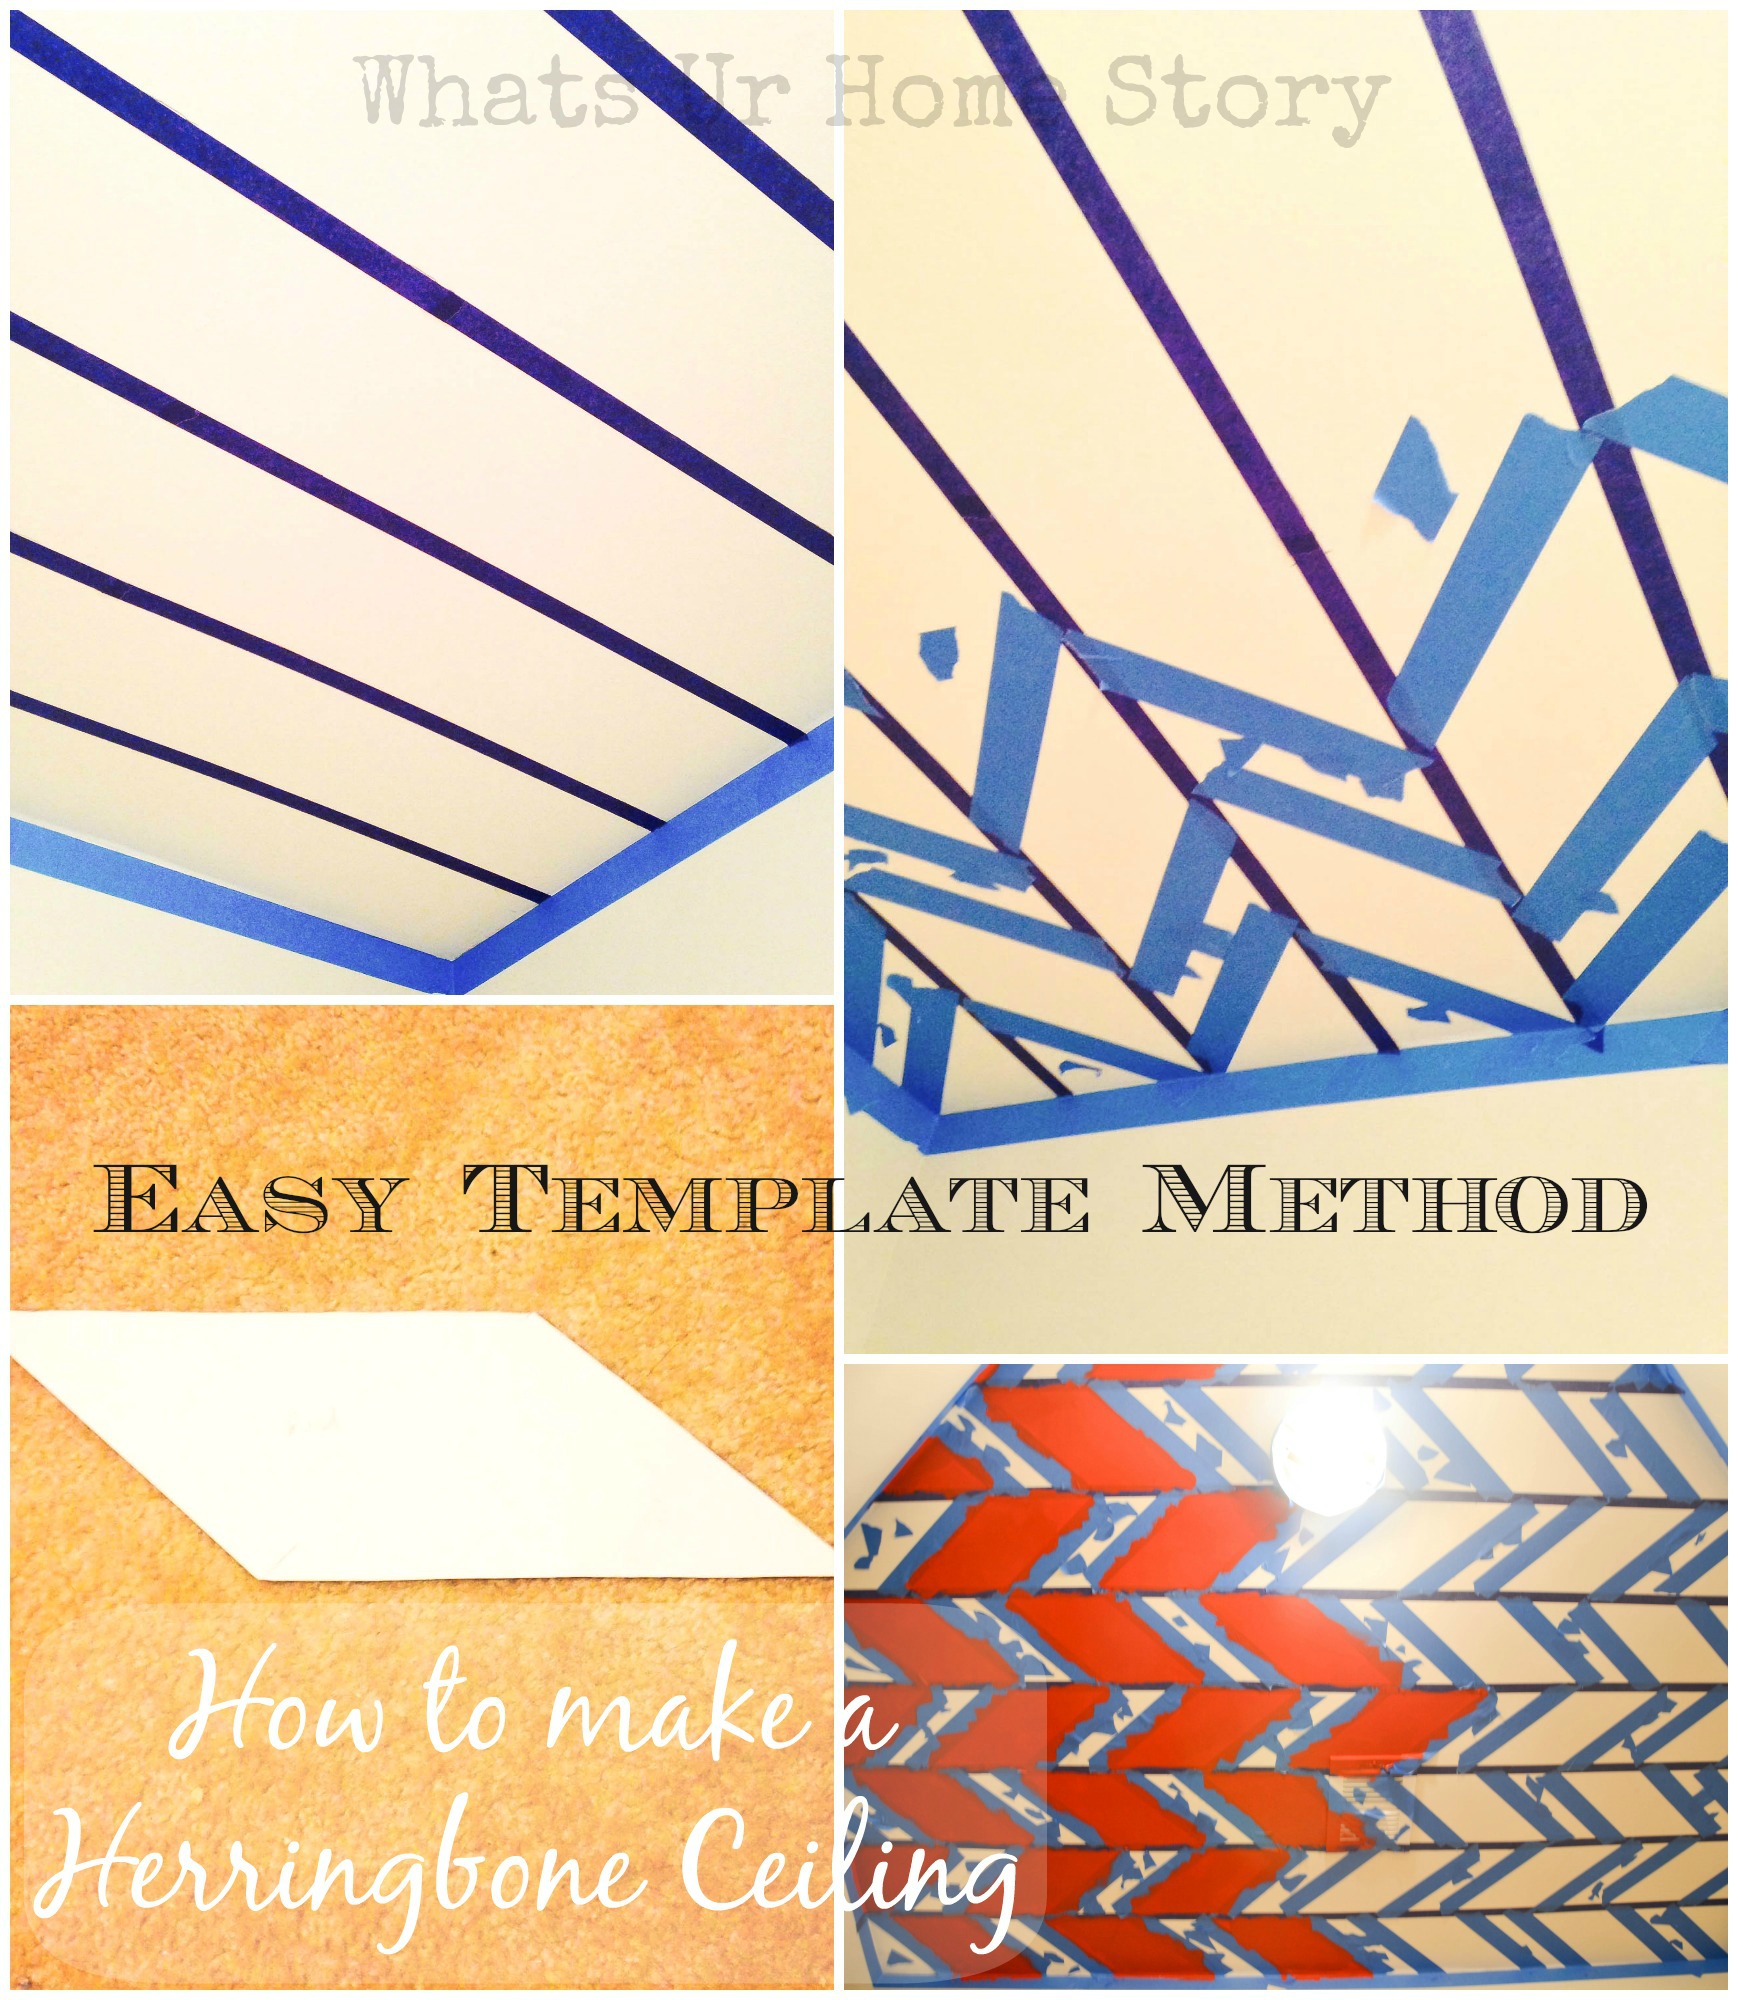
The idea was inspired from Vintage Revivals‘ hallway ceiling. I started out like she did, the old school way of marking the stripes and individual herringbone or parallelograms by hand. Soon realized that I was getting no where! That’s when B (ya, have to give him full credit for the idea) came up with a very simple and effective solution. Make a template and trace it onto the ceiling! Needless to say, the template speeded up the process significantly and I was done in half an hour (for half of that ceiling).
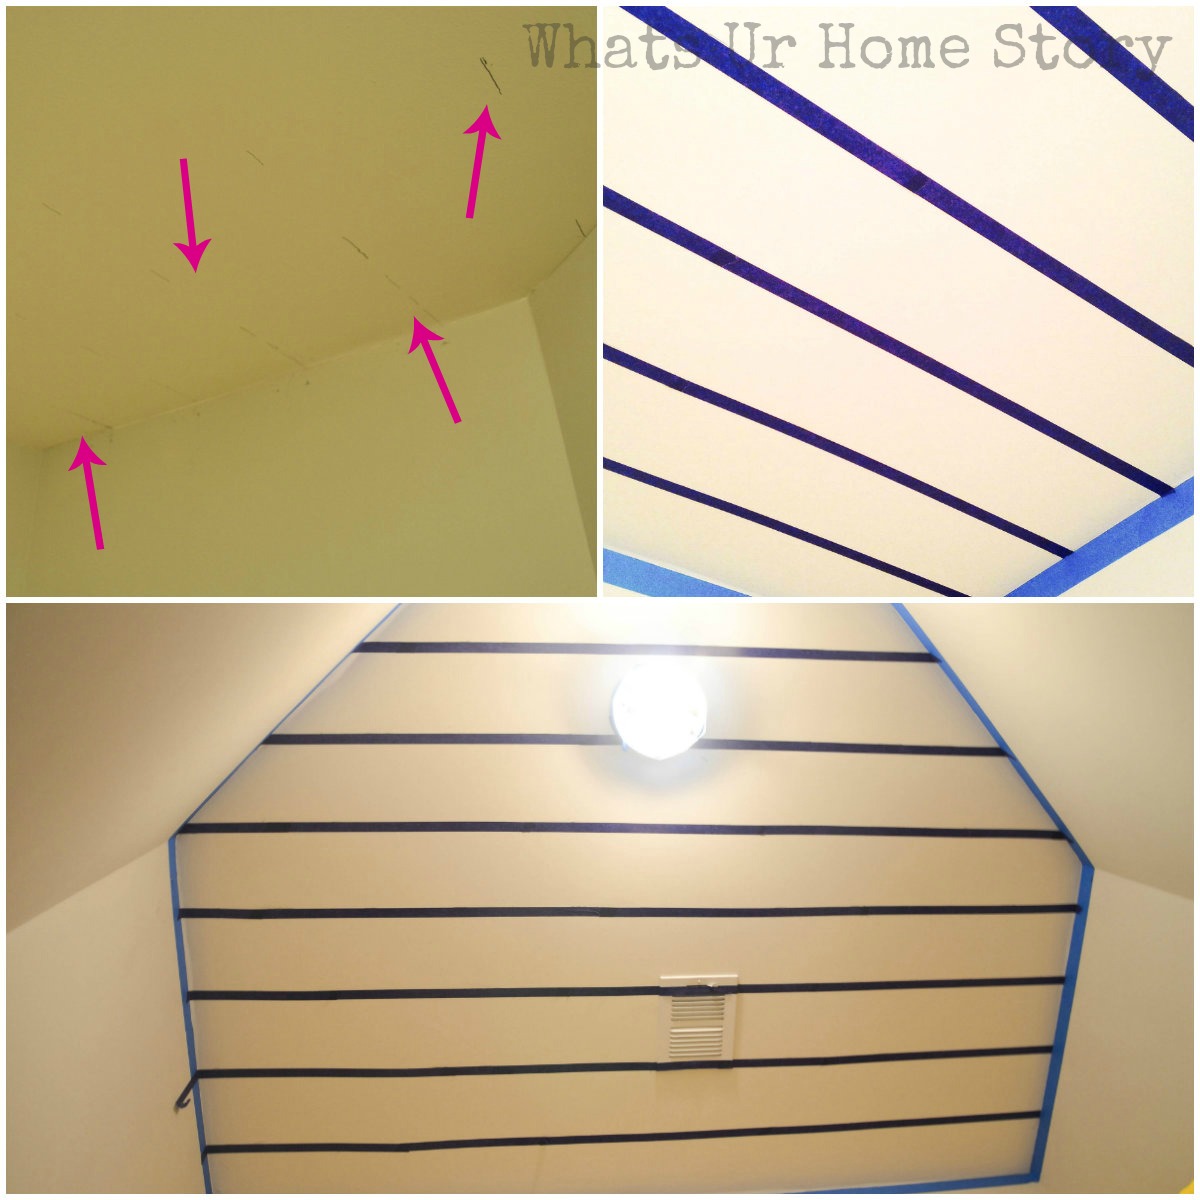
Just to give you an idea of the effort involved;
- Measuring and marking the stripes with a laser level was definitely a 2 person job and took us an entire afternon. Part of it was because we were working around the washer and dryer. There was no way we could get those out of the room. For a completely empty room the time would be a lot lesser.
- Marking the herringbone pattern along the stripes – Ideally would have take me (one person) an hour to finish had I used the template method from the get go.
- Taping the herringbone pattern was the most confusing part and took me a good 2 hours. Will tell you why in a bit.
- The actual painting hardly took an hour.
The Easy Template Method Tutorial
- Decide on how wide you want your herringbone pattern to be. I decided upon 8 inches ‘coz that was the closest round number to the width of the air vent that we had to work with in the ceiling.
- With a laser level mark 8 inch stripes with a pencil (see the arrows in the below pic) and painter’s tape. For the painter’s tape always make sure to mark either inside or outside of the stripe. Doesn’t matter which side you pick just be consistent and pick the same side for all the stripes/tape.
- Cut out the template as shown below. My parallelogram ended up being 11 x 8 inches.
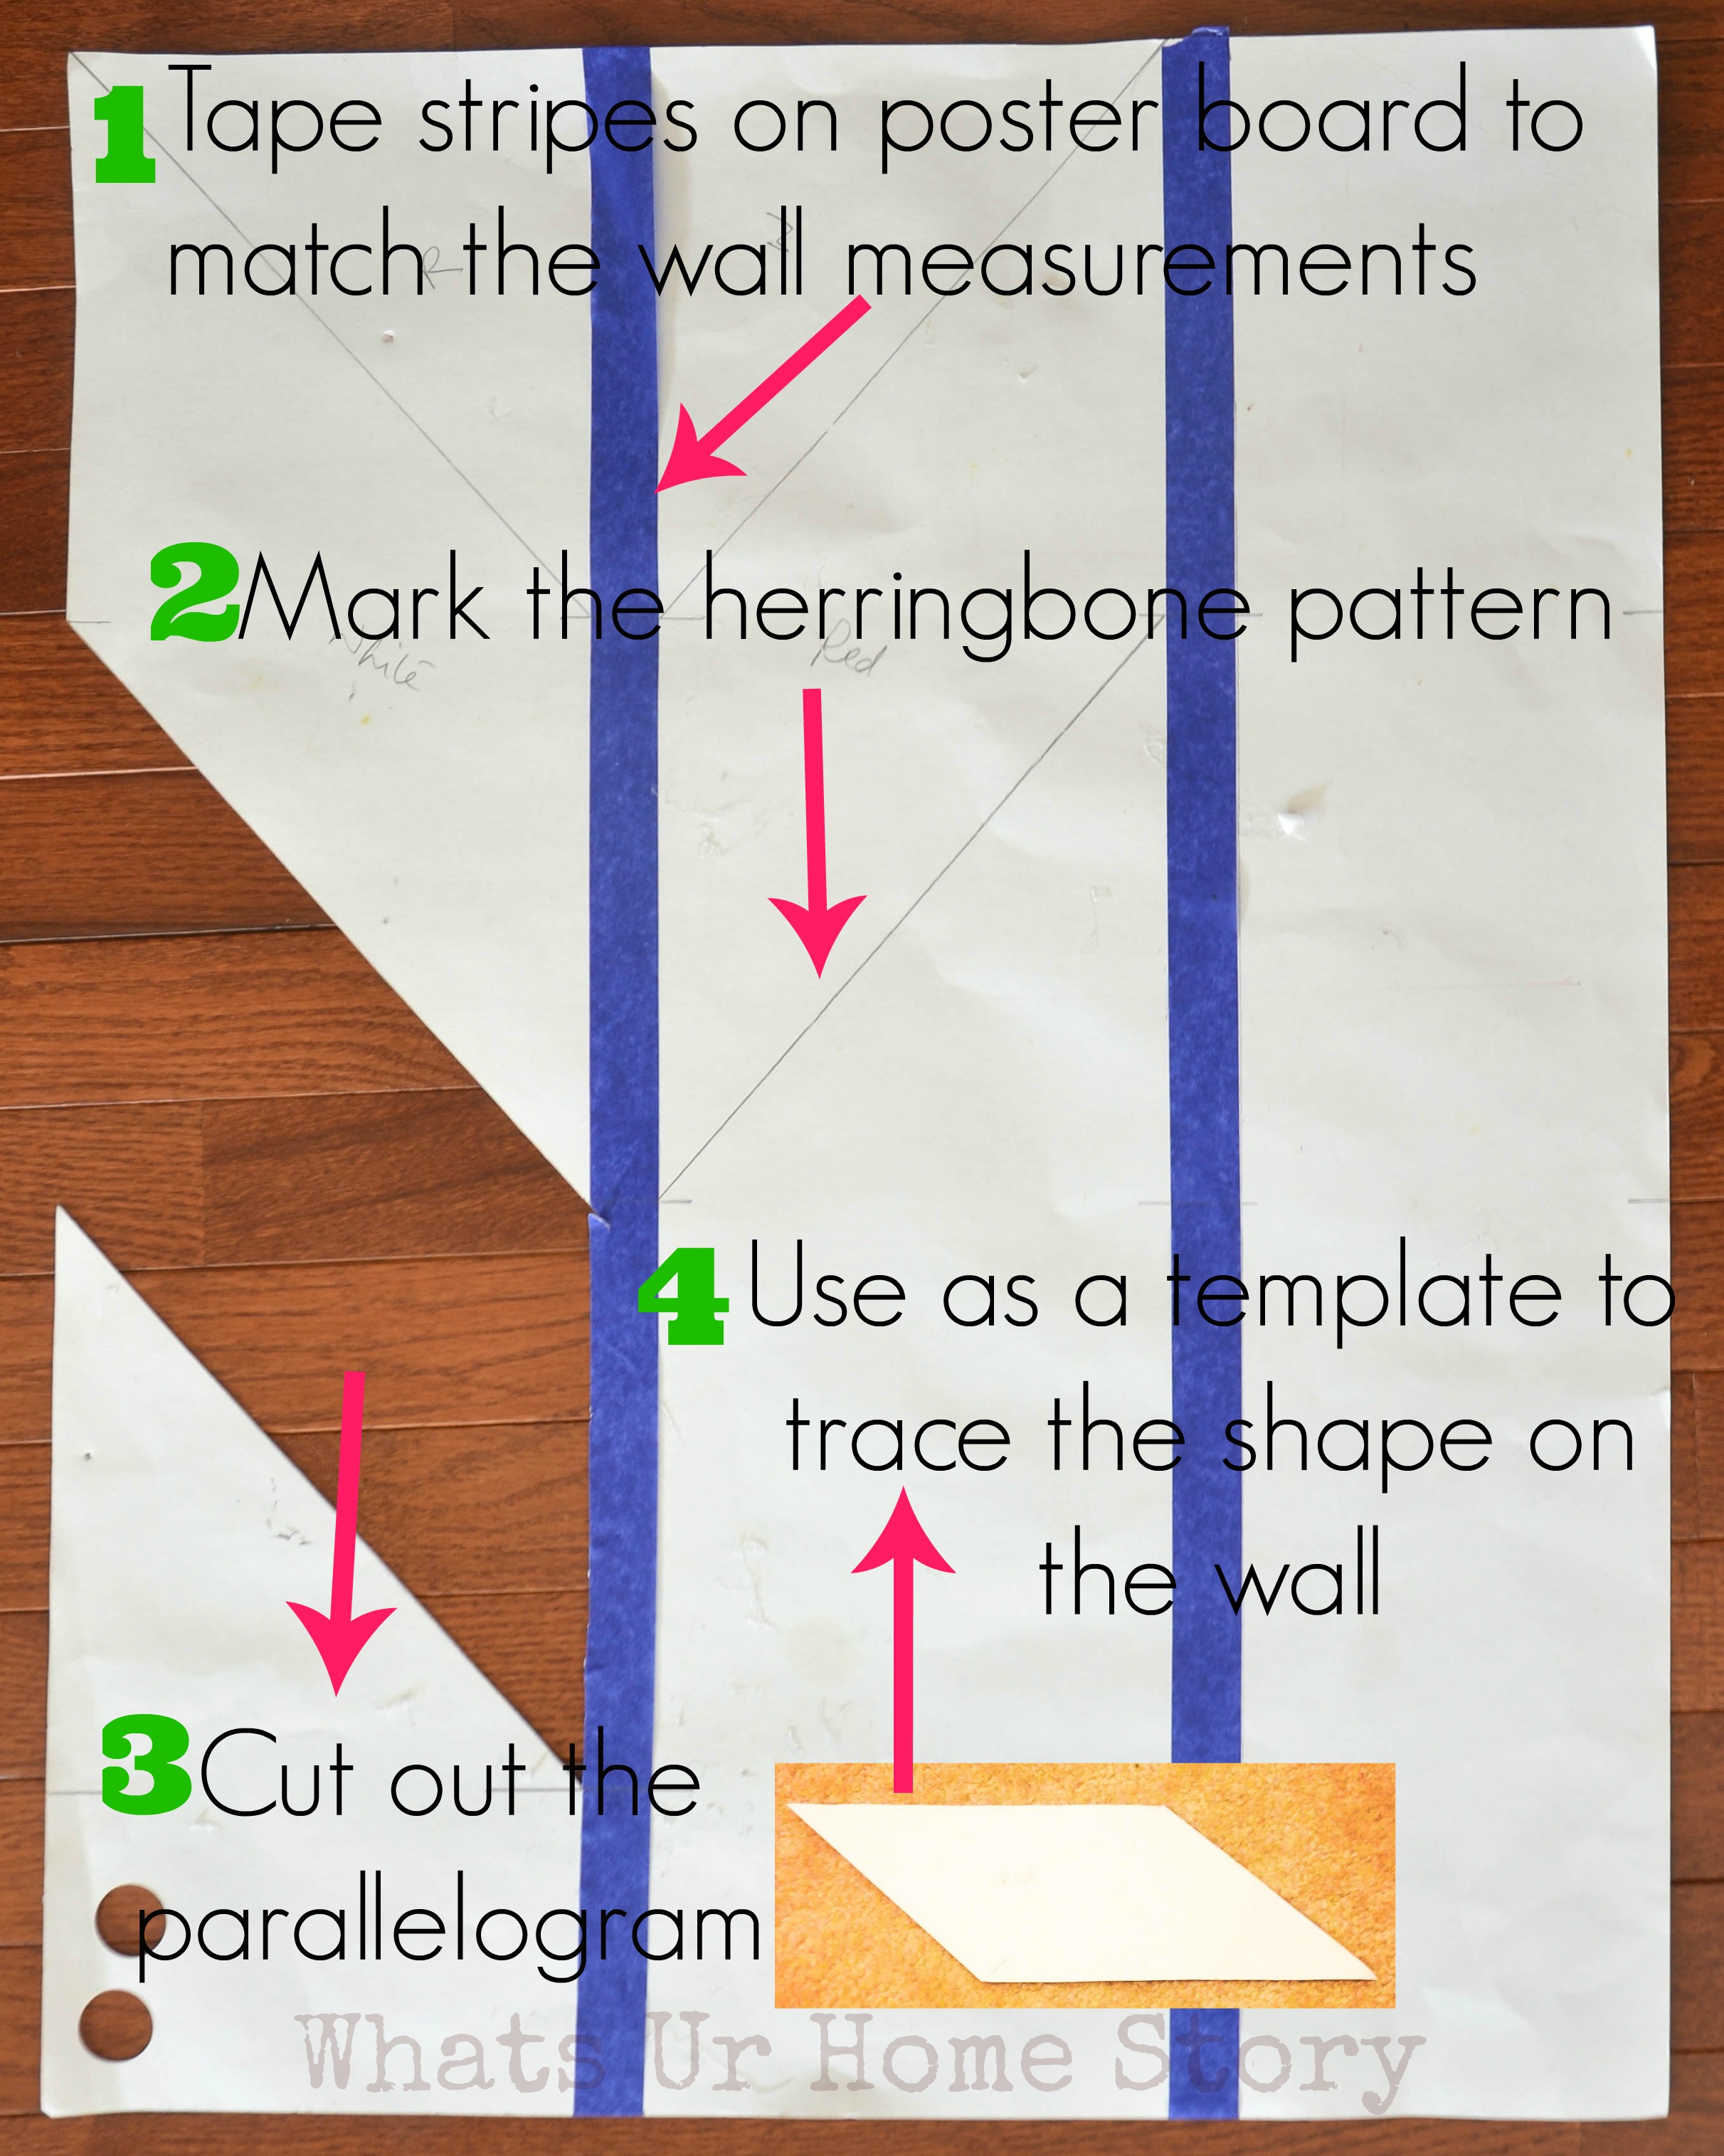
- Using the template trace the shape on the first stripe. Flip the template and trace the shape on the 2nd stripe. For the 3rd stripe flip the template back so that it is in the same angle as in the 1st stripe and so on.
- Now comes the toughest part, taping off the herringbone pattern! Pay very close attention to how an herringbone pattern looks like. In simple terms it looks like 2 leaves across a plant’s stem but with different colors. For example, to tape off the red parallelogram the tape should be inside the white area. i.e to the plain eye the red parallelogram will look bigger while the white side will look smaller.
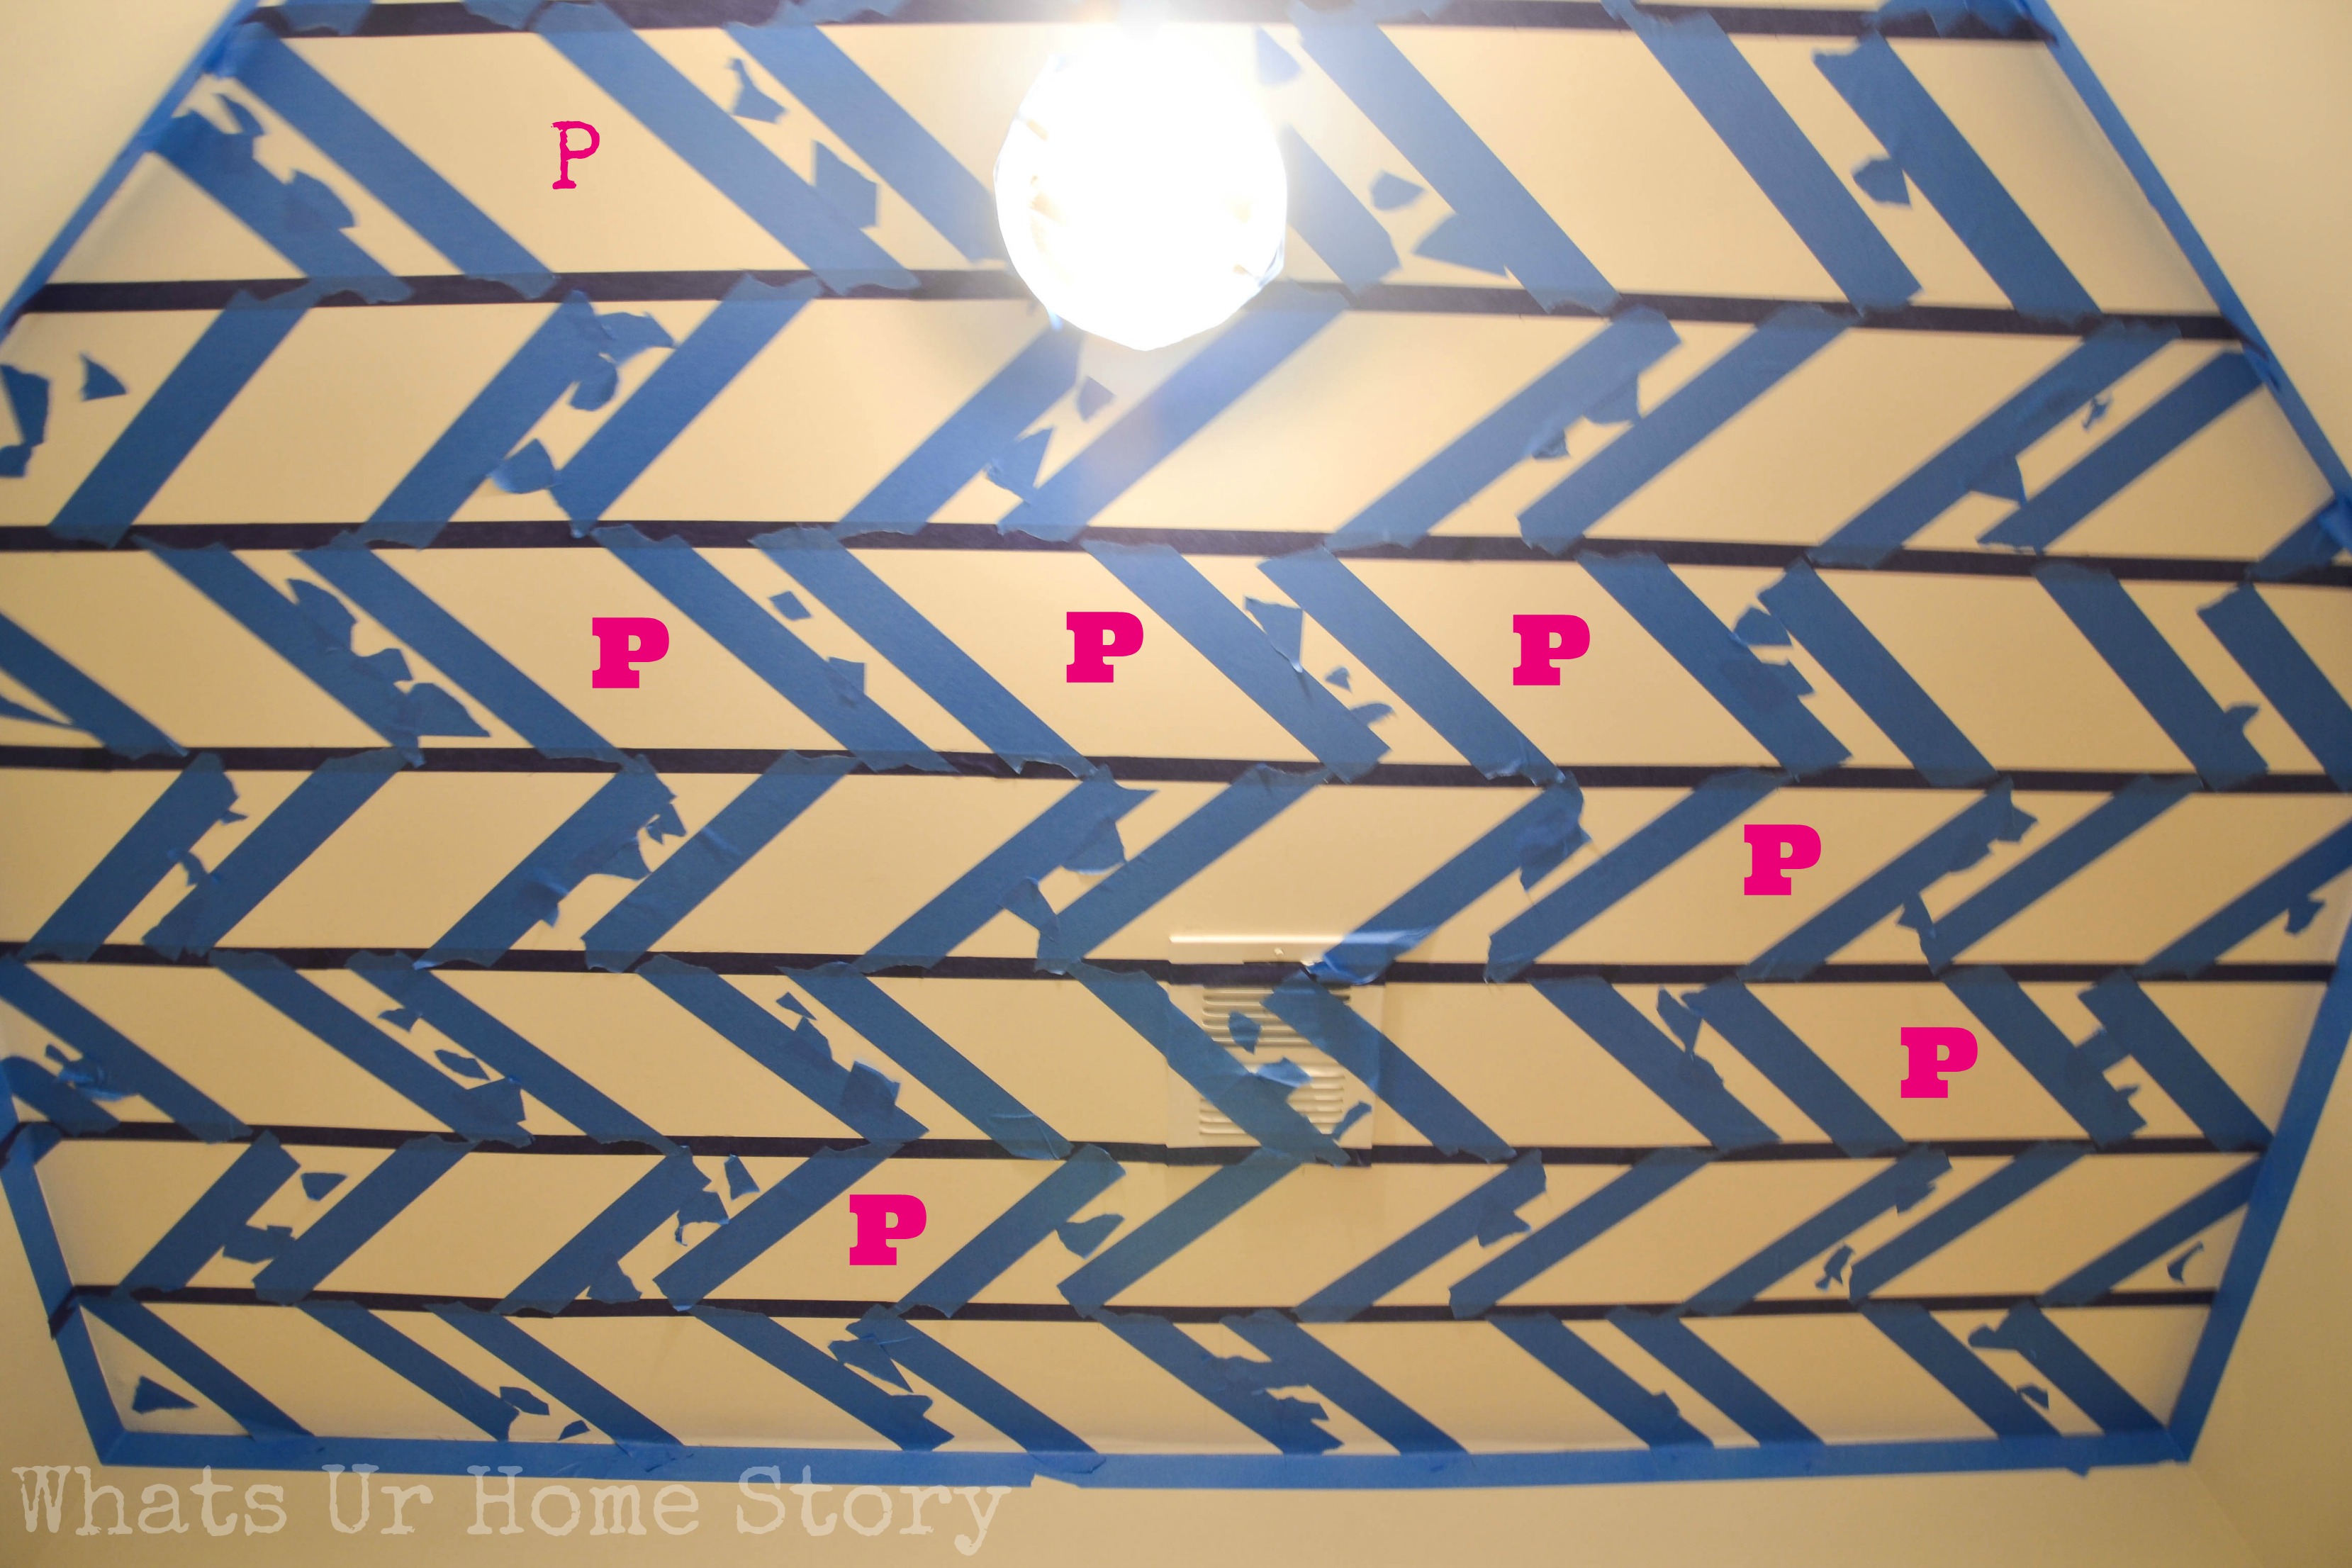
- In the above picture I’ve marked some of the red areas with P. To make it extra clear for me, I stuck pieces of tape all over the white area so I won’t touch the white areas even by accident.
- Before you start painting,
double checkcheck at least 4-5 times to make sure that you’ve got the pattern correct. - Paint only the red areas. Oh, the paint color is Behr Firecracker.
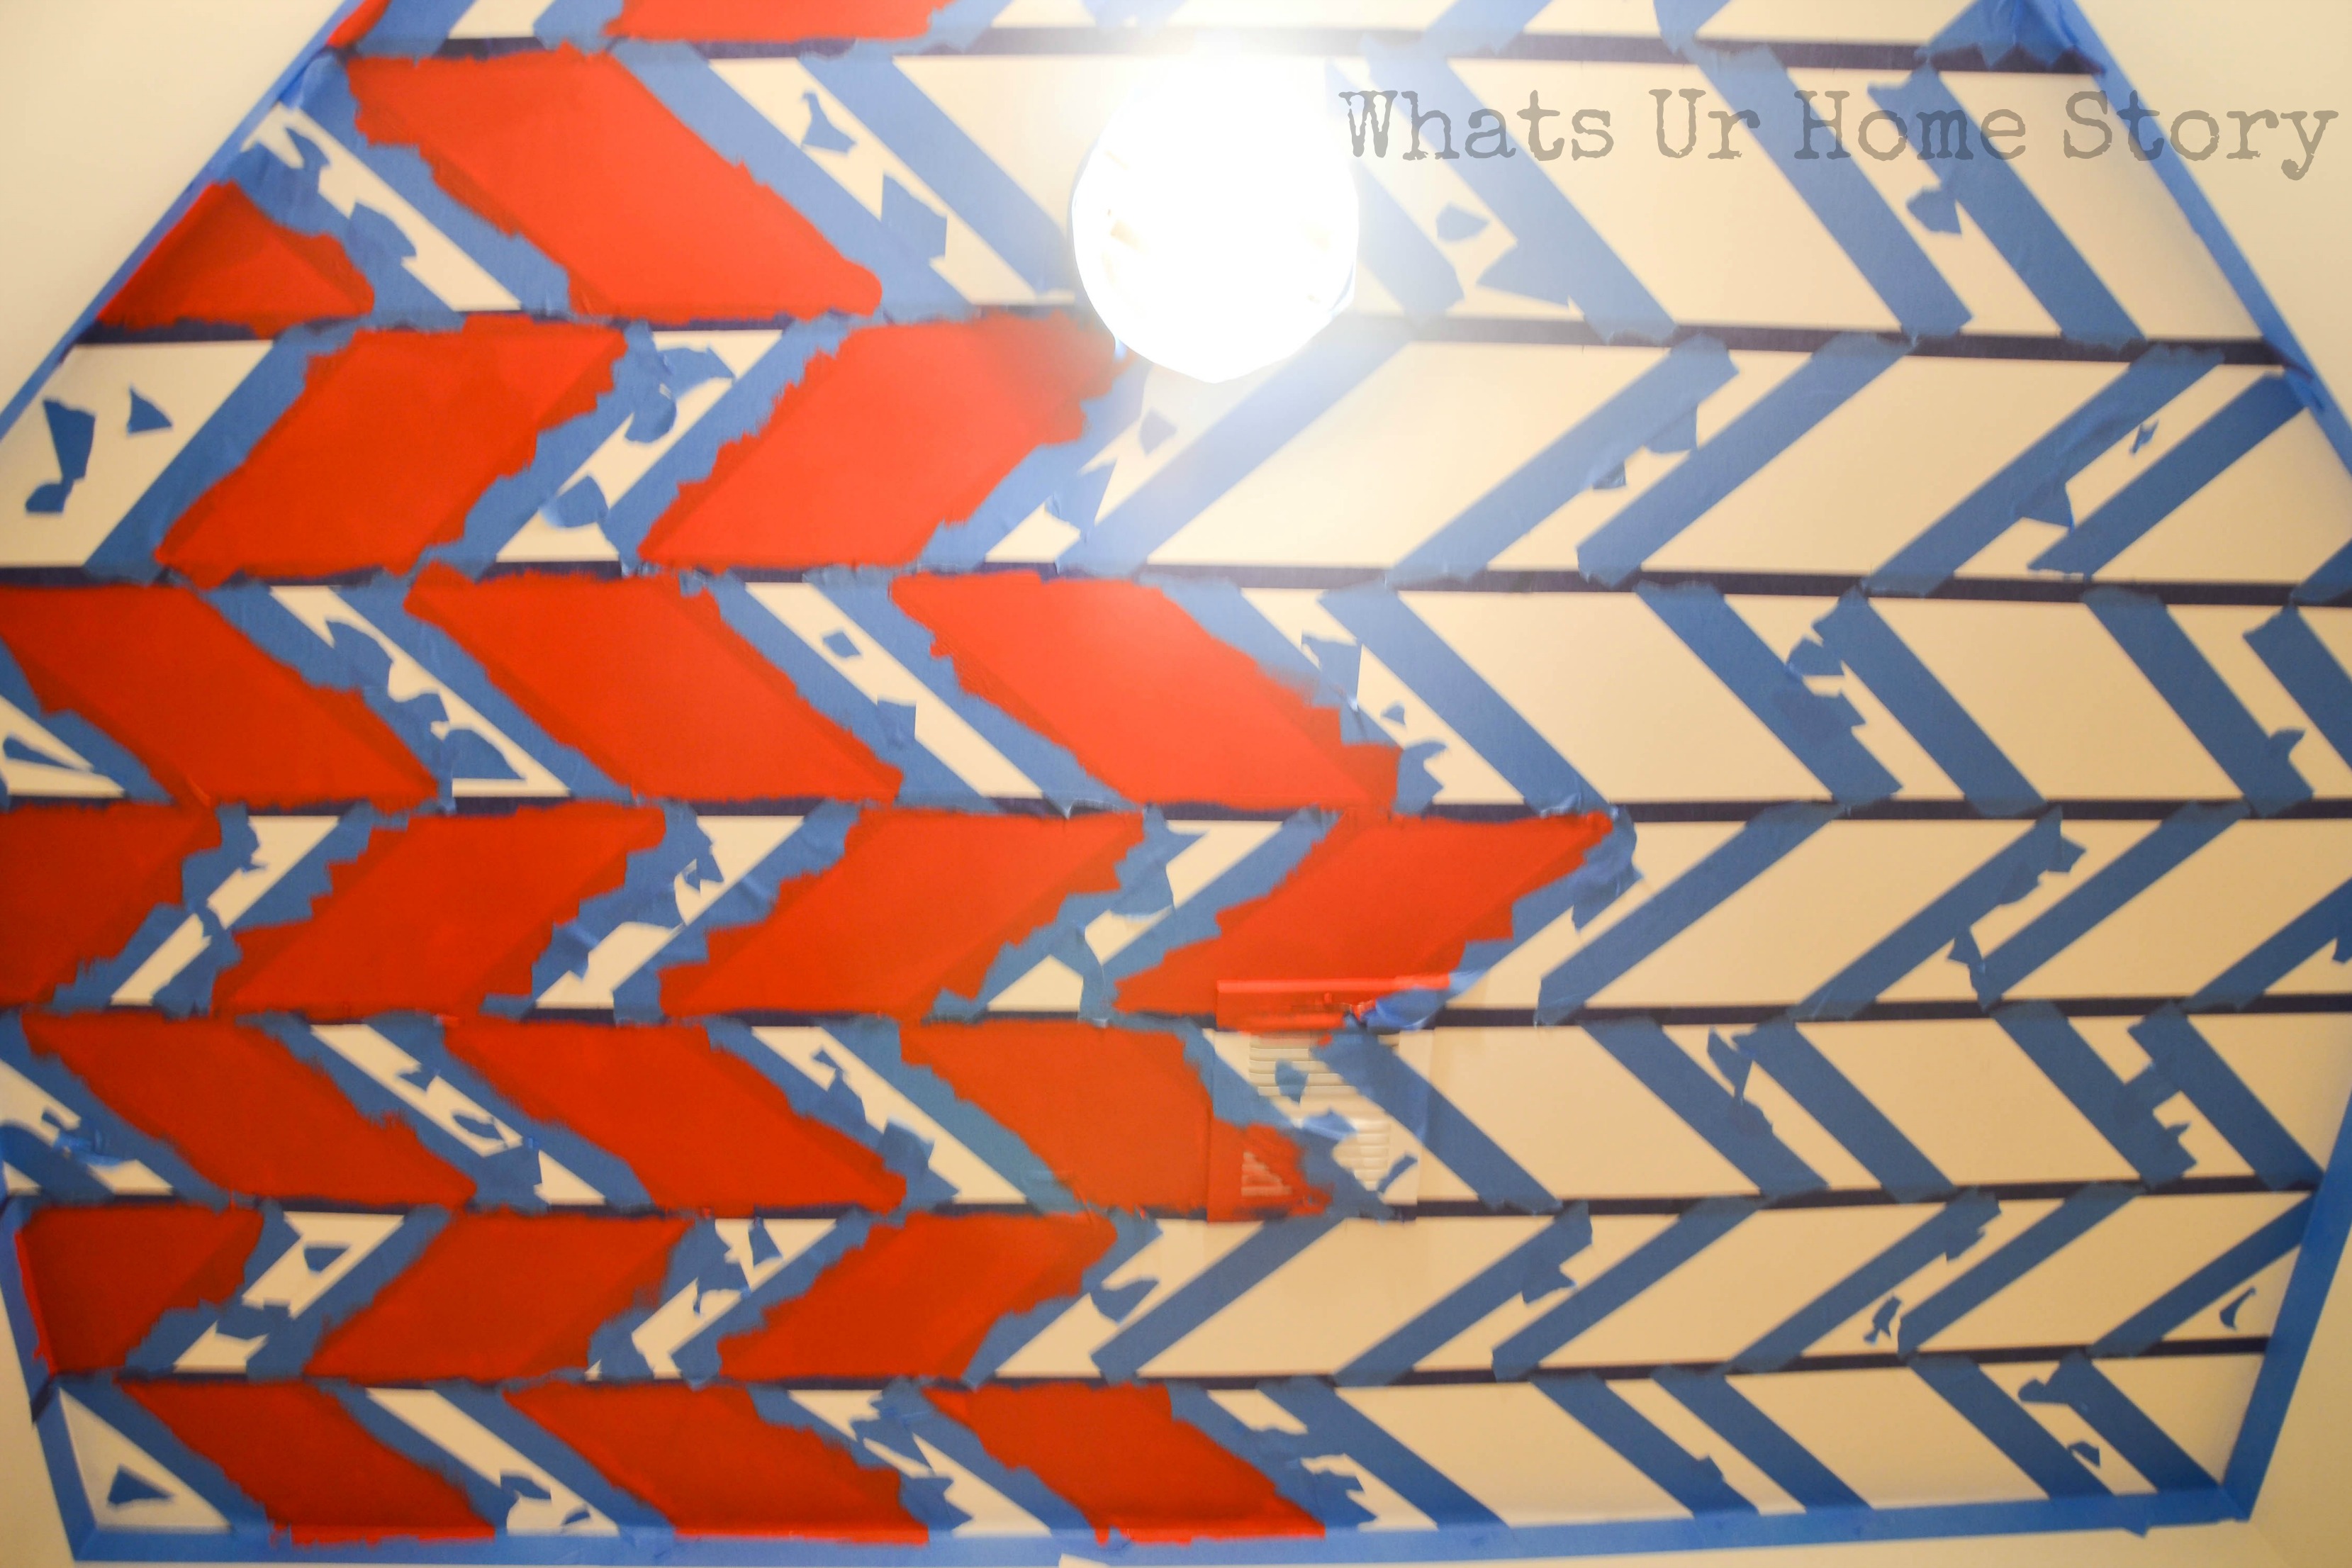
- Peel the tape off when done and reveal your masterpiece!
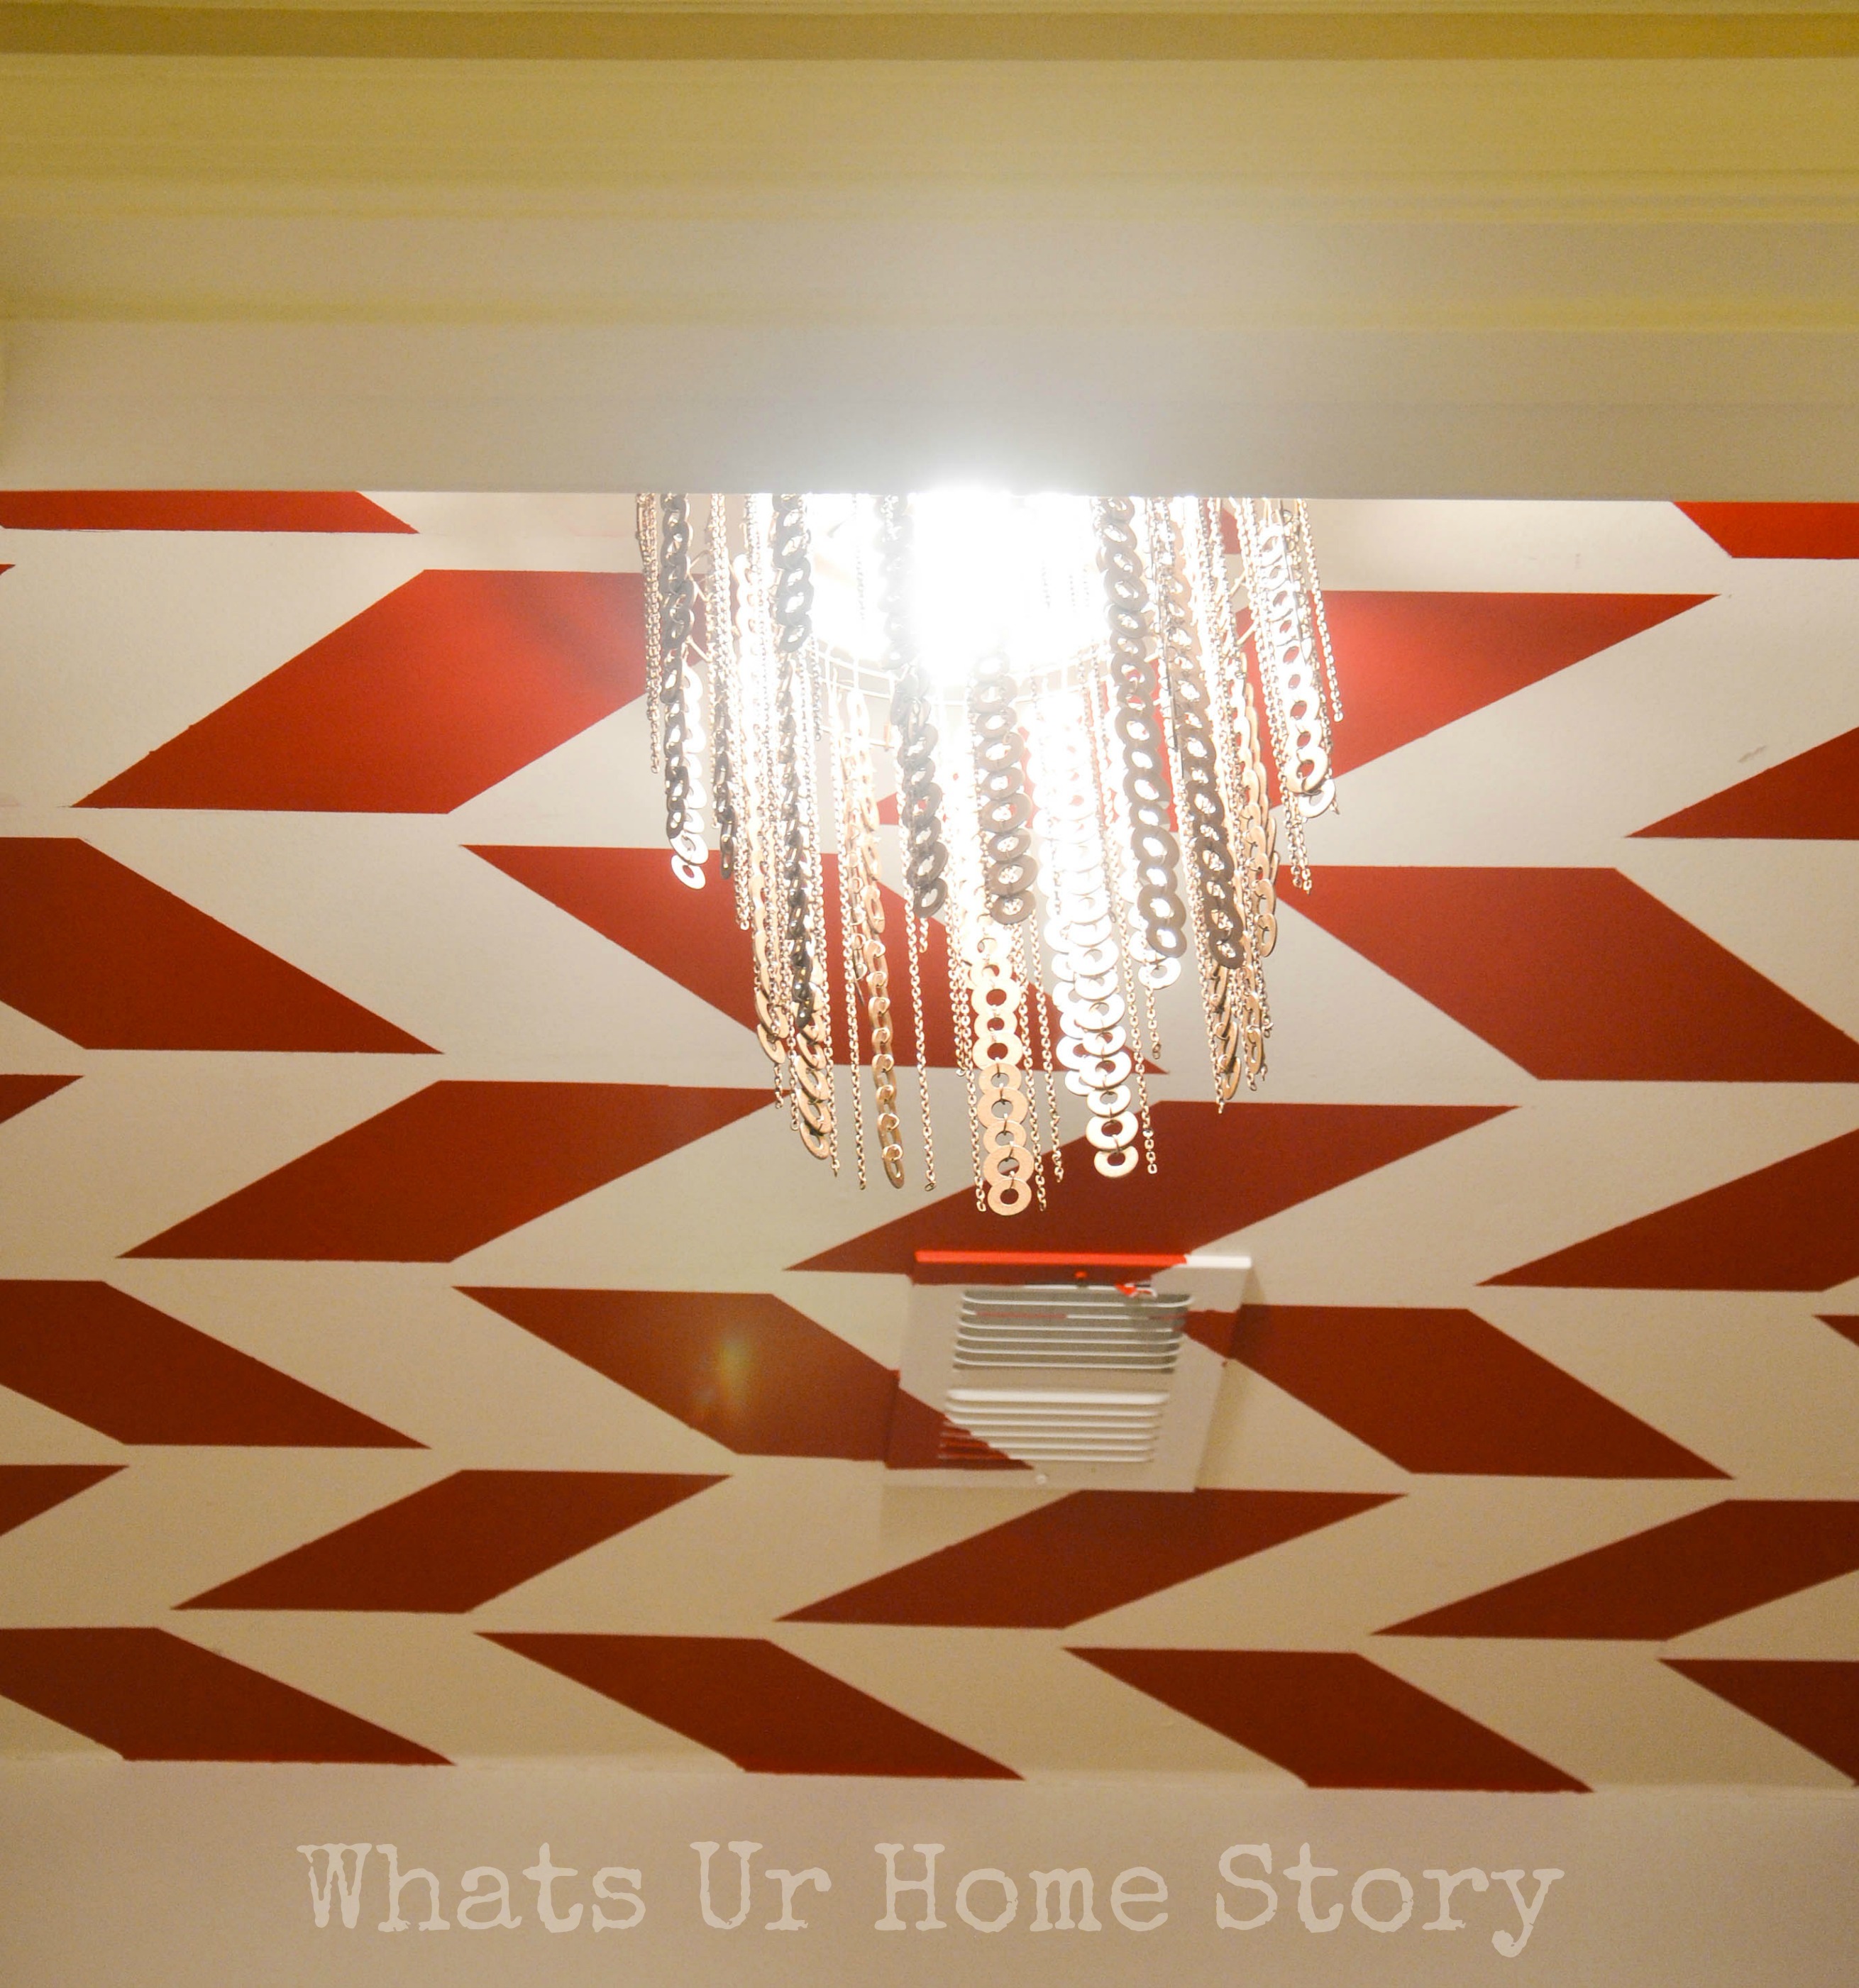
Here’s a closeup shot;
Verdict
- No matter how hard it is to do, a herringbone ceiling in a bold color is a game changer in a room.
- Unless you want to pull your hair out or break your neck go for it only in small rooms or hallways.
- Would I do it again? Absolutely, in a small space!
What are your thoughts on patterned ceilings?


I love it!!!! Might try it……for sure I’m saving your post.
Simply superb! Love your ceiling! On a different note, may I know what the racks on the wall are… Where did u get them?
Thanks Sirisha. Sure, will post on how we added them and the details next week.
Vidya
What a fantastic idea vidya!!! Absolutely love it!!!
Thanks Deepa. Me too. 🙂
Woooow! It looks great! Awesome job, Vidya!
looks really nice . painting the ceiling is a tiresome job , and that too with this pattern . congrats for this wonderful post
Yes Rakhi. After our previous home, I was done with ceilings but this is such a tiny room I thought I could give it a shot. I’m glad I didn’t think of trying this in a larger room.
V
So beautiful Vidya! I especially like the spaces between each row, so the herringbone isn’t right on top of each other. Great job!
Thanks Chi Wei.Took some planning on figuring the pattern out as I taped. That was the toughest part.
Girl, You have tons of patience….:-).
Just beautiful! I’m thinking you have a LOT more patience than I do. 🙂 Just found your blog and so happy I did. I will be following along as I see a lot of wonderful projects here. Very happy to “meet” you!
xo
Pat
Thank you so much for dropping by Pat. Oh yeah, it did take some patience especially drawing the lines. But every time I go up to the room I look at the ceiling and the chandelier and am so happy even if I have loads and loads of laundry to do! 🙂 🙂 🙂
V