This is a Sponsored post written by me on behalf of Elmer’s ProBond Advanced. All opinions are 100% mine.

All you ladies out there, what would you say is a must have in your closet apart from the clothes and accessories? A full length mirror of course! You see, ever since we moved into this home 4 yrs ago I’ve been living without one while our over the door full length mirror from the first house has been sitting in our basement unused, still in its movers’ wrapping! Even though I was well aware that I badly needed one we just didn’t hang it ‘coz we thought it was too plain, you know your average frame less mirror. Kinda hard to make sense ‘coz dressing up in traditional Indian attire means draping 6 yards of fabric on you! How do you do that without a full length mirror? Instead I resorted to checking out my reflection at the first chance I got, be it out on the street or a hotel lobby. 🙂 So when I came across the ProBond Advanced, the only multi surface adhesive that bonds a variety of Mixed Materials like wood to metal, ceramic to dry wall, a project idea cropped up in my mind. I just knew it was time to bring my full length mirror back to life.

Hands down ProBond Advanced is the best multipurpose glue I’ve ever used. It combines heavy duty strength with the ease of use aka. no foam residue, translucent painted finish, and the best part gives you control of where the glue goes and where it stays when drying. All you need to do is apply, clamp, and let it do its magic!
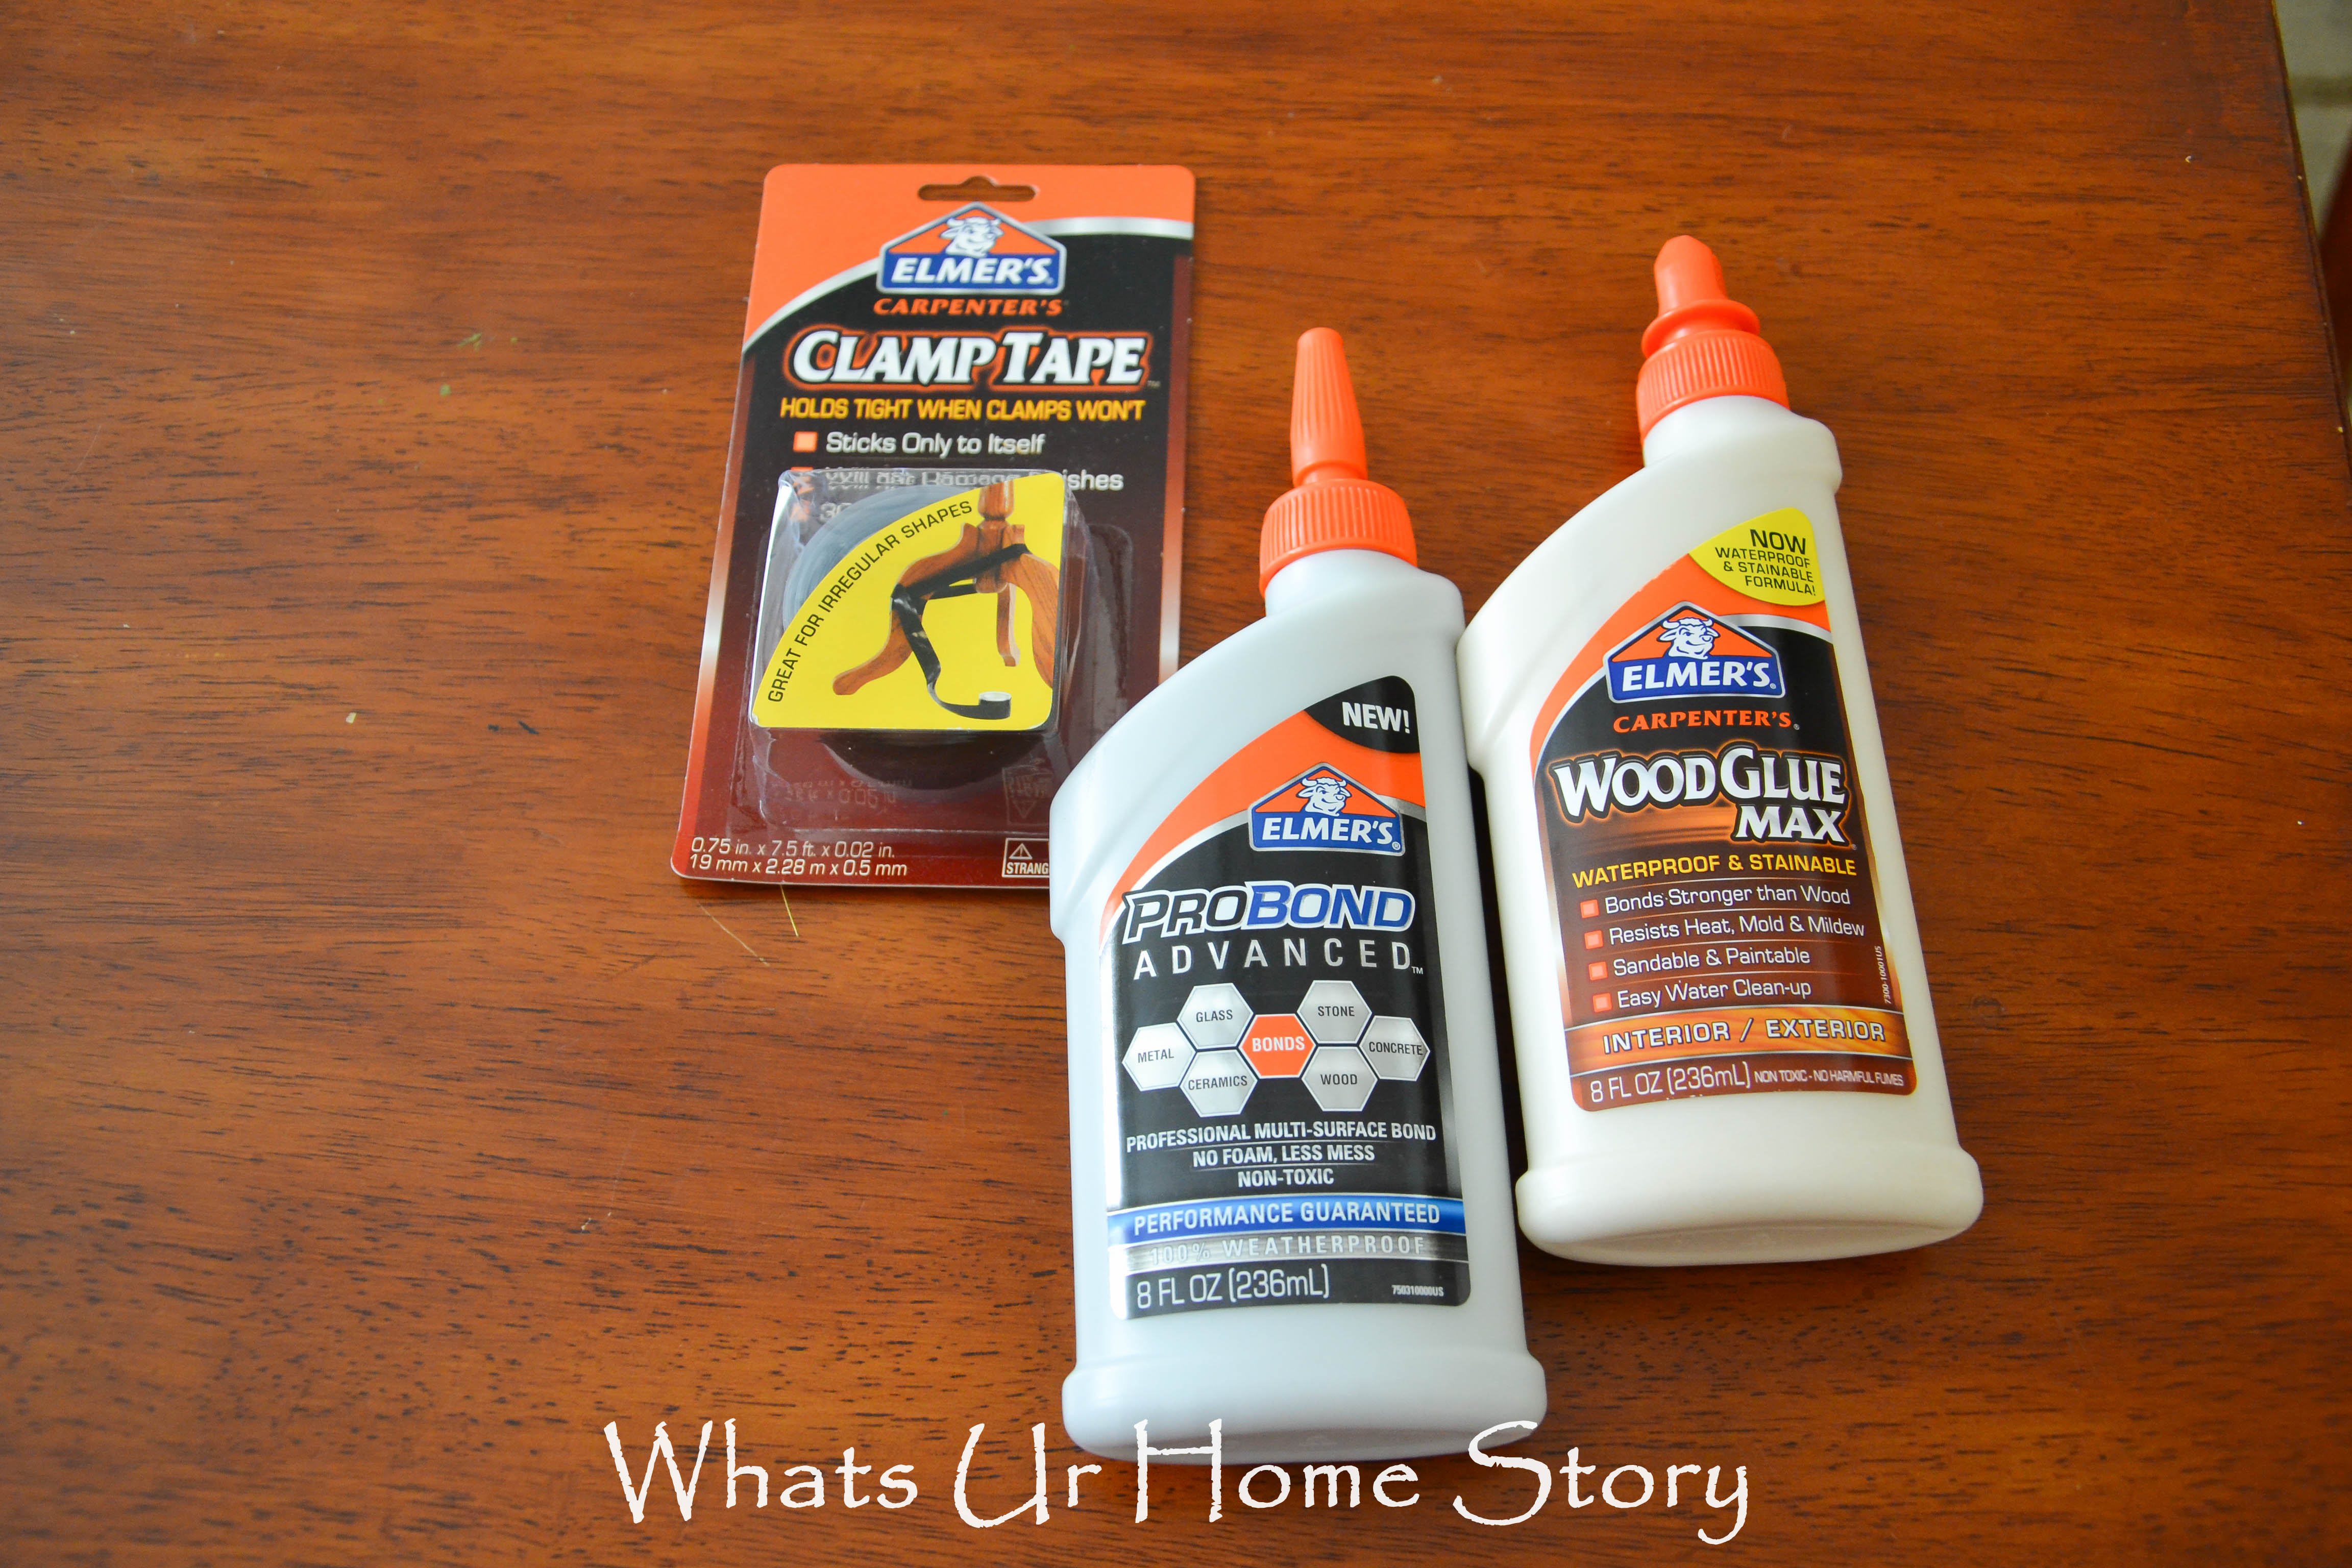
Elmer’s provided me with the ProBond Advanced, Clamp tape (another genius product, can’t tell you how big of a fan I’ve become), and Wood glue max, which I didn’t use as ProBond Advancedworked great for everything I wanted for this project.
Materials
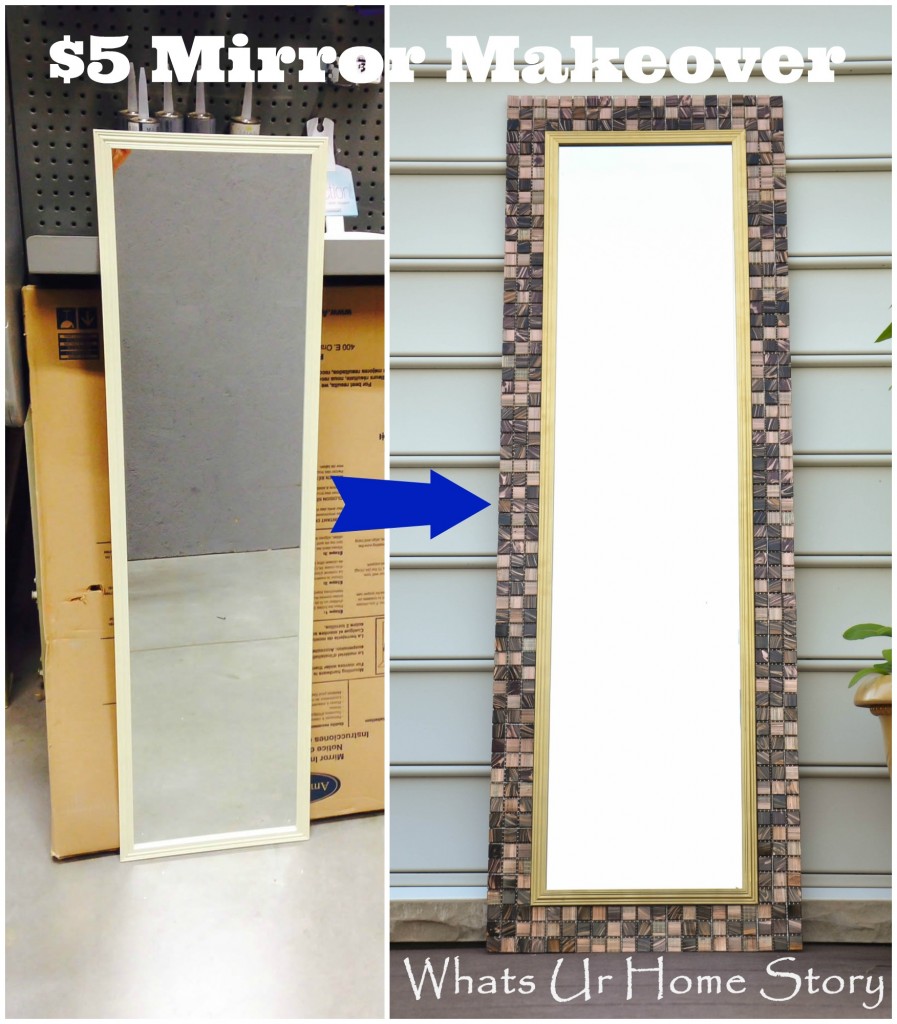
- Plain Jane Mirror – Frame or frameless will work depending on the look you want. I ended up having to buy a new one from Home Depot for $5 (13″ x 48″) ‘coz when we unwrapped our old one there was huge crack across.
- MDF board cut to size (got mine at our local Home Depot $10)
- Elmer’s ProBond Advanced
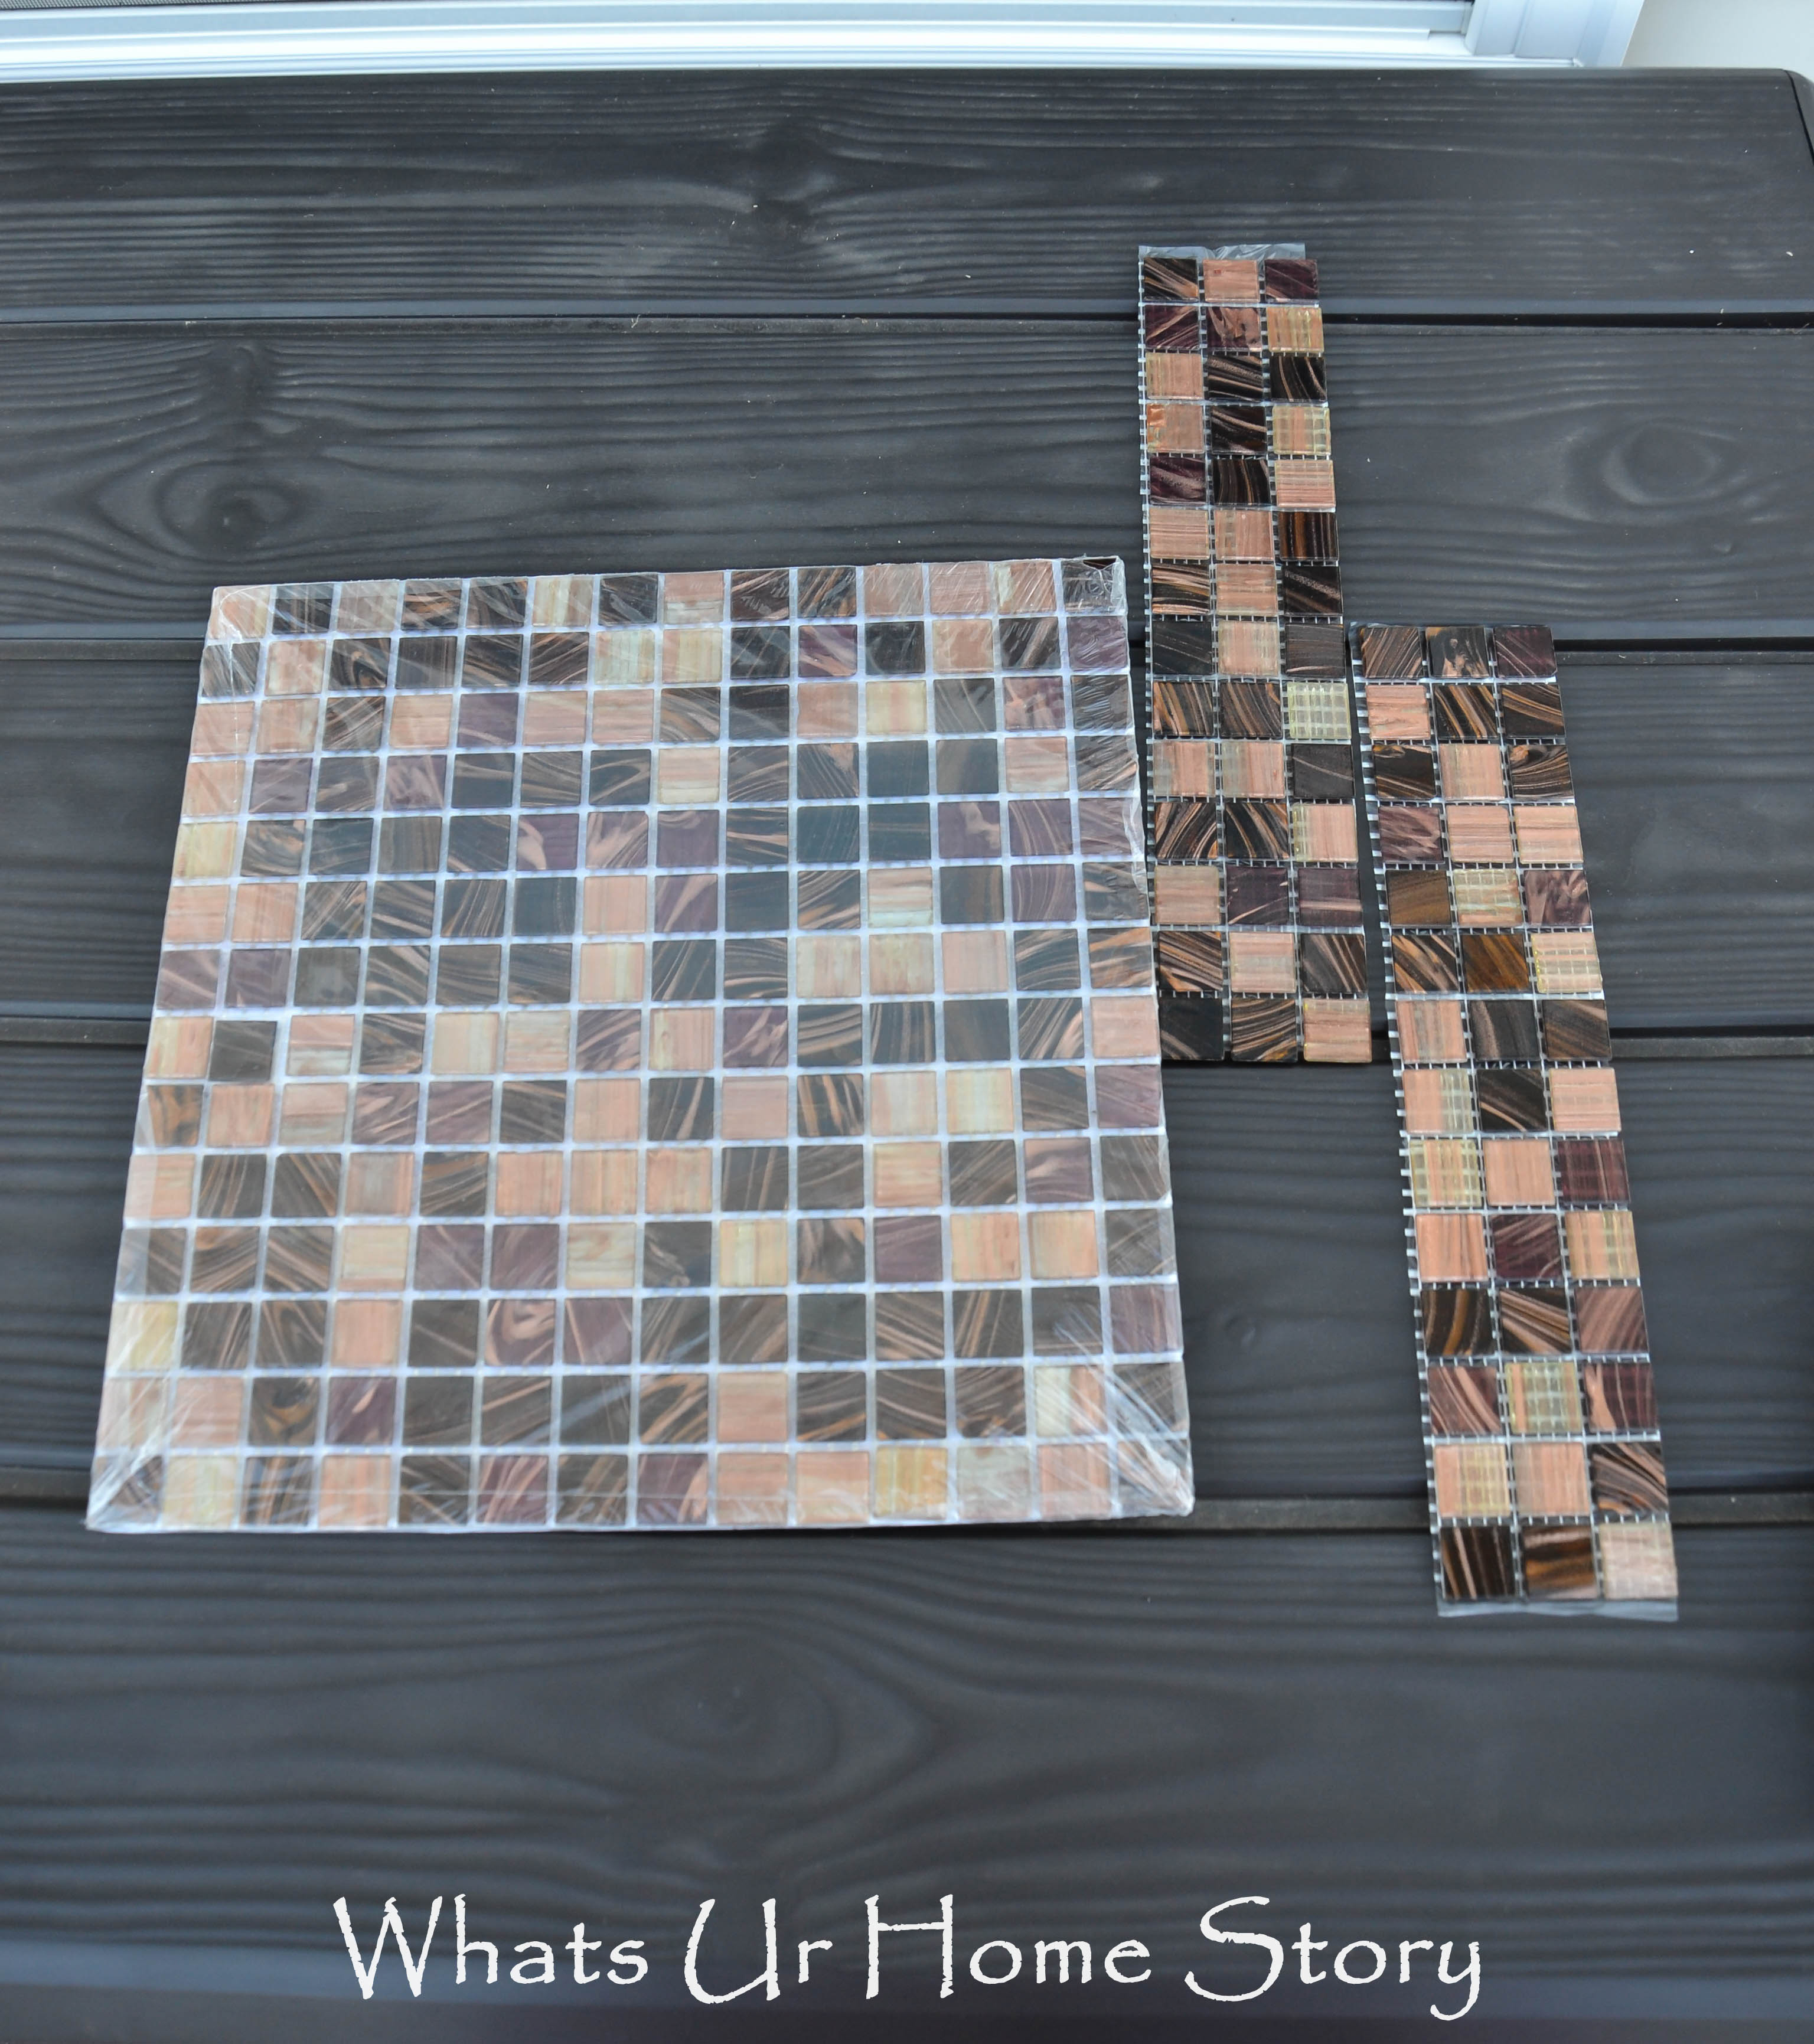
- Glass tiles – again from Home Depot I ended up using 3 sheets ($4.50 each)
- Elmer’s Clamp Tape
- Foam Brush
- Gold Spray Paint
- Painter’s Tape
- Hanging Hardware
Tutorial
- First and foremost measure, measure, measure. My mirror was 13″ x 48″ and I wanted a 2.5″ thick tile border (3 tile squares) around, which meant that my MDF board would have to be 18″ x 53″.
- Cut your MDF board to size, your local hardware store will do it for free when you buy the MDF from them. There was a lot of extra board which I’m sure I’ll find use for something else.
- My mirror had a white border which I wanted to paint Gold. So taped off everything else except the frame.
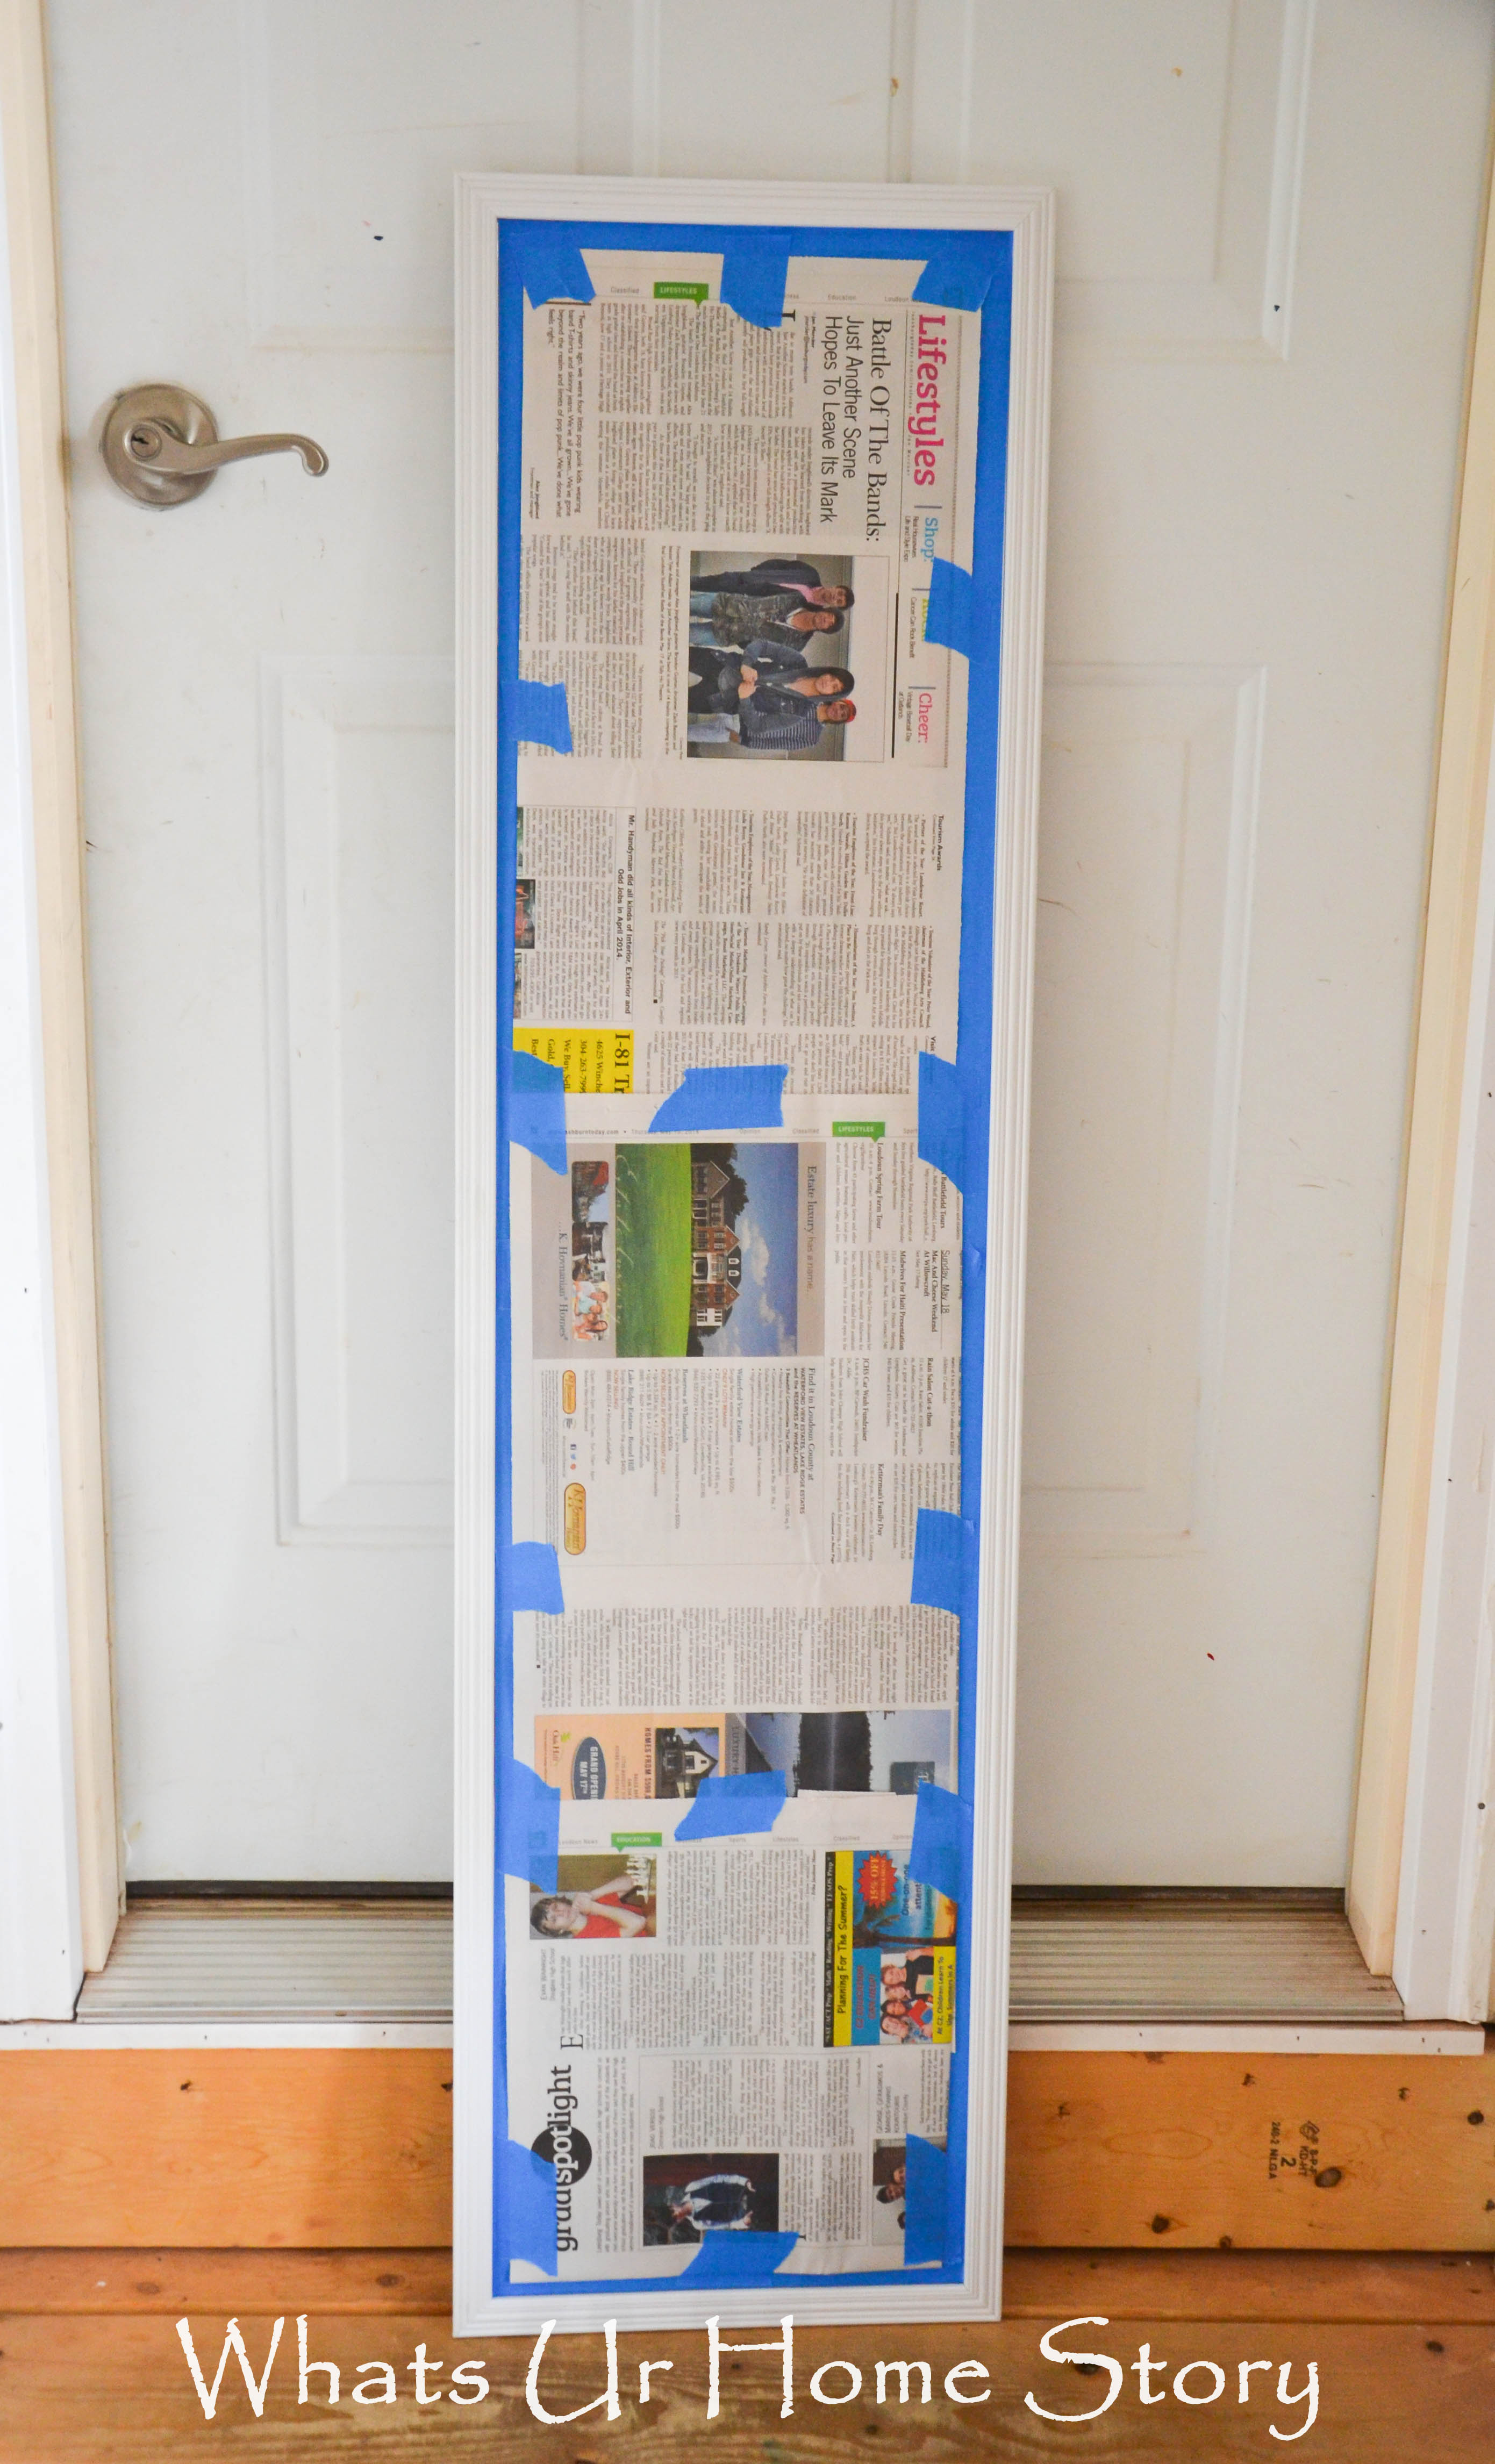
- Spray paint the frame Gold.
- Cut the tile into strips that are 2.5 inches long or 3 tiles wide.
- Place the MDF board smooth side down. You’ll be working on the rough side as it has ridges that will help adhere the glue better. Position the mirror and and the tile strips around so that they are evenly laid out across the board.

- With a pencil/ Sharpie mark the outline of the mirror on the board.
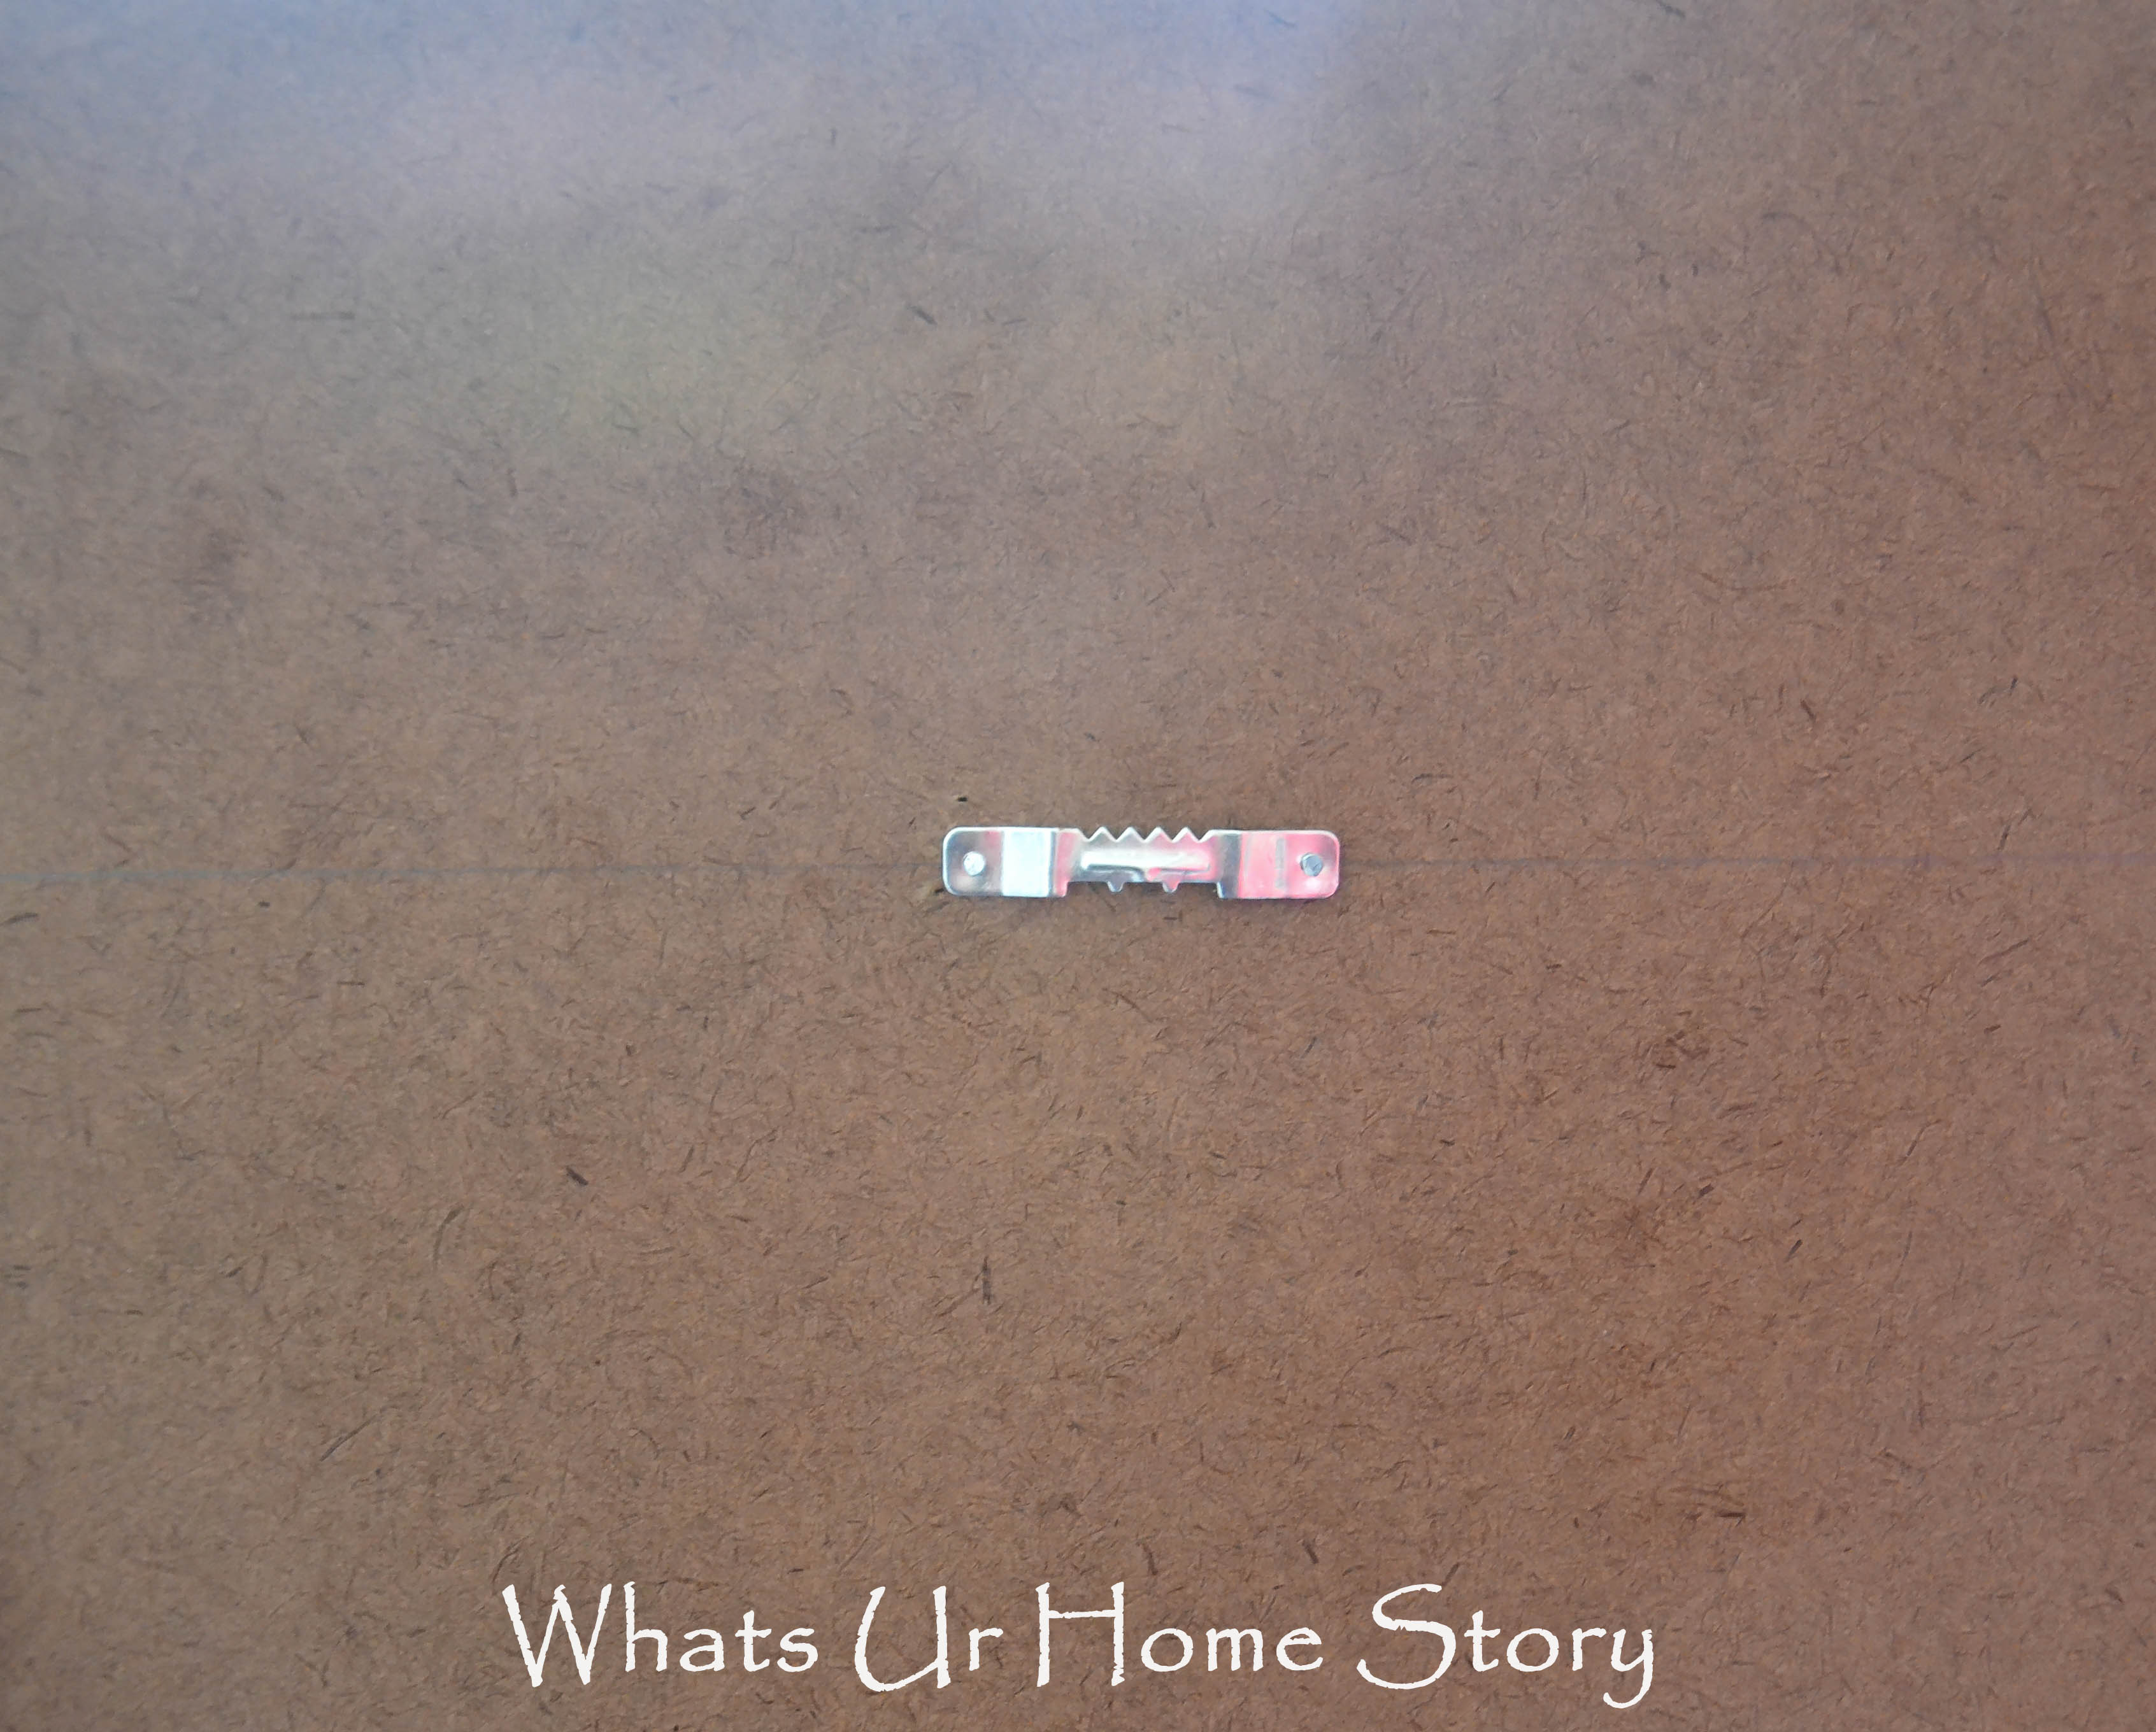
- Clear out everything from the board and screw in the hanging hardware on the back. Important: You have to do this before you glue down the mirror. We used this hook and the nails that came with it. On the glue side of the board we just bent the nail ends and hammered into the board.
- Now comes the fun part. Place the board on a flat surface and apply ProBond Advanced liberally in the area you marked earlier with pencil/Sharpie.

- Spread evenly with a foam brush and place the mirror over it lining up with your outline correctly.
- Clamp it using the Clamp tape. Measure the sides to make sure that the mirror stayed within your outline while clamping. If it didn’t adjust it gently. By the way I had ample help on this one from both B and my dad.

- Lay the mirror on a protected surface face down and weigh it down with something heavy. We used the drawers from my Campaign chest and the extra leaves from our breakfast table.
- Let it set for overnight. The glue usually dries within 2 hrs but since we were dealing with heavy objects we didn’t want to take any chances.
- Once you’ve remove the clamp tape it is time to glue the tiles down. Peel off the plastic backing from the tiles and glue using ProBond Advanced.
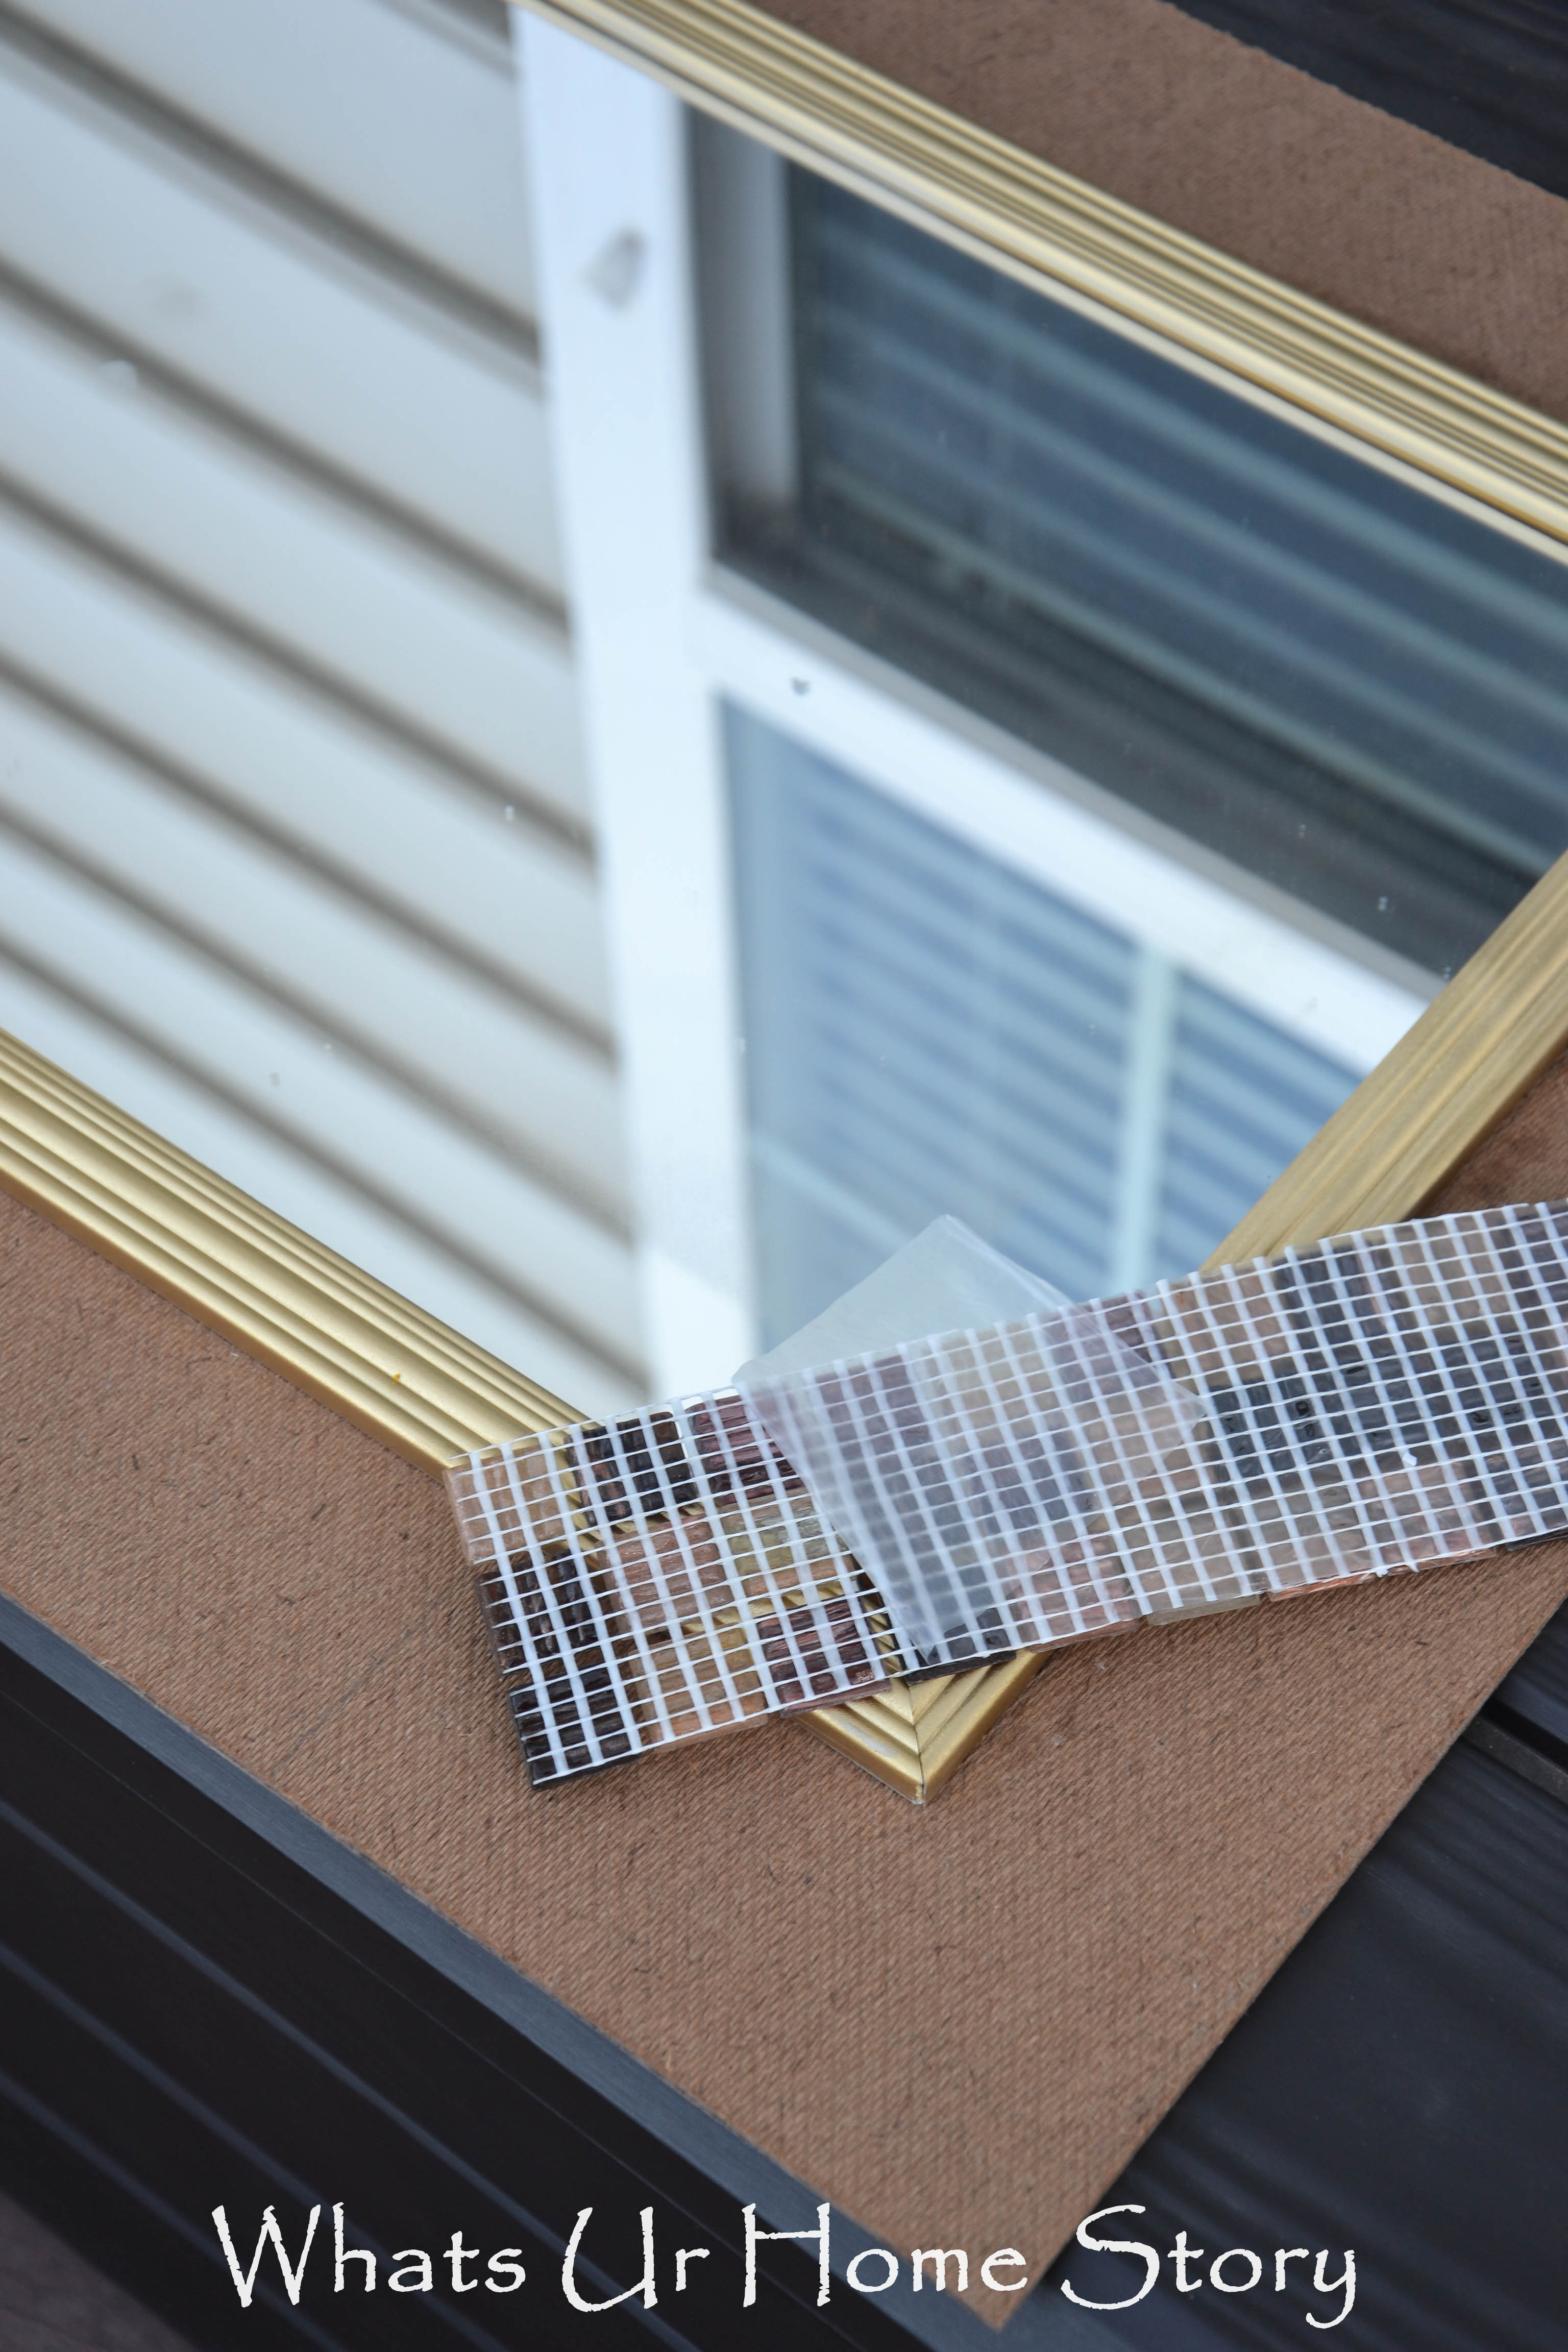
- Again let it set overnight and voila!
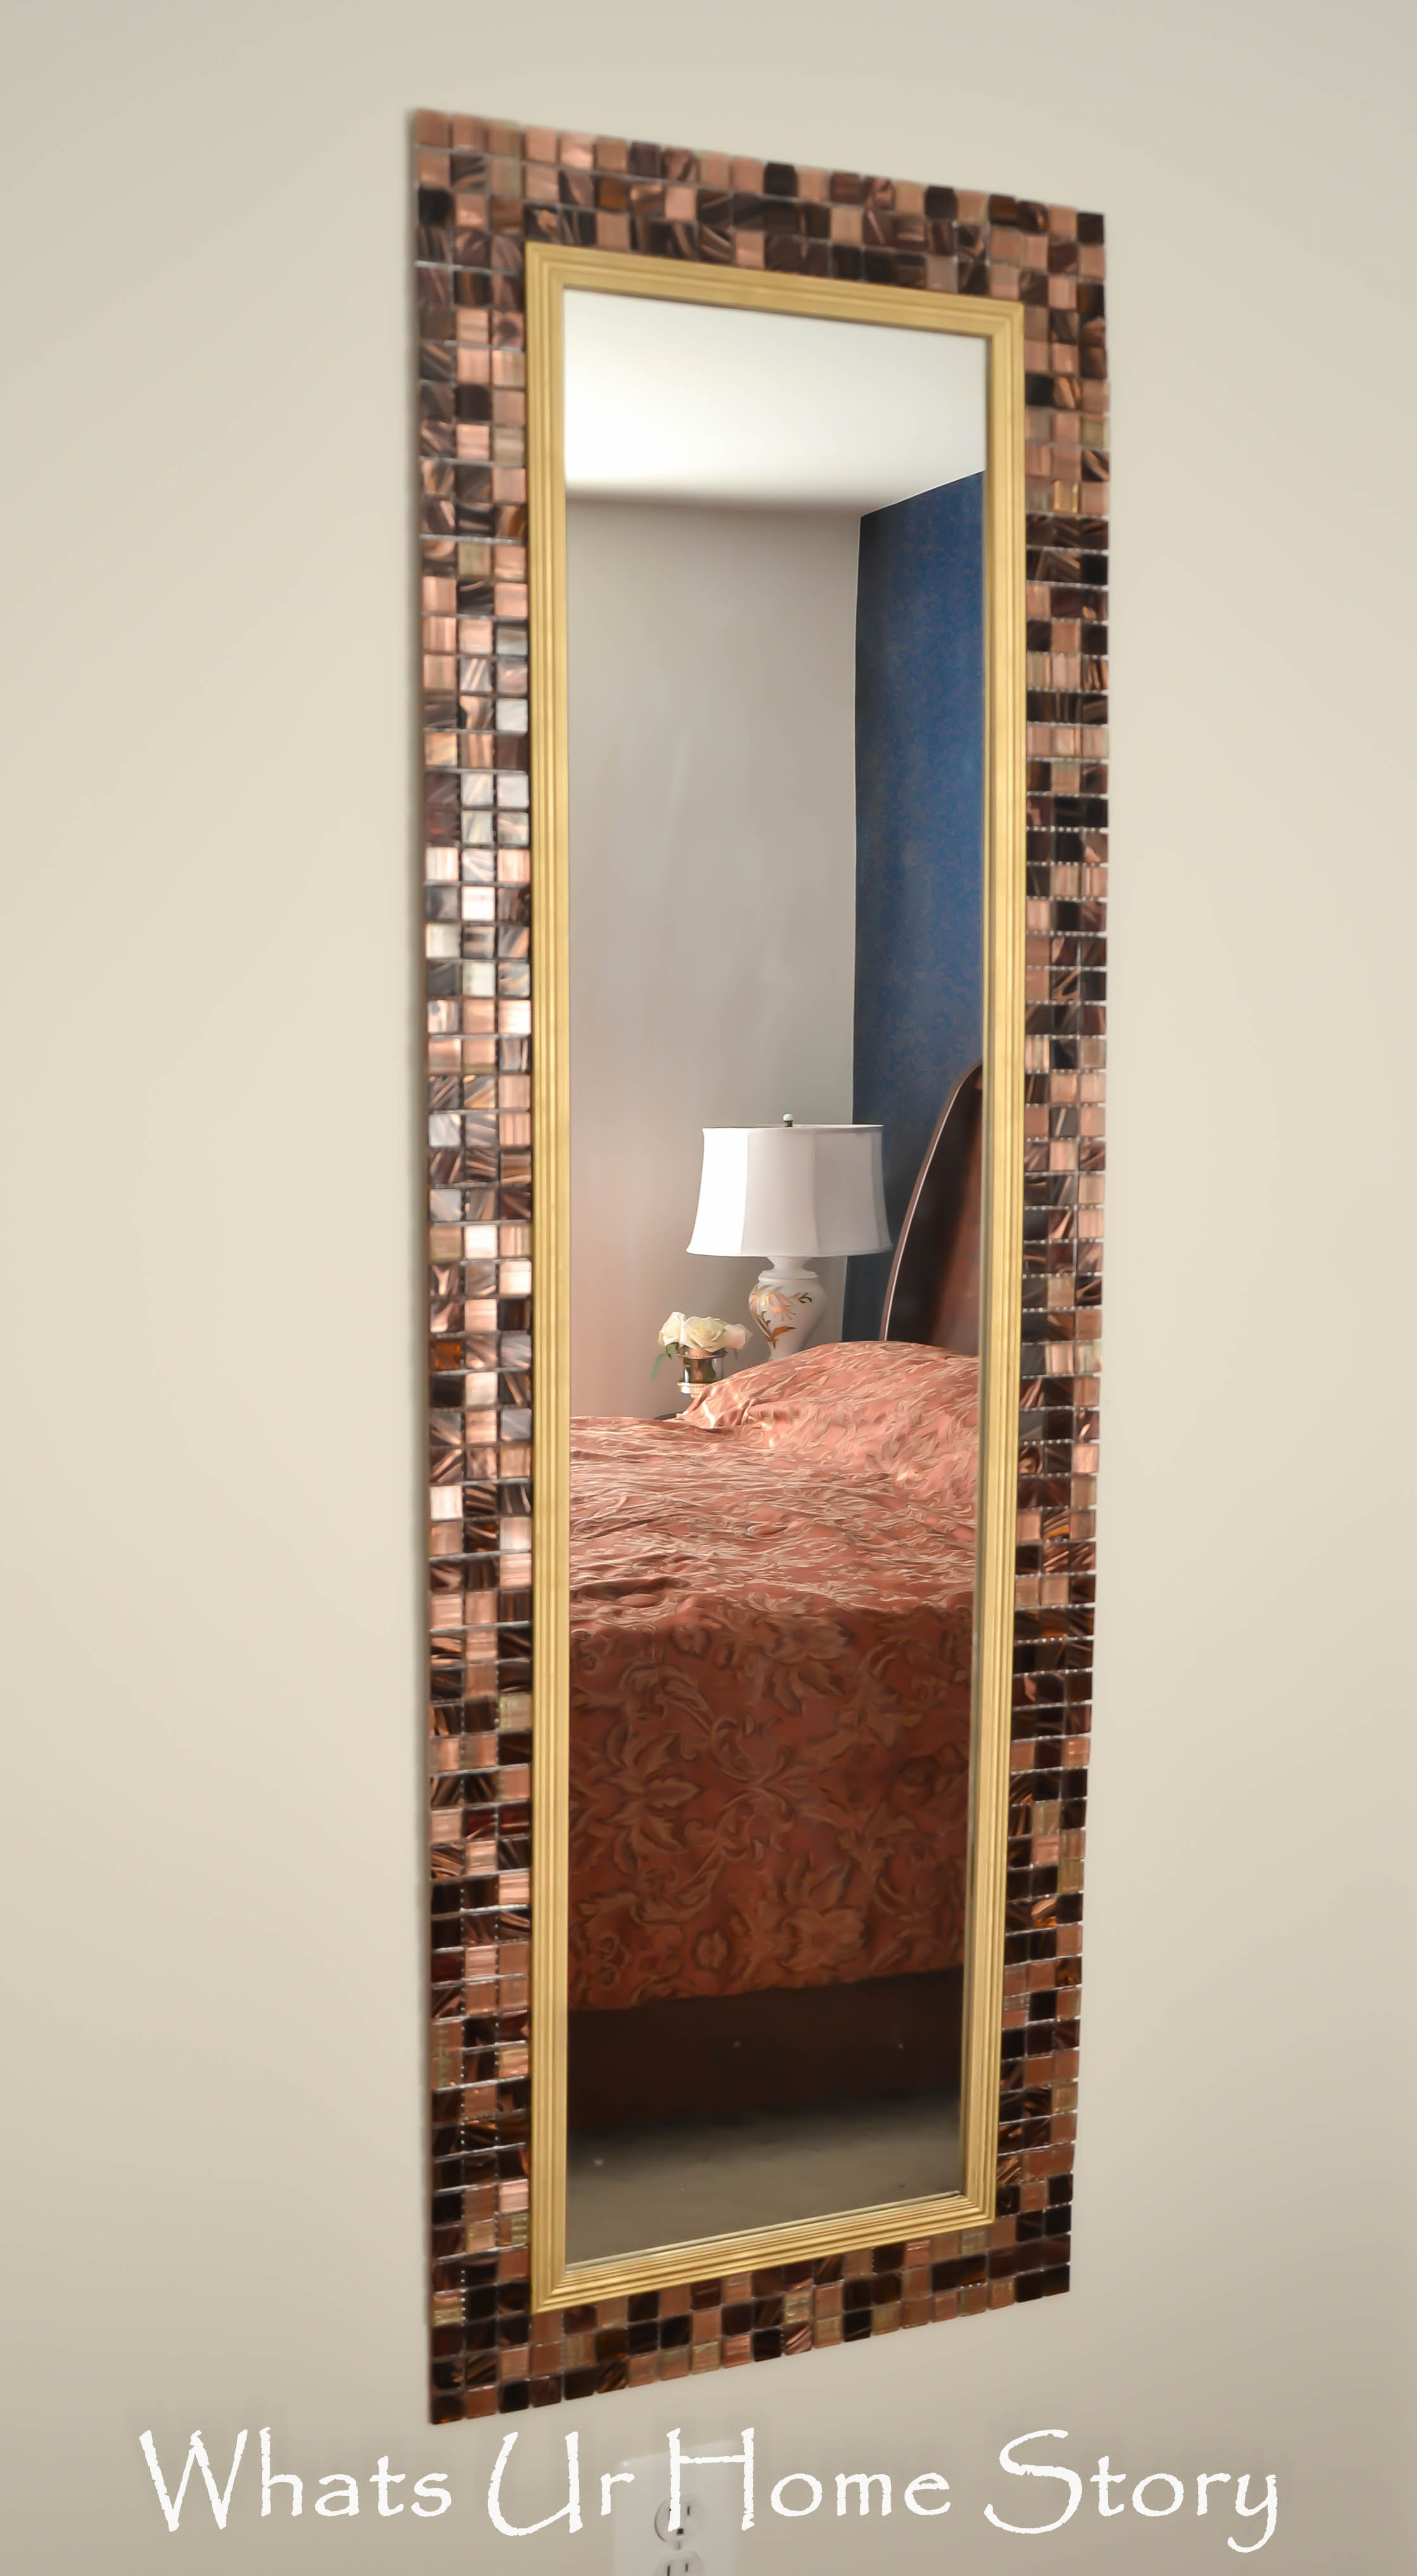
The plan is to eventually grout the tiles but for now I can’t decide what color I want.
I think it looks pretty even without the grout, don’t you?
Linking up to;


I really love this look. I don’t have a full length mirror but I might have to get one now so I can do a makeover like this!
thank you Kaylene. It was a pretty easy project to do.
I want one too now. Been eyeing a full length mirror since we moved too. Maybe now I’ll make one myself. Let you know when the finished product is done!!!! Thanks V for the inspiration!
Good luck with your Jes. Looking forward to seeing it.
Awesome Job Vidya…Adding to my do list, some day 🙂 Have spent days looking at some tiles for my back splash never would have come with mirror idea . Great Going! Looks Beautiful.
You know who to ask for if you need any help. 🙂
Awesome Vidya!!!!!
Thanks Shruthi.
This is beautiful! I need a full length mirror for the back of my bedroom door and have been trying to figure out a way to incorporate some pink into my bedroom, this just might be it!
Thanks Raj. The project is very versatile. Instead of he tiles you could use molding and paint it pink to frame the mirror.
Nice mirror V! Darn it.. We spent more than a $100 on one a year ago.. This looks very classy..
Thanks Aj. How did I miss that mirror at your home?
Awesome makeover.
Thank you Reshma.
What a difference that makes! Love it!!
Nancy
Great idea! Love how it turned out.
that’s beautiful!
It looks amazing now!
I love it!!..Great job!
hi vidya , that is really beautiful !!!!
What a good idea.. I have a frame with a wide liner that would be perfect for a project like this… then add a mirror and voila!! Thanks for the inspiration 🙂
Sounds like a plan. Would love to the”After” pics of your project Cynthia.
V
Wow! This is so awesome! I love that glue – I made a table with it, but would have never thought to put tile on a mirror frame! Fab job!
Wow, did you make a table? Isn’t that glue fabulous? Heading over to checkout the table.
V
You really jazzed this up! Love the end result!
Love this and I so need a mirror in my room!
What a great project!! I love seeing something common and inexpensive and made to look like a high end custom piece. Great work! I would love if you came and shared this tomorrow afternoon at my group link party at Redouxinteriors. Thanks!
Thank you. Sure will do Karen.
This is so awesome!! I love this idea – pinning!
It looks awesome. And without the grout!
Oh yeah, who needs grout! Actually my hubby does, he is in the “let’s grout it now” camp. 🙂
This is gorgeous! Looks like a million bucks!
Great project…really makes your mirror into a design piece.
Thank you!
Vidya, this is fabulous! What a great way to upgrade a plain mirror.
What a beautiful mirror!!
Love it! I have a mirror that is begging for an upgrade. Thank you!
Came across your blog whilst looking for “mirror ideas”! I had a beautiful 5ft by 3ft antique mirror-weighed a ton, but I’d been toting it around with me for over 10yrs. Unfortunately, all of my things were destroyed in a fire in March-including my prized mirror. 🙁 (my neighbor had been fiddling with electrical wires, swore that she & her hubby knew what they were doing. They didn’t. AND they got caught trying to pull off insurance fraud-so, right now, my claim is kind of up-in-the-air until the insurance co decides whether I was somehow involved-I WASNT, BUT, SHE tried to drag me into it trying to get out of HER lies…(sigh)).
Anyways, STILL trying to replace my stuff, a little at a time on my own. Had looked at these cheap mirrors-but REALLY wanted something nicer-without the $350 Sale price I’d gotten my antique mirror for.
I think you solved my problem!! Thank you!!
Was out of town for few days, only catching up on the comments now. Elaine, you made my day! Thank U!Sorry to hear about the fire. Glad you are ok.
How heavy is the finished product? This would look fabulous over my tv, but the hubby was concerned. I will definitely be checking out tiles in Home Depot!
It is heavy Kristen but I would assume almost the same as a similar size store bought mirror with a wide and thick frame would weigh. Nothing a good hook can’t hang.
Vidya
How think is the mdf?
MDF boards come in all size of thickness. This piece was an eighth of an inch thick.
Vidya Wow that is one total transformation for sure. I can’t believe you glued tile around the edges, it looks professionally done. LOVE how you took it from ok to fabulous. Thanks so much for linking up to our Something to Talk About Link Party again and have a great week, xo Lisa at Concord Cottage.
Wow! What a transformation! Never tried glueing the tiles but I think I’ll try it now. Thanks for sharing on Something To Talk About Link Party!
Was the MDF board thick or thin
It is thin. If I were doing it again I would do it with thin wood rather than MDF.
Hello again. Have the tiles stayed in place? Did you eventually grout the tiles ?
Hi NiLaLa,
Thank you! The tiles have stayed in place. The mirror is still hanging in my guest bedroom. An no, I never got around to grouting it. 🙂
I think my 1st comment never made it in. So, here it is: I love, love, love this mirror transformation! I was so inspired that it was my project this weekend. After having the MDF cut I broke !that mirror and the one I got was a different size so I needed more tile. However, at that lovely price (4.99) it was no problem. I only needed 1 more pack Thanks for sharing your creativity.
Love it….I did one for my granddaughter in bling…
how many sheets did you need for this length mirror
3 sheets.
To make it light and very, very easy don’t rule out peel and stick gel tiles. They come in a huge assortment just like regular tiles.
where to get mdf boards?
Home Depot
It’s beautiful. I was so inspired that I did my own for the dining area and it turned out perfect. What a great idea! https://ibb.co/d4LJ8S
Wow that looks great Ritu!
This is so incredible, I started trying to figure out how much it would cost to make. I figured about $50. How much would it cost to buy something like this?
Thank you. I guess it really depends on the size.