DIYs, Recipes, Furniture, Art - Whatsurhomestory

Your family's story through your home

  • Home
  • My Story
    • Contact
  • Our Home
  • Tutorials
    • DIY & Crafts
    • Furniture Makeovers
    • Sewing
    • Gardening
    • Room Makeovers
    • Home Tours
  • Holiday/Seasonal
    • Christmas
    • Winter
    • Spring
    • Summer
    • Halloween
    • Fall / Thanksgiving
    • Parties
    • Indian Holidays
  • Recipes
  • Advertise
    • Privacy Policy
    • Features

Paint & Paisleys

March 27, 2012 By Vidya 4 Comments

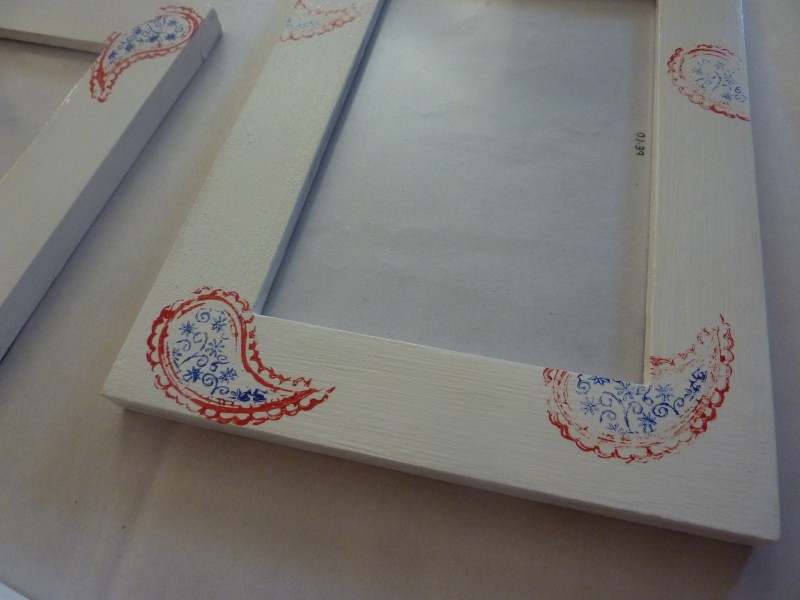
On her recent visit, my mom loaded up on the kids’ artwork planning to frame them. We went looking for inexpensive frames and found these RAM frames at IKEA for $1.99/3 pack. I know, they kinda look blah….

Paint & Paisleys

Some paint and stamps later…..voila;

Paint & Paisleys

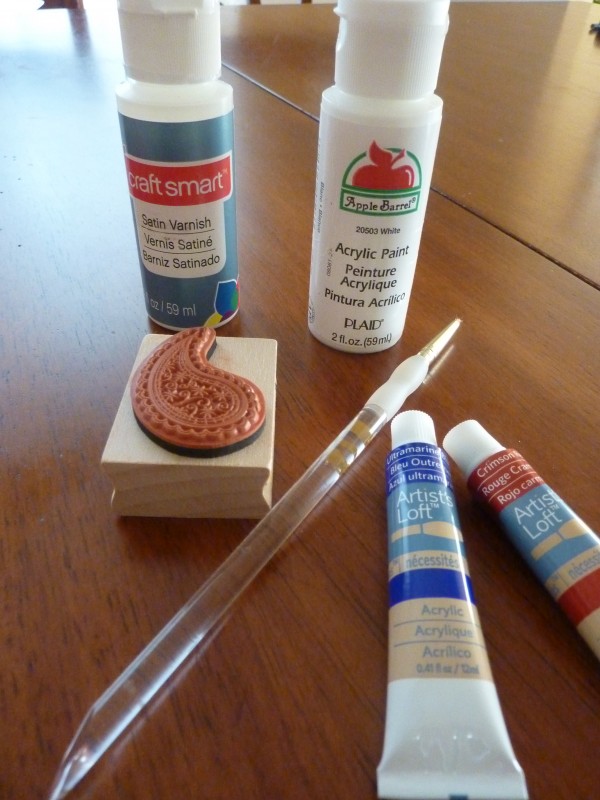
Yup, you are seeing paisleys again! 😉 More about my other paisley project here. In this case the technique was way simpler. All I used is;

Acrylic craft paint, paisley stamp (the regular kind not the one specifically made for acrylic), acrylic paint (I used the beginner’s quality paint because I had it on hand. You can use acrylic craft paint too.), brushes, and satin craft varnish.
Paint & Paisleys

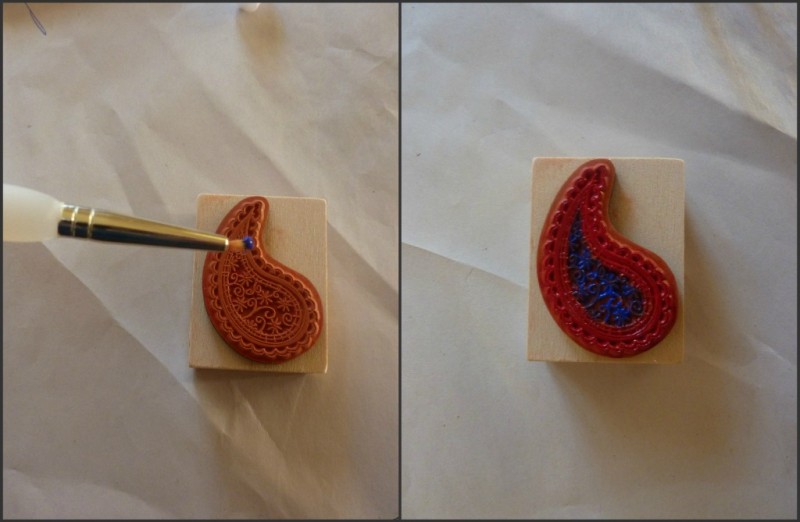
First, brush on the base coat (I used white) with a foam brush. My kids helped me with the first and second coat. So I had to go over it a third time to make the brush strokes clean. Once the base coat is dry, mix your paint color with a few drops of water (just a little bit to prolong the drying time, we don’t want it runny). If you are using regular craft paint you wouldn’t need to add the water. Load the brush lightly and paint right onto your stamp.
Paint & Paisleys

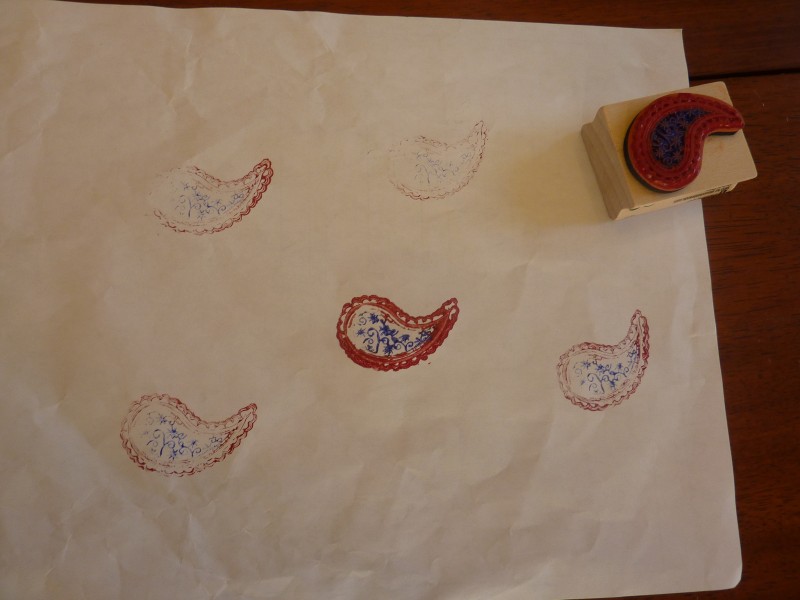
Once you are done, it should look like the 2nd pic. Now, press the stamp firmly on to your frame. The project was done during my pre-blog days. So I’ve tried to recreate the same on some scrap paper that was lying around. Gently lift the stamp off.
Paint & Paisleys

See the center paisley? I dabbed on too much paint on that one. It is always better to test on a piece of paper before you stamp onto your actual surface. You can usually get at least 3 impressions before you have to repaint the stamp. Again, I forgot to add water to my acrylic paint this time so it dried off by the 3rd one (hence the lighter one on the top). After everything is dried coat with the satin varnish to seal your stamp work.

Here is a look at the finished product. Wasn’t that an easy under $5 project?
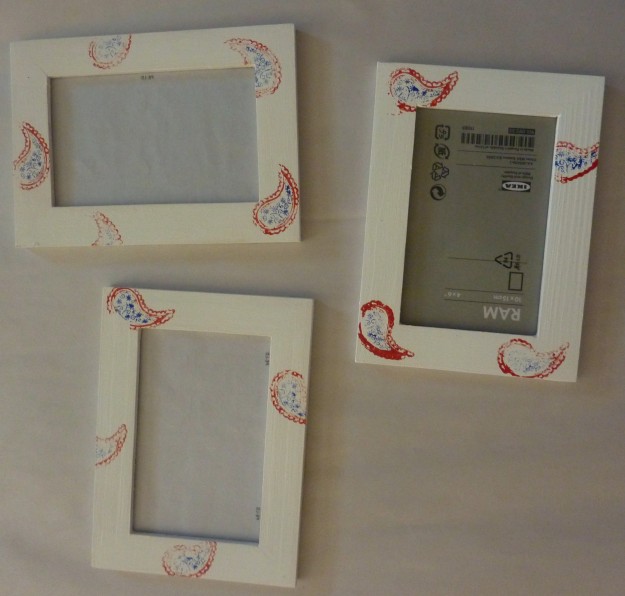
Paint & Paisleys

Source List

RAM frames – $1.99 – IKEA per 3 pack
Craft Satin Varnish -$0.69 – Micheals
Acrylic craft Paint (white) -$0.69 -Micheals
Brushes and other paint – Already had
 
Total – $3.37
 

← Cherry Blossoms in DC Online Auction Tips →
« Cherry Blossoms in DC
Online Auction Tips »

Comments

  1. Shruthi says

    March 28, 2012 at 10:20 am

    Where did you got this paisley stamp,? I was looking for something like that one…

    Reply
    • whatsurhomestory says

      March 28, 2012 at 11:26 am

      I got it at Micheals in Sterling. You can borrow mine, if you would like.

      Reply
  2. sumitra says

    March 29, 2012 at 2:36 pm

    Very lovely! I’m so inspired to try something like this.

    Reply
    • whatsurhomestory says

      March 29, 2012 at 6:35 pm

      Thanks Sumitra. Should definitely try, it is very easy.

      Reply

Leave a Reply Cancel reply

Your email address will not be published. Required fields are marked *

Hi! I'm Vidya, an IT professional by day, a mom to my 2 darling monkeys, a wife, a home maker, an avid gardener and home decor/ DIY enthusiast round the clock, and a blogger in my free time. Read More…

  • Facebook
  • Instagram
  • Pinterest
  • Twitter
  • YouTube
subscribe img

Categories

Love this outdoor space with a beautiful red and blue outdoor decor with a flamingo pillow, metal tray side table, and loads of green plants

Finally the long overdue post, our new screened in porch reveal. This space has undoubtedly become our favorite room in the house now. To tell you the truth, I was against the idea of ripping apart our good size deck and replacing it with a screened in porch but B insisted that this was the…

Read More »

Archives

Features

Features

Networks

POPSUGAR Select Homemarthabadge1
  • Facebook
  • Instagram
  • Pinterest
  • Twitter
  • YouTube

HOME | MY STORY | OUR HOME | TUTORIALS | HOLIDAY/ SEASONAL | RECIPES | TIPS & TRICKS | ADVERTISE | PRIVACY POLICY | FEATURES | SITEMAP
DIY, Crafts, Recipes, Gardening – Whatsurhomestory.com COPYRIGHT © 2020 WHATS UR HOME STORY

Like What You See? Subscribe to Receive WUHS Posts via Email!
Your information will *never* be shared or sold to a 3rd party.