
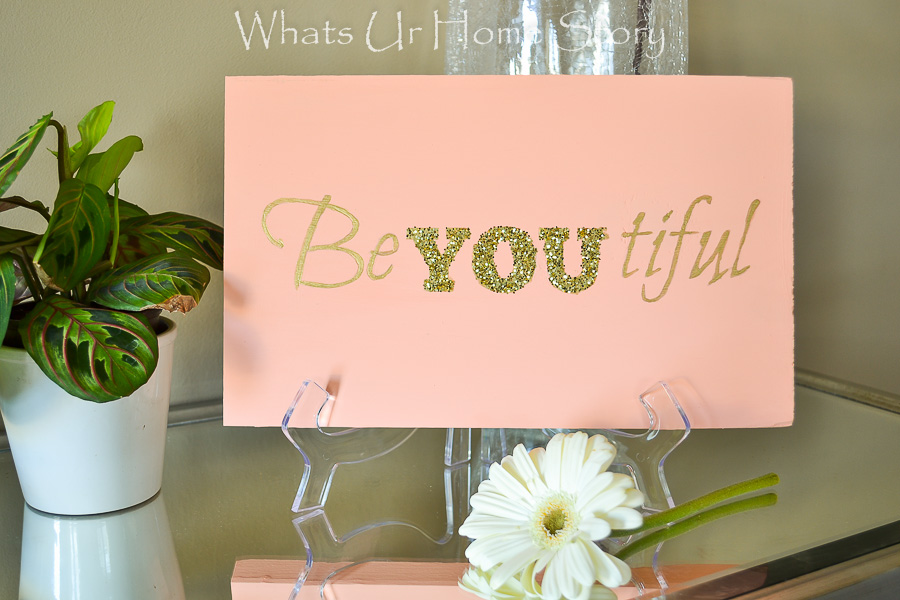
As we discussed plans for her room makeover my Monkey #2 excitedly said, “Amma, you know you are beautiful……I mean be-you-tiful, get it?” I smiled and said ya I get it to which her reaction was utter surprise. “Really, you know about it? How?” Poor thing was under the impression that it was some cool word that only elementary school kids used. It took a few minutes for her to recover from the shock that her mom was familiar with the “cool” terms they used at school but she soon bounced back with a, “Can we add it to my room somehow, Amma?” I promised her I would think about it and left it at that.
When the makeover plans grew to include a gallery wall I knew exactly how to add it to the room, in the form of a Beyoutiful sign.
The best part is it cost me nothing to make! The perks of doing projects frequently; you’ll always have paint, glitter, and wood scraps lying around.

The Americana Decor ‘Smitten’ chalk paint was a swag bag gift from the Haven conference. I’d used the ‘Charcoal’ earlier for the side table in her room.
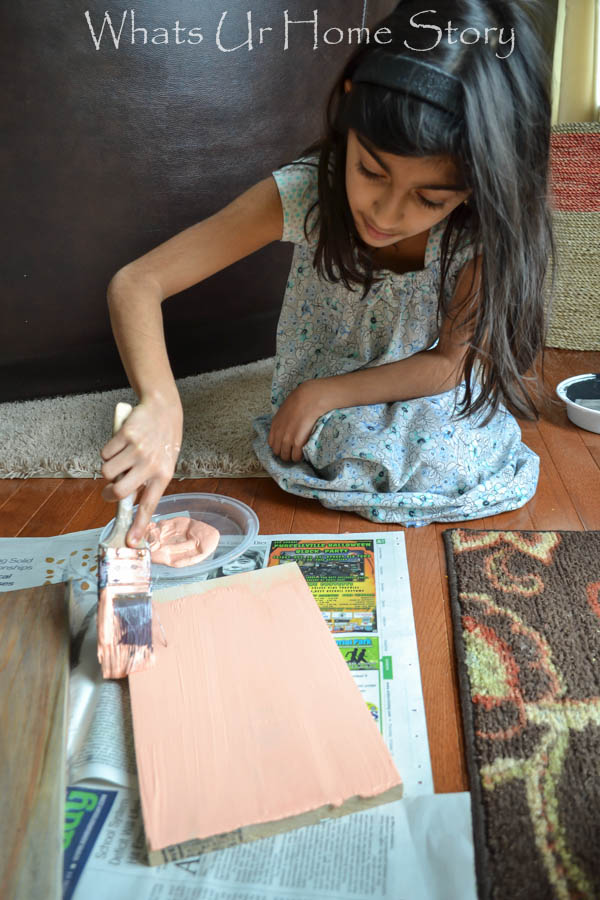
Someone was eager to help with the painting, which was an added plus.
To make this cute Beyoutiful sign you’d need;
Materials
A scrap piece of wood – Mine was 7.5″ x 11.5″ left over from another project
Chalky Finish Paint – Americana Decor Smitten
Metallic Gold Paint – Martha Stewart crafts from Michaels
Paint Brush
Pencil
Glitter
A small stencil sponge
Painter’s tape (to hold the paper in place on the wood)
2 copies of Beyoutiful word art – I made mine on Picmonkey. You can download it for free here.
Tutorial
- Paint the scrap piece of wood with the chalky finish paint and let dry completely.
- Using the back tracing method aka. place the paper good side down over a hard surface, trace the “Be” and “tiful” on the back side of the paper. For the detailed steps on this tracing method see my Sharpie canvas art project.
- Now flip the paper and place it on the painted piece of wood good side facing you. Secure with 2 pieces of painter’s tape.
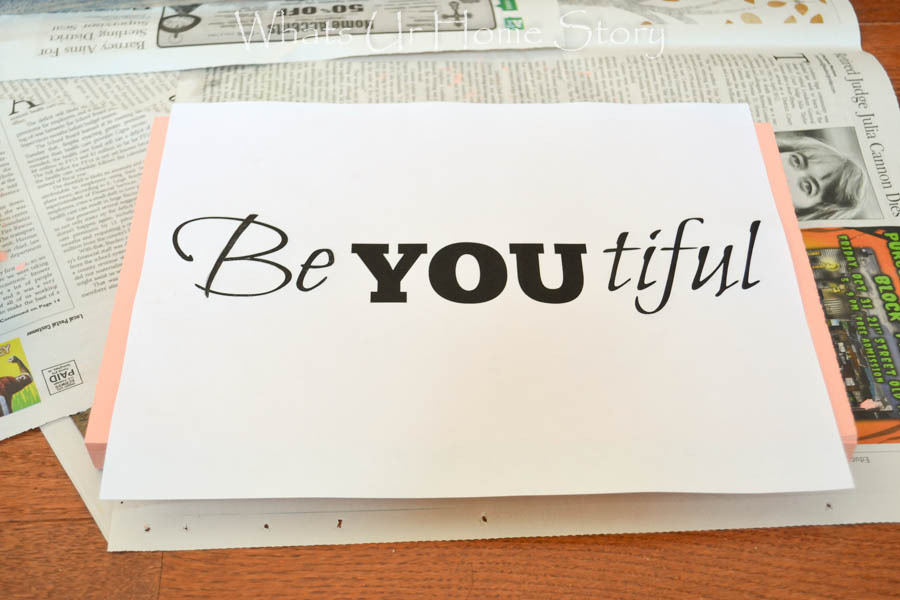
- Trace the “Be” and “tiful” with the pencil onto the wood.
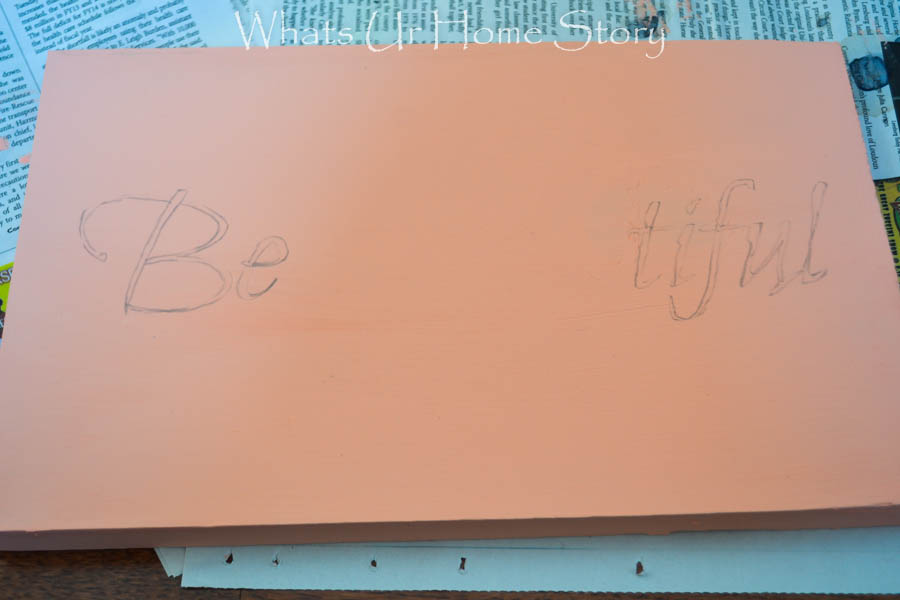
- Paint these letters with the Gold paint, allow to dry.
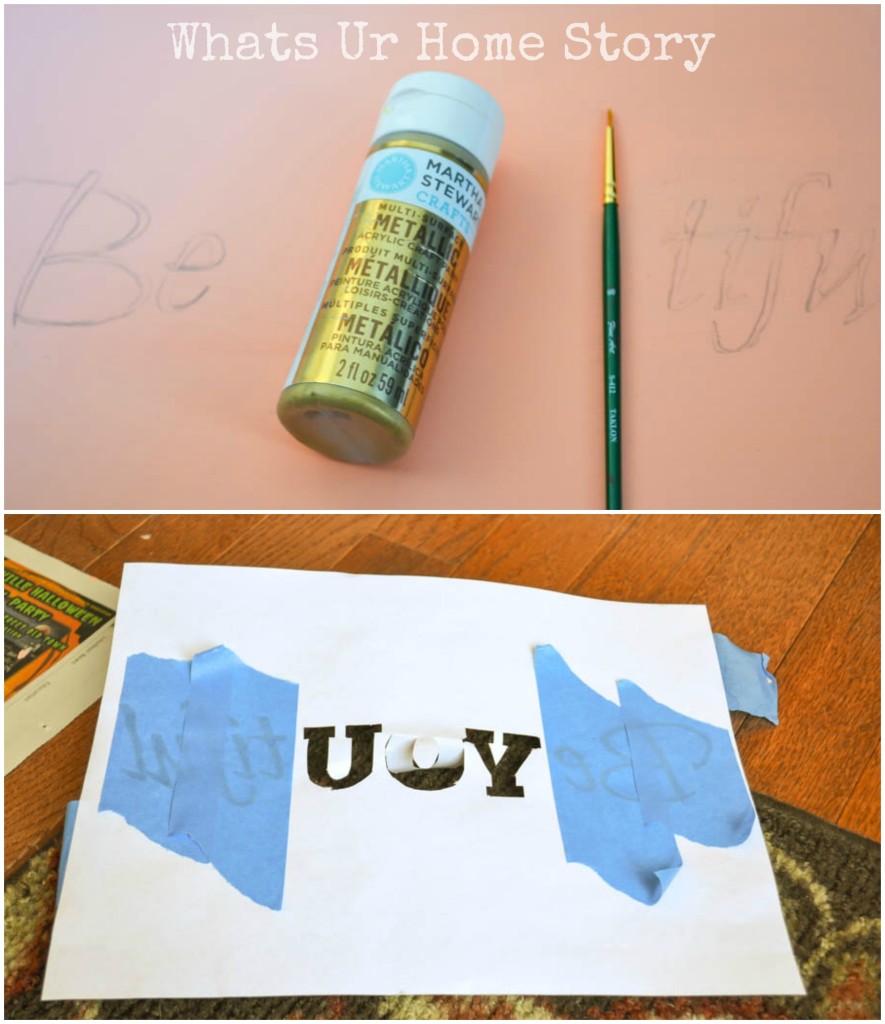
- For the “YOU” I decided to go with a stenciling effect as I wanted to use glitter. Cut the “Y” and “U” out.
- The letter “O” can be very tricky when trying to make a stencil out of. So cut just 3/4 of the letter out leaving both the inside “O” and the outer ring attached at the top.
- As I didn’t want the pencil marks to smear over my freshly painted Gold letters I taped off the the pencil trace marks (on the back of the paper) with painter’s tape. That way when I lay the paper over the wood to glitter the pencil marks won’t rub against the already painted surfaces.
- Using the stencil sponge paint stencil the “Y”, 3/4th “O” holding the center circle down with your finger, and “U” with the gold paint.
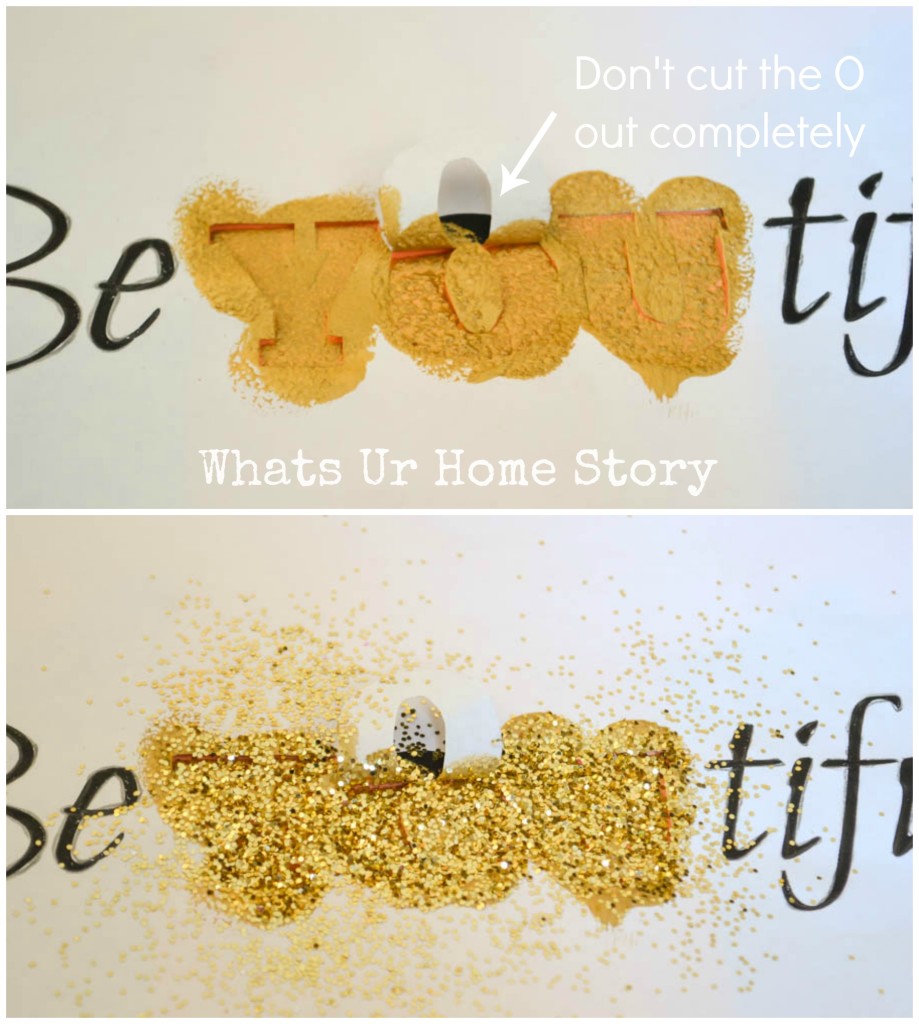
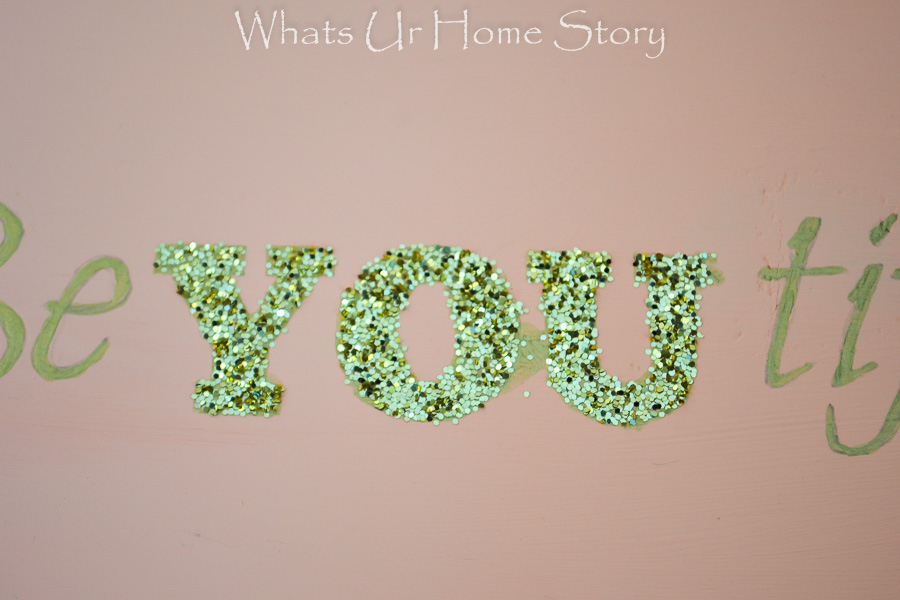
- While the paint is still wet sprinkle glitter over the letters.
- Gently remove the paper and blow away any excess glitter.
- When dry, on the 2nd copy of the “Beyoutiful” print out cut the top part of the “O” out keeping the bottom attached.
- Repeat the last 3 steps to finish off the “O”.
- If there are any mishaps like paint seeping from under the stencil (like I had see below) you could paint right over it with the chalk paint.
- Let dry and you are good to go!
Easy and super cute, right? The light peach color and gold combo is becoming a hot favorite of mine lately. What is your favorite color combination?


Vidya, It is Be-YOU-tiful! I see those face expressions too when I let my 9 year know that I am aware of the lingo…
Thanks Reshma. So true love the look on their faces when we say that. 🙂